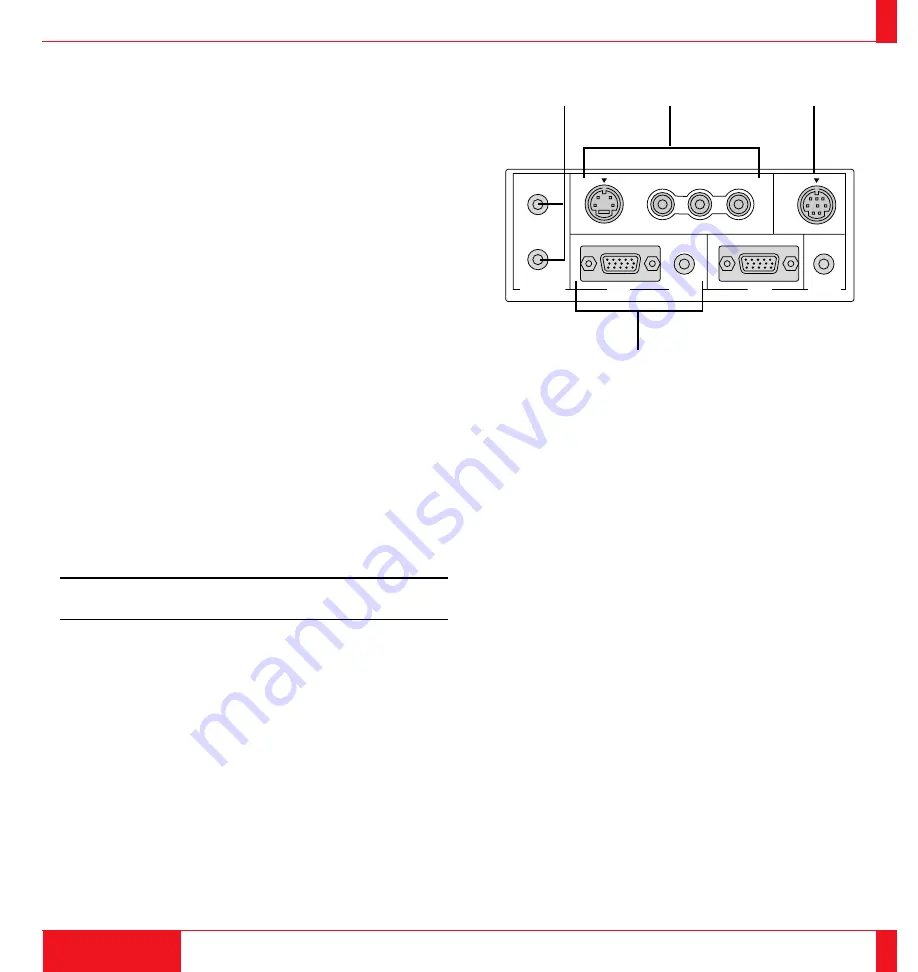
Terminal Panel Features
This panel is located in the side and is where you connect your cables.
1 Remote Control Jacks (LT100 only)
a. Remote Control Input Jack
Connect your remote control cable here for wired operation.
b. Remote Control Output Jack
This terminal enables you to operate up to five projectors with the
same remote control. When your remote mouse receiver is con-
nected here, the remote sensors on the projector cabinet will re-
ceive your mouse commands.
2 Video Input
Connect a VCR, laser disk player, DVD player, or document cam-
era here to project video.
Left Channel/Mono Audio Input Jack
This is your left channel audio input for stereo sound coming from
video equipment or audio system. This also serves as your mon-
aural audio input.
Right Channel Audio Input Jack
This is your right channel audio input for stereo sound.
21
INTRODUCTION
22
PC CONTROL
VIDEO INPUT
RGB INPUT
OUTPUT
OUTPUT
S-VIDEO
VIDEO L
(
MONO
)
-R-AUDIO
OUTPUT
INPUT
RGB
RGB
AUDIO
AUDIO
REMOTE
CONTROL
S-Video Input
Here is where you connect S-Video input from an external source
like a VCR.
NOTE: S-Video provides more vivid color and higher resolution than
the traditional composite video format.
3 PC Control Port
Use this port to connect your PC to control the MultiSync LT81/
LT100 Projector. This enables you to use your PC and serial com-
munication protcol to control the projector. If you are writing your
own program, command reference are on pages 103 to 106.
4 RGB Input Connector (Mini D-Sub 15 pin)
Connect your PC or other RGB equipment such as IBM or com-
patible computers. Use the signal cable that's supplied to connect
to a PC. This also serves as the Y/Cb/Cr input connector which
allows you to connect a DVD player with the component video
output.
RGB Audio Input Mini Jack
This is where you connect RGB audio output from a computer or
another RGB source.
1
2
3
4


