8-13
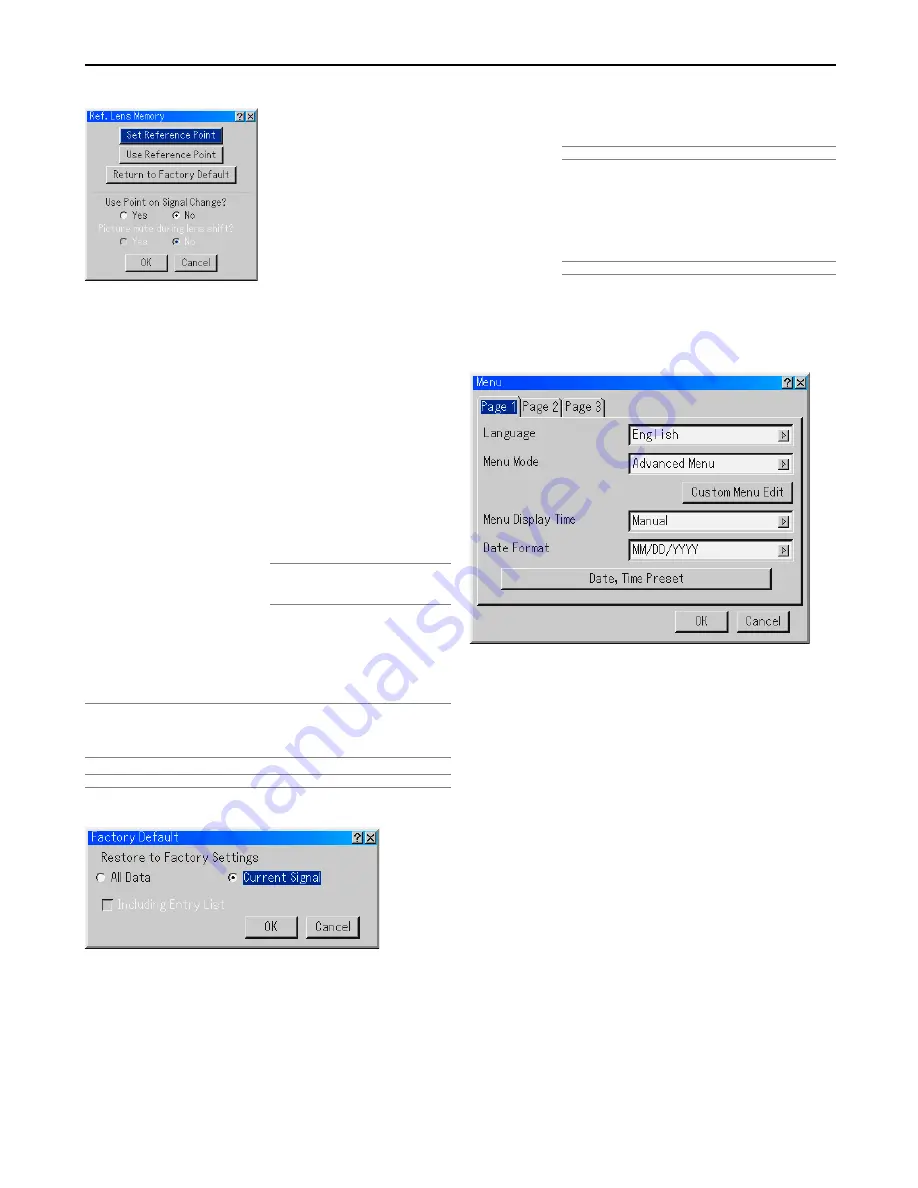
Reference Lens Memory [Ref. Lens Memmory]
This function serves to store the adjusted value common to all
input sources when using the Shift, Focus, and Zoom buttons of
the main unit or the remote control.
Set Reference Point ............. Stores the current adjusted val-
ues in memory as a reference.
Use Reference Point ............ Applies the adjusted values
stored in Set Reference Point to
the current signal.
Return to Factory Default ..... Returns the adjusted values to
the factory default setting.
Use Point on Signal Change? .... For change to take effect at the
time of source selection, select
“Yes”.
Picture Mute during Lens Shift? ... To turn off the image and sound
during lens shift, select "Yes".
NOTE: This option is only available when
"Yes" is selected for "Use Point on Signal
Change?".
Even if “CANCEL” is executed, changes to “Set Reference Point”,
“Use Reference Point” and “Return to Factory Default” will not be
canceled.
* See "Tips on Adjusting Focus" on page 3-4 for more information.
NOTE:
• Adjusted values in Ref. Lens Memory will not be returned to default when per-
forming Factory Default.
• To store adjusted values for each input source, use the Lens Memory.
NOTE: In the Link mode the Lens Memory feature is not available.
Factory Default
All Data /Current Signal
The Factory Default feature allows you to change adjustments
and settings to the factory preset for source.
All Data ........ Reset all the adjustments and settings for all the
signals to the factory preset except Ref. Lens
Memory, Language, Background Logo, Idle
Mode, Communication Speed, Projector ID,
Lamp Settings, LAN Mode, Password, Security,
Remaining Lamp1/2 Time, Lamp 1/2 Hour Meter,
Filter Usage and Projector Usage.
Including Entry List:
Also deletes all the signals in the Entry List and
returns to the factory preset.
NOTE: Locked signals in Entry List cannot be deleted.
Current Signal
.................... Resets the adjustments for the current signal to
the factory preset levels.
All the items in "Adjust (Source)" and "Sound"
can be reset.
NOTE: Locked signals in Entry List cannot be reset.
Projector Options
Menu
[Page 1]
Selecting Menu Language [Language]
You can choose one of seven languages for on-screen instruc-
tions. The options are: English, German, French, Italian, Span-
ish, Swedish and Japanese.
Selecting Menu Mode [Menu Mode]
This feature allows you to select 4 menu modes: Advanced,
Custom, Basic and Service Menu.
Advanced Menu ...... This is the menu that contains all the
available menus and commands.
Basic Menu ............. This is the basic menu that contains mini-
mum essentials of menus and com-
mands.
Custom Menu .......... This is the menu that you can customize
using the Custom Menu Edit to fit your
needs.
Service Menu .......... For service personnel only.
Customizing the Menu [Custom Menu Edit]
See page 8-2 for instructions about how to customize the Menu.
8. Using On-Screen Menu
Содержание GT5000 Series
Страница 1: ...GT6000 GT5000 LCD Projector User s Manual ...


