E-17
Using Image Memory
You can store images (up to 8 images) in advance and output them later.
䡵
Storing images
q
Select the image memory to be used by operating ‘UP’ or
‘DOWN’.
The No. of the image memory selected is displayed by
the indicator.
w
Press the ‘CAPTURE’ button.
The image is stored in the image memory.
NOTE:
• Image cannot be stored when EXTERNAL or MEMORY has been selected in source selection.
• Capturing during the use of digital zoom will result in the storage of image before the use of digital zoom.
䡵
Outputting images stored in image memory
q
Press the ‘MEMORY’ button in source selection.
The contents of the image memory currently selected are
outputted.
Select the image memory by pressing the ‘UP’ or ‘DOWN’
button.
NOTE:
• Image memories can be selected directly by pressing the buttons ‘1’ to ‘8’ on the remote control.
• The stored images will be deleted by turning power off.
Transferring Image Memory Contents to PC
By the use of a USB cable, the contents of image memory can be transferred to a PC in the form of a JPEG file.
NOTE:
• Transfer of memory contents is only possible to PCs running on Windows Me, Windows 2000 Professional, Windows
XP Home Edition and/or Windows XP Professional and compatible with USB Ver. 1.1.
䡵
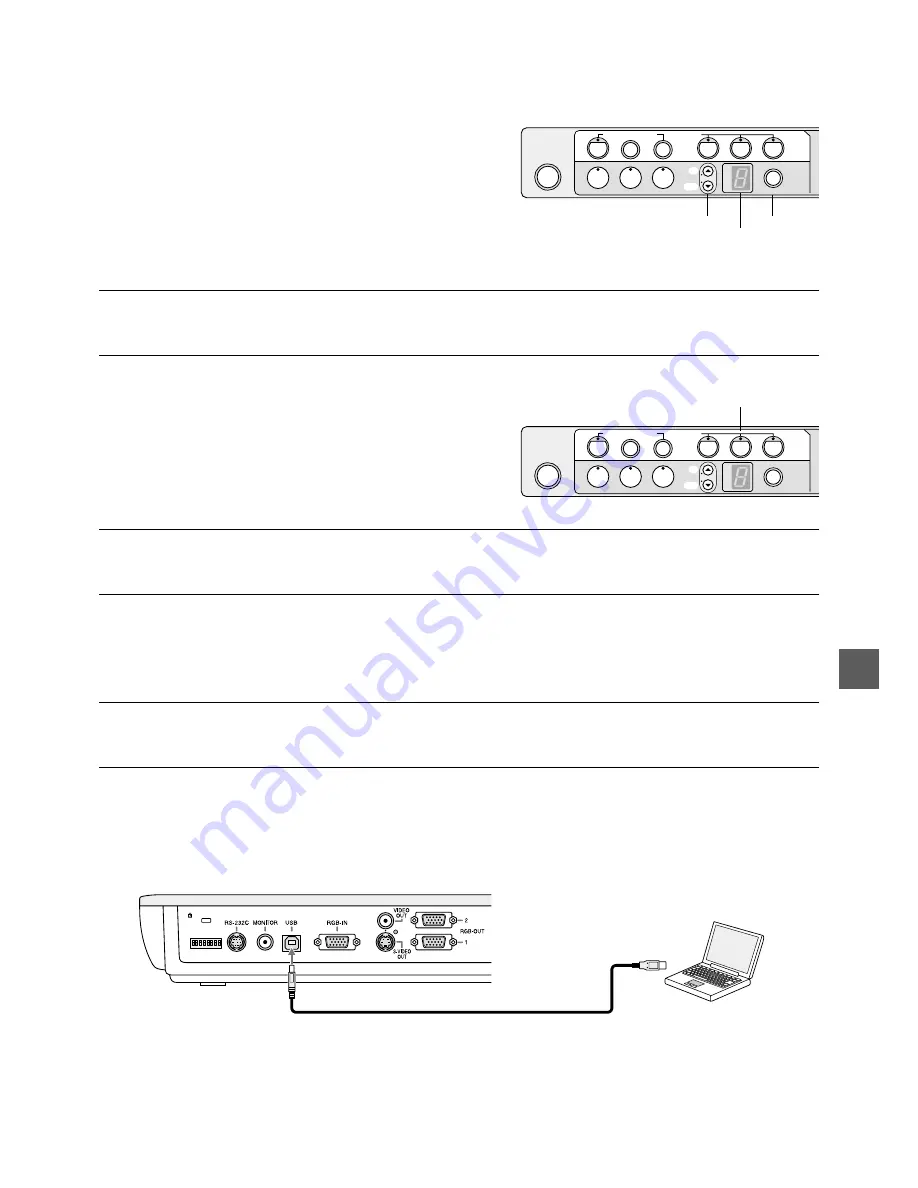
Connecting the cable
Connect the square terminal (type B) of the commercially available USB cable (USB standard Ver. 1.1 or equiva-
lent) to the USB port on the back panel.
Connect the other end of the USB cable to the USB port (type A) of your PC.
1
2
3
4
5
6
7
8
Indicator
q
w
LIGHT
WHITE BALANCE
AUTO
POSI/NEGA
BLUE
RED
COLOR/BW
TEXT/PHOTO
MEMORY
DOWN
UP
CAMERA
MEMORY
EXTERNAL
SOURCE
CAPTURE
LIGHT
WHITE BALANCE
AUTO
POSI/NEGA
BLUE
RED
COLOR/BW
TEXT/PHOTO
MEMORY
DOWN
UP
CAMERA
MEMORY
EXTERNAL
SOURCE
CAPTURE
q


