12 Testing with Zodiac Diagnostic or Clinical - PC-based
102
MADSEN Zodiac
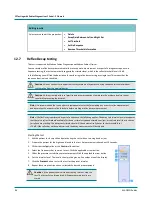
On-screen selections
Click to select the curve, and right-click to edit the curve
Swap Ear...
Delete Curve
Delete all curves
12.10
ETF-P
ETF-P can be performed on ears with eardrum perforations prior to reconstructive surgery to evaluate whether the middle
ear could be ventilated through the Eustachian tube following tympanoplasty. Air must be able to pass through the
Eustachian tube to equalize the middle ear pressure following reconstructive surgery.
For testing the Eustachian tube function in ears with perforated eardrums (ETF-P), a method different from immittance
measurements is used. In ETF-P, the ear air pressure is monitored continuously to detect any airflow through the
Eustachian tube.
An initial positive or negative air pressure is applied to the ear through the probe (positive pressure is recommended). Due
to the eardrum perforation, the pressure will be applied to both the ear canal and middle ear cavities. The patient is then
instructed to swallow some water, which typically causes a functioning Eustachian tube to open. Any pressure equalization
through the tube will show as a sudden pressure drop toward, but not necessarily reaching, atmospheric pressure (0 daPa).
This is repeated until the pressure is equalized or until the test is stopped. The pressures at which the tube opens, and
closes are reported as test results.
Typically, an initial build-up of positive pressure will cause the Eustachian tube to open spontaneously. To avoid
premature spontaneous pressure equalization related to positive pressure build-up, the pump speed should be kept at a
maximum of 50 daPa/s.
Procedure
1. Record a tympanogram to confirm the perforation. The resulting tympanogram curve will be flat, and the ear
canal volume will be abnormally high because it includes the volume of the entire middle ear.
See
Tympanometry testing 49
.
2. Click the
ETF-P
tab to select the test.
3. If needed, click the
Pressure Up
or
Pressure Down
arrows to adjust the initial pressure setting in the control panel.
4.
Click the
Start/Stop
button on the control panel or press the
Start/Stop
button on the probe control pad on the
shoulder strap.
If needed, click the
Positive Pressure
or
Negative Pressure
button to reverse the pressure control.


