


Chapter 3
I/O Information
3-10
ni.com
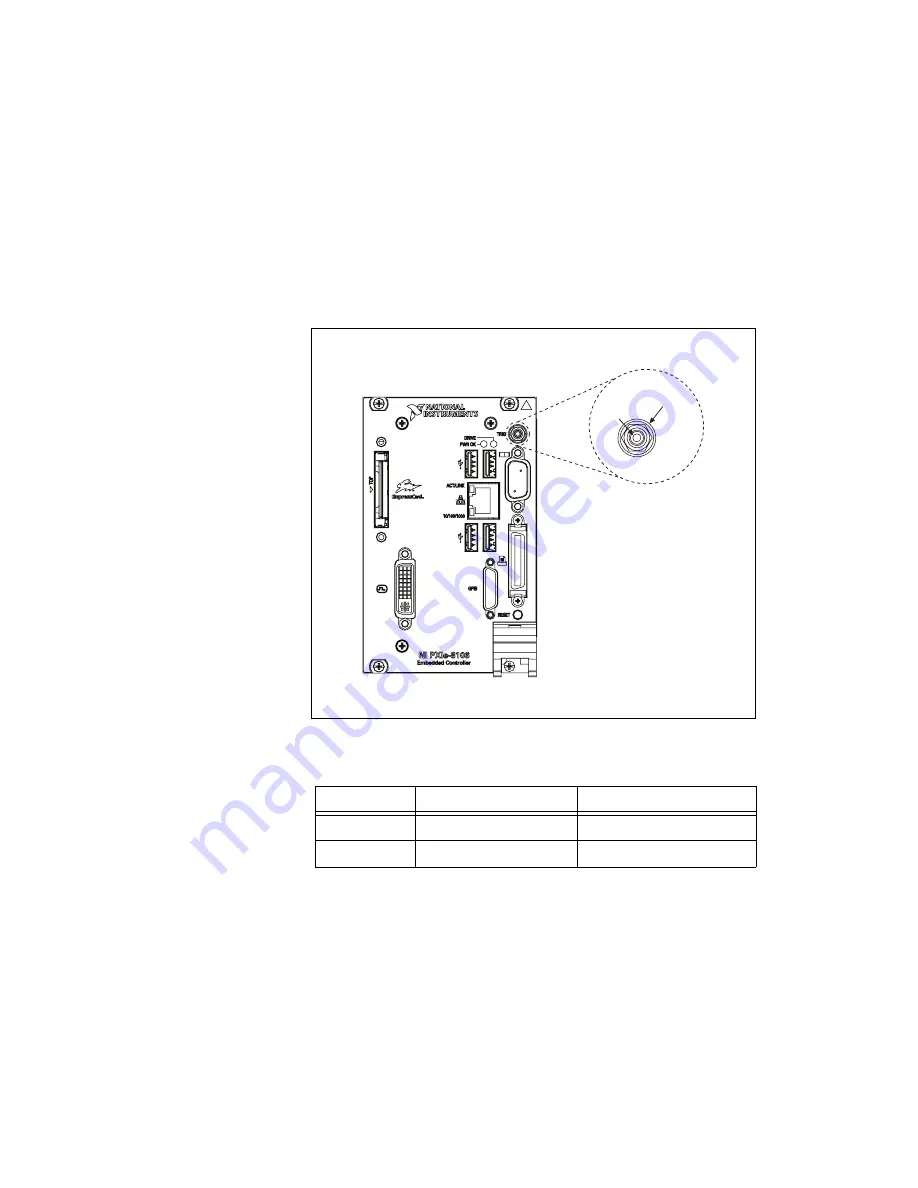
Trigger
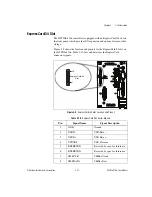
The TRIG connector is the software-controlled trigger connection for
routing PXI triggers to or from the backplane trigger bus.
Figure 3-7 shows the TRIG connector location on the NI PXIe-8106.
Table 3-8 lists and describes the trigger connector signals.
Figure 3-7.
TRIG Connector Location and Pinout
Table 3-8.
TRIG Connector Signals
Pin
Signal Name
Signal Description
1
TRIG
Trigger
2 (Shield)
GND
Ground
1
2