background image


Naim Audio HDX Hard Disk Player – Network Setup 

4 September 2008 


Page 10 of 14 

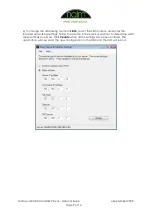
7)  After  the  network  settings  have  been  changed  and  the  Update  button  clicked  (as 
described  in  step  5  or  6)  the  following  screen  will  be  shown.  The  server  will  automatically 
shutdown then restart using the new network settings. Check that the message in the Update 
Progress  window  confirms  that  both  the  server  and  front  panel  configurations  were 
downloaded successfully. The message displayed should look like the message below. When 
it has been confirmed that the configuration was sent successfully click OK to continue. 


8) The following message will then be shown. Click Ok then close the Set IP Tool. 


Содержание HDX - REMOTE CONTROL CODE

Страница 1: ...as they cannot be contacted directly by a computer on the WAN side without the LAN side device initiating the communication The HDX should never be connected directly to the Internet without a Router...

Страница 2: ...iagram below shows how the Main Controller and Front Display Controller are connected inside the HDX The HDX is always shipped from Naim Audio in DHCP mode as this is the most common and preferred add...

Страница 3: ...d Front Panel IP addresses must be set between 192 168 0 151 and 192 168 0 254 Front Panel IP address This is the IP address of the Front Display Controller Usual practice is to allocate the front pan...

Страница 4: ...the back of the user manual for future reference Installing the Naim IP Tool Application The HDX ships with a CD ROM that contains documentation the Desktop Client application and the Naim Set IP Tool...

Страница 5: ...aller will open Click Next on the first screen Then select the Folder in which to install the application The default location is shown below and will be suitable for most typical installations Click...

Страница 6: ...Naim Audio HDX Hard Disk Player Network Setup 4 September 2008 Page 6 of 14 4 When the installation is complete the following screen will be shown Press Close to complete the installation...

Страница 7: ...process takes 30 seconds and scans the network for any Naim HDX hard disk players or Naim Servers 3 When the discovery process has finished the application will show the name and IP address of any Nai...

Страница 8: ...amic address use DHCP will be selected see step 5 If the current addressing mode is Static then Static address will be selected and the address details will reflect the current network settings see st...

Страница 9: ...e to Static select the Static option and enter the required networking settings Follow the advice in the previous sections to determine what these settings should be Click Update when all the settings...

Страница 10: ...omatically shutdown then restart using the new network settings Check that the message in the Update Progress window confirms that both the server and front panel configurations were downloaded succes...

Страница 11: ...addressing mode with incompatible settings Either return the server to DHCP mode or correct the static address settings Here are some examples of incompatible settings 1 Example 1 Server IP 192 168 0...

Страница 12: ...address but the time it will take to do this will vary depending on network conditions The quickest way to recover from this situation is to ensure the network is connected and reboot the HDX If the...

Страница 13: ...from other computers Microsoft Windows XP and Vista are both supplied with software firewalls Normally Windows will advise if these are not enabled Examples of other software firewall vendors are Zon...

Страница 14: ...ices to the home network o Firewall Prevents unwanted intrusions from the Internet o DHCP server Automatically allocates IP addresses Netmask The Netmask determines the range of IP addresses that the...

Отзывы: