


INTRODUCTION
GETTING STARTED
WHAT’S IN THE BOX
Packed with your M17 you will find
•
A detachable mains power cord
•
Audyssey microphone
•
3.5mm female jack to RCA plug Adapter for Audyssey microphone input
•
HTRM 2 remote control with 4 AA batteries
•
ZR 7 zone remote control with 3V CR2025 battery
•
Four pieces of magnetic feet
•
Cleaning cloth
•
USB flash drive
•
Quick Setup Guide
SAVE THE PACKAGING
Please save the box and all of the packaging in which your M17 arrived.
Should you move or otherwise need to transport your M17, this is by far the
safest container in which to do so. We’ve seen too many otherwise perfect
components damaged in transit for lack of a proper shipping carton, so
please: Save that box!
CHOOSING A LOCATION
Choose a location that is well ventilated (with at least several inches to
both sides and behind), and that will provide a clear line of sight, within
25 feet / 8 meters, between the M17’s front panel and your primary
listening/viewing position—this will ensure reliable infrared remote control
communications. The M17 generates a modest amount of heat, but
nothing that should trouble adjacent components.
It is perfectly possible to stack the M17 on top of other components, but
the reverse usually should be avoided.
DEFAULT SOURCE SETTINGS
The following table lists the default SOURCE settings. Note that the Audio
input settings show both digital and analog audio input. Digital input will
always take precedence over analog audio input even if both are present.
Source
Audio Input
Video Input
Source 1
HDMI 1/Audio 1 IN
HDMI 1
Source 2
HDMI 2/Audio 2 IN
HDMI 2
Source 3
HDMI 3/Audio 3 IN
HDMI 3
Source 4
HDMI 4/Audio 4 IN
HDMI 4
Source 5
Optical 1 IN/Audio 5 IN
Video 1 IN
Source 6
Optical 2 IN/Audio 6 IN
Video 2 IN
Source 7
Coaxial 1 IN/Audio 6 IN
Video 3 IN
Source 8
Optical 3 IN
Component Video Input 1
Source 9
Coaxial 2 IN
Component Video Input 2
To modify the above default settings and for a better understanding of
source setting and combinations, please refer to the item about “SOURCE
SETUP” in the “USING THE M17 - SETUP MENU” segment of the “OPERATION”
section.
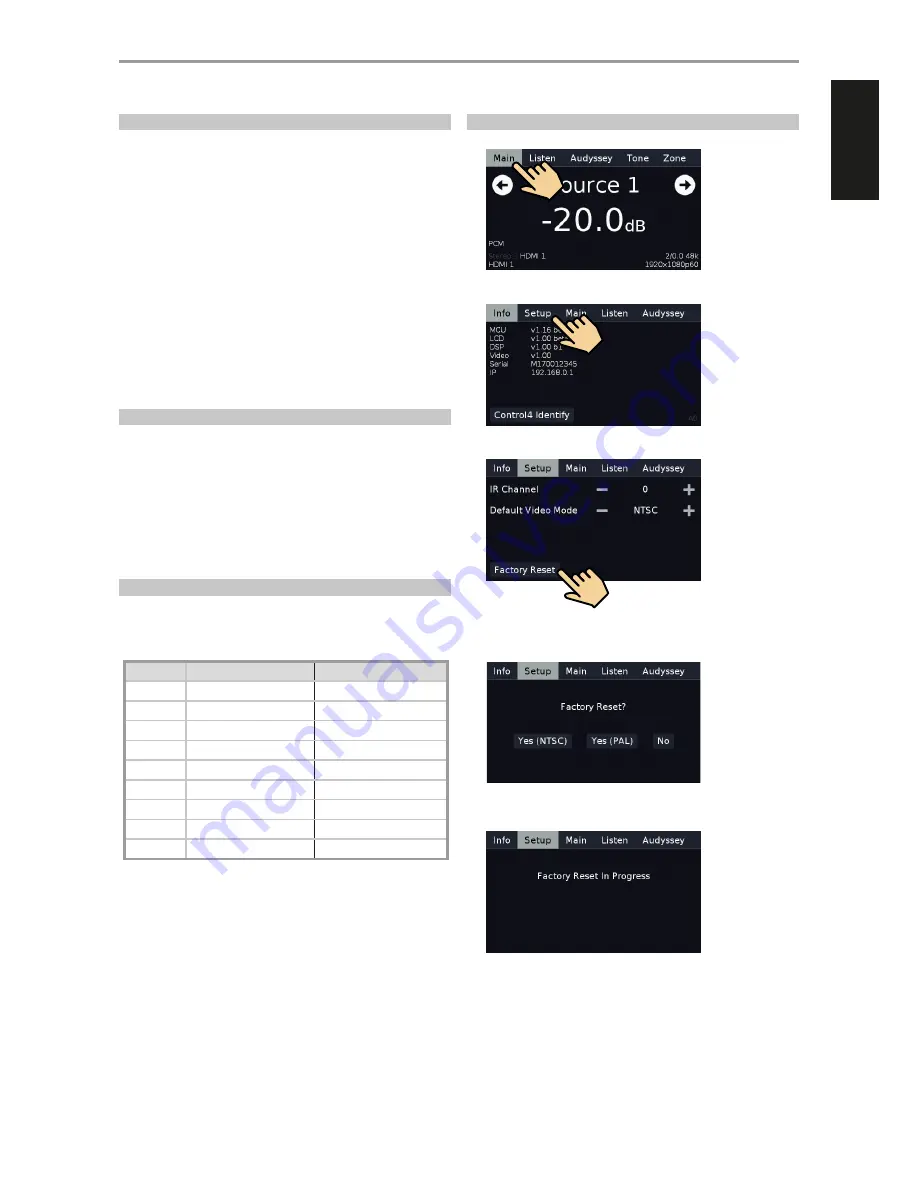
RESTORING M17 TO ITS FACTORY DEFAULT SETTINGS
1
Press and hold front panel’s “Main” display.
2
Select “Setup” display option.
3
Select “Factory Reset” display option.
4
Select between “Yes (NTSC)” and “Yes (PAL) to select video mode after
Factory Reset. Select “No” if you decide not to reset your M17.
5
Factory reset is complete after the display below and the M17 going to
standby mode.
5
ENGLISH
FR
ANÇ
AIS
ESP
AÑOL
IT
ALIANO
DEUT
SCH
NEDERL
ANDS
SVENSK
A
РУ
ССКИЙ


