background image

IDENTIFICATION OF CONTROLS

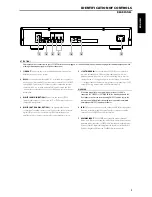
REAR PANEL

1 LINE 

OUT:

 Connect to the corresponding analog audio input of an 

amplifier, receiver or stereo system. 

2 RS232:

 Connect this interface via RS-232 serial cable (not supplied) to 

any Windows® compatible PC to allow remote control of the C 565BEE 
through NAD’s proprietary PC software or other compatible external 
controllers. NAD is a certified partner of AMX and Crestron and fully 
supports these external devices. See your NAD audio specialist for more 
information.

3  DIGITAL AUDIO IN (OPTICAL):

 Connect to the optical S/PDIF-

format digital output of sources such as CD or DVD players, and other 
compatible components. 

4  DIGITAL OUT (COAXIAL, OPTICAL):

  The digital playback audio 

output signal is available at these ports. Connect the optical or coaxial 
digital OUT ports to the corresponding S/PDIF digital input of an 
amplifier, receiver, computer soundcard or other digital processors.

5 +12V 

TRIGGER 

IN:

 This input allows the C 565BEE to be switched 

remotely to standby and ON by ancillary equipment, such as an 
amplifier, preamp, AV processor, etc. The controlling device must be 
equipped with a 12 V trigger output to use this feature. Connect this 
+12V-trigger input to the remote component’s corresp12V DC 
output jack using a mono cable with 3.5mm male plug.  

WARNING


If the male plug of the mono cable (with or w12V DC) is 
connected to C 565BEE’s +12V TRIGGER IN, the Standby button in the 
front panel as well as the corresponding ON/OFF function keys in the 
remote control will be disabled. Unplug the mono cable to maintain 
normal power ON/OFF function procedures.

6 IR 

IN:

 This input is connected to the output of an IR (infrared) repeater 

(Xantech or similar) or the IR output of another component to allow 
control of the C 565BEE from a remote location.

7  AC MAINS INPUT:

 The C 565BEE comes supplied with a separate AC 

Mains cable.  Before connecting the cable to a live wall socket ensure that 
it is firmly connected to the C 565BEE’s AC Mains input socket first. Always 
disconnect the AC Mains cable plug from the live wall socket first, before 
disconnecting the cable from the C 565BEE’s Mains input socket.

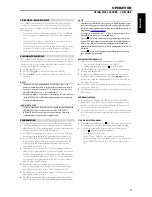
ATTENTION!


Please make all the connections to your C 565BEE with the unit unplugged.  It is also advisable to power down or unplug all associated components while 
making or breaking any signal or AC power connections.

2

3

4

5

6

7

1

9

ENGLISH

FR

ANÇ

AIS

ESP

AÑOL

IT

ALIANO

DEUT

SCH

NEDERL

ANDS

SVENSK

A

РУ

ССКИЙ

Содержание C565BEE

Страница 1: ...ENGLISH FRANÇAIS ESPAÑOL ITALIANO DEUTSCH NEDERLANDS SVENSKA РУССКИЙ Owner s Manual C565BEE Compact Disc Player ...

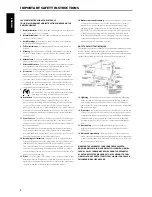
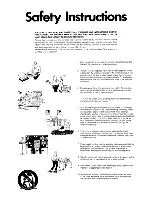
Страница 2: ...ly one way This is a safety feature If you are unable to insert the plug fully into the outlet try reversing the plug If the plug should still fail to fit contact your electrician to replace your obsolete outlet Do not defeat the safety purpose of the polarized plug 13 Power Cord Protection Power supply cords should be routed so that they are not likely to be walked on or pinched by items placed u...

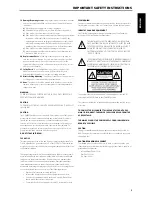
Страница 3: ...its are designed to provide reasonable protection against harmful interference in a residential installation This equipment generates uses and can radiate radio frequency energy and if not installed and used in accordance with the instructions may cause harmful interference to radio communications However there is no guarantee that interference will not occur in a particular installation If this e...

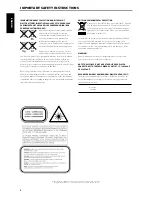
Страница 4: ...mprovement of the environment NOTES ON ENVIRONMENTAL PROTECTION At the end of its useful life this product must not be disposed of with regular household waste but must be returned to a collection point for the recycling of electrical and electronic equipment The symbol on the product user s manual and packaging point this out The materials can be reused in accordance with their markings Through r...

Страница 5: ...ime here at the outset might save you a good deal of time later and is by far the best way to ensure that you make the most of your investment in the C 565BEE One more thing We urge you to register your C 565BEE ownership on the NAD Worldwide Web site http NADelectronics com warranty For warranty information contact your local distributor IMPORTANT SAFETY INSTRUCTIONS 2 INTRODUCTION GETTING STARTE...

Страница 6: ... circuits may produce static that would interfere with reception of weak broadcast signals If this occurs move the C 565BEE away from other devices or switch it off when viewing or listening to broadcasts QUICK START In case you simply cannot wait to experience the performance of your new NAD C 565BEE we provide the following Quick Start instructions to get you underway Please make all the connect...

Страница 7: ...nd close the disc tray Pressing this button during disc playback will cause the C 565BEE to stop playback press again to open the disc tray Press STOP OPEN button once to stop playback and re set the pickup to the beginning of the disc The display reverts to showing the number of tracks and total playing time on the disc for WMA MP3 files the display will revert to total number of files If the C 5...

Страница 8: ...TIST or NO ALBUM 10 SCAN Press and hold for more than 2 seconds to search up or down a track file The SCAN button causes the optical pickup to scan backwards through the recording at high speed The SCAN button causes the optical pickup to scan rapidly forward through the music 11 USB INPUT Connect a USB device into this input 12 PLAY PAUSE SKIP This control knob has three functions PLAY PAUSE and ...

Страница 9: ...2 V trigger output to use this feature Connect this 12V trigger input to the remote component s corresponding 12V DC output jack using a mono cable with 3 5mm male plug WARNING If the male plug of the mono cable with or without 12V DC is connected to C 565BEE s 12V TRIGGER IN the Standby button in the front panel as well as the corresponding ON OFF function keys in the remote control will be disab...

Страница 10: ...elect through WMA MP3 files ENTER Select desired folder or WMA MP3 file Open or close disc tray Pause playback temporarily 0 to 9 NUMBER BUTTONS Direct entry of track or file number OFF Switch OFF C 565BEE RAND Play tracks files in random mode RPT Repeat track file or whole disc RPT A B Setup repeat sequence DIM Reduce turn off or restore VFD brightness FILTER Select filter number SKIP Go to next ...

Страница 11: ...that there are now a total of two programmed tracks and 6 45 is the total playback time of both programmed tracks 4 Repeat steps 2 and 3 to select and store other track numbers in memory up to a maximum of 40 entries If you attempt to program more than 40 tracks or files P FULL will be displayed in the VFD 5 Press PROG to end or finalize the program the VFD will show the last programmed number and...

Страница 12: ...R to select desired folder Press ENTER 3 Press FILE to select desired file number 4 Press ENTER to start playback Toggle CD 9 s DISP button to show information about the current file Refer also to the item about DISPLAY at the FRONT PANEL section of the IDENTIFICATION OF CONTROLS page NOTE Do not disconnect the USB flash drive during playback It may cause damage to the C 565BEE OPTICAL INPUT MODE ...

Страница 13: ...filters allow users the flexibility to choose key characteristics that affect frequency response and time domain characteristics Before describing these five digital filters please take time to read the following brief definitions of some of the terminologies used in their descriptions Passband is the range of frequencies or wavelengths that can pass through a filter without being attenuated A sto...

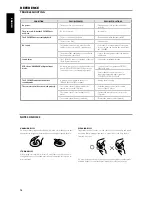
Страница 14: ...BEE s OPTICAL DIGITAL IN The C 565BEE cannot be switched to standby mode A mono plug is plugged in at the 12V TRIGGER IN port of the rear panel Unplug the mono plug The remote control does not work properly The remote control is not pointed at the remote sensor on the CD player Point the remote control at the remote sensor of the CD player The remote control is too far from the CD player Operate t...

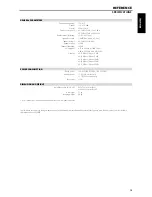
Страница 15: ... kHz at 10 dB 0 05 dB ref 1 kHz at 20 dB 0 15 dB ref 1 kHz at 60 dB POWER CONSUMPTION Rated power 18 W ref 230V AC 50 Hz 120V AC 60 Hz Standby power 1 W 230V version only 0 7 W 120V version only Idle power 15 W DIMENSION AND WEIGHT Unit Dimensions W x H x D 435 x 70 x 285 mm Net 435 x 86 x 293 mm Gross Net weight 5 2 kg Shipping weight 6 6 kg Gross dimensions include feet extended buttons and rear...

Страница 16: ...S INTERNATIONAL A DIVISION OF LENBROOK INDUSTRIES LIMITED All rights reserved No part of this publication may be reproduced stored or transmitted in any form without the written permission of NAD Electronics International C 565BEE Manual 03 09 ...

Страница 17: ...ming pool 4 To mount the unit on a wall or ceiling follow the recommended instructions in the owner s manual 5 Slots and openings in the cabinet and in the back or bottom pro vide ventilation to prevent the unit overheating For safety and to ensure reliable operation of the equipment these openings should not be blocked or covered They should never be covered with a cloth or other material and the...

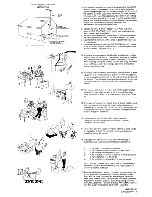
Страница 18: ... from the wall outlet and disconnect the antenna This will prevent damage to equipment that might be caused by power line surges or by lightning attracted to the antenna 14 lf an indoor antenna is used either built into the set or installed separately never allow any part of the antenna to touch the metal parts of other electrical appliances such as a lamp TV set etc 15 When you want to use the un...

Страница 19: ... Ie produit a NAD Lenbrook ou aun centre de reparation NAD agree Si les reparations sont couvertes par la garantie NAD Lenbrook ou Ie centre de reparation assumeront les frais de transport pour Ie retour de votre produit Etendue de la garantie La presente garantie ne couvre par les composantes 1 endommagees dans Ie transport ou dans un cas de force majeure 2 soumises aune trop forte charge utilise...

Страница 20: ... you must pay any shipping charges if it is necessary to ship the product to NAD Lenbrook or to an authorized NAD service center If the repairs are covered by the warranty NAD Lenbrook or the service center will pay the return shipping charges What is not covered This warranty does not cover a component which has been 1 Damaged in transit or by act of God 2 Overloaded abused misused or operated wi...

Отзывы: