MyTek USB2 CLASS2 Скачать руководство пользователя страница 11

User’s Manual

11

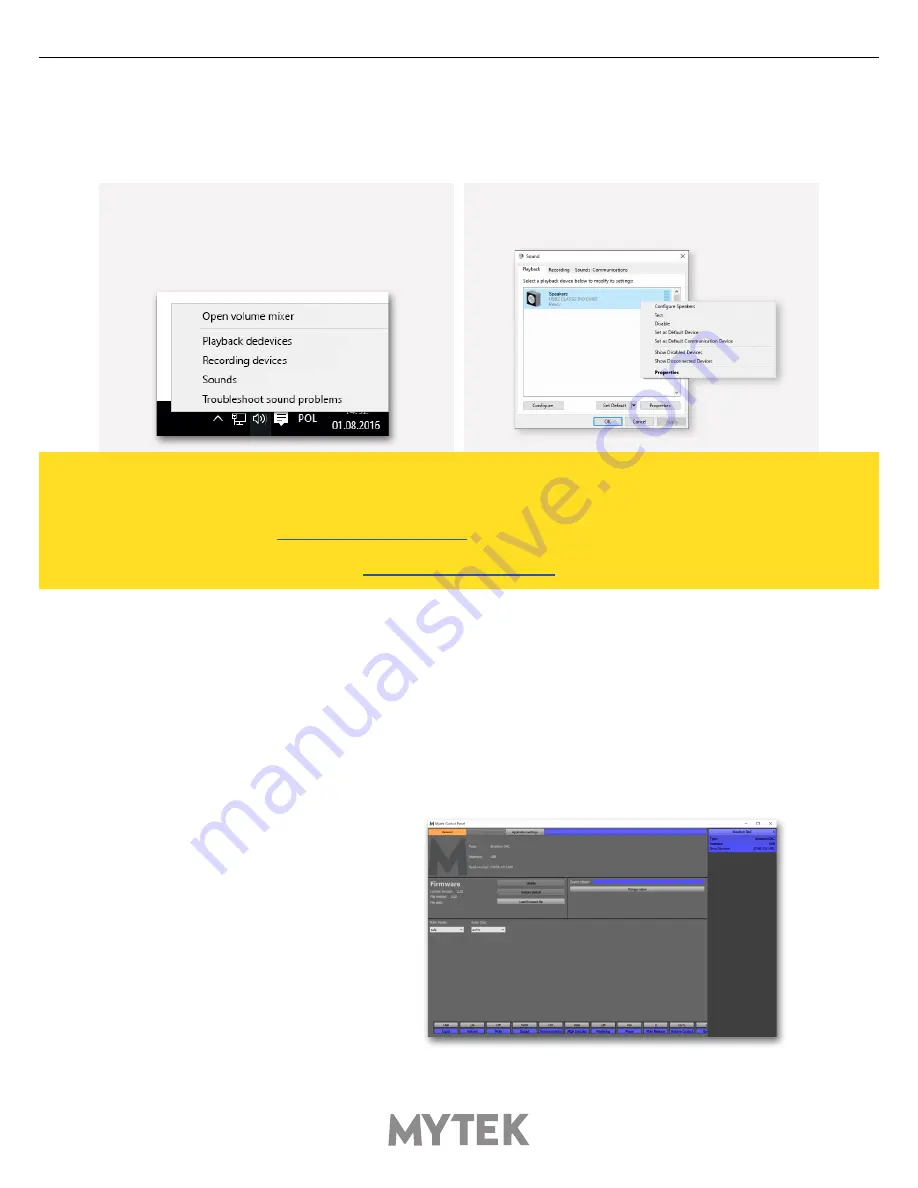
11.3  Windows – setting the USB2 CLASS2 DIO CARD as 

1. To set the USB2 CLASS2 DIO CARD as your 

default Windows playback device find the speaker 

icon  (Sound  Settings)  in  the  notification  area 

(lower right corner of your screen) and right-

click. Choose "Playback devices" from the context 

menu.

2. Right-click „Speakers USB2 CLASS2 DIO CARD” 

and choose „Set as Default Device”.

12. USB2 CLASS2 DIO CARD OSX installation

12.1 OSX – USB 2.0 driver installation

The USB2 CLASS2 DIO CARD custom designed USB2 controller supports 

driverless

 operation on 

MAC. It means that no extra drivers are required. Driverless operation basically means 

„plug and 

play”

. The USB2 CLASS2 DIO CARD will automatically show up in your computer’s list of supported 

audio devices as „USB2 CLASS2 DIO CARD”. Simply choose that as your default audio playback device 

and the system will work.

12.2 OSX – Mytek Control Panel installation.

Note!  –  pro  audio  (DAW)  applications  (Cubase,  Samplitude, 

Reaper etc.) or proffesional media players (Jriver etc.) use ASIO 

drivers  and  need  to  be  configured  different  way.  Please  check 

our „

Software Setup Guide

” shown on our web site:

mytekdigital.com

To install the Mytek Control Panel 

simply drag and drop Mytek 

application  file  (located  in  Mytek_

ControlPanel_v.1.xx.dmg  file)  to 

„Applications” system folder. Follow 

the link to downlad the latest 

varsiion of the Mytek Control Panel 

application.

playback device.

+

Содержание USB2 CLASS2

Страница 1: ......

Страница 2: ...tips and further product information please visit our website mytekdigital com Technical support issues are handled via our online support ticketing system Please enter details of the ticket in the su...

Страница 3: ...front panel 8 9 Input Connection 8 10 Signal Routing 8 11 Windows installation and configuration 9 11 1 Windows USB 2 0 driver installation 9 11 2 Windows Mytek Control Panel installation process 10 1...

Страница 4: ...connecting 8x192 ADDA via the USB interface and using this converter as the audio interface for Windows Linux and Mac OS 4 Before You Begin Before connecting the USB2 CLASS2 card please check if the m...

Страница 5: ...r Most current drivers are available in the download library at www mytekdigital com 3 Connecting the card to the computer Turn off the ADDA 8x192 converter before plugging in the USB cable The comput...

Страница 6: ...s before unpacking and handling the DIO card Turn off power and detach power and signal cables while working with the top cover removed To install the USB card 1 Check if the power cord and all signal...

Страница 7: ...ide and secure it with four screws 8 Attach converter top cover 9 Connect power and signal lines 10 Turn the converter on After boot up which takes approx 20 sec the converter will switch to regular m...

Страница 8: ...ing frequency in Control Panel Correct clock configuration is necessary for the proper operation of the converters and for the best sound quality Make the 1st Mytek in the chain the clock master for t...

Страница 9: ...rchive by right clicking on the zip archive icon and selecting Extract Here 2 Installation works automatically by a double click on MytekUSB2Drv v4 xx x exe file 3 Once the Setup exe opens click Next...

Страница 10: ...s click Next then accept license and click Next again 3 All options should be choosen in Custom Setup menu To confirm the installation of each option select Will be installed on local hard drive then...

Страница 11: ...iverless operation basically means plug and play The USB2 CLASS2 DIO CARD will automatically show up in your computer s list of supported audio devices as USB2 CLASS2 DIO CARD Simply choose that as yo...

Страница 12: ...mytekdigital com 2 Click Load firmware file button and browse to the new firmware file then click Open 3 Press the Update button to confirm uploading the firmware file to device s memory 4 Confirm you...

Страница 13: ...isconnect power and signal cables while working with the top cover removed To perform firmware update of 8X192 ADDA converter 1 Check if the power cord and signal and clock lines are disconnected 2 Re...

Страница 14: ...hen all LEDs should turn on momentarily for about 10 20sec and subsequently the unit should begin normal operation Check Mytek webpage for information on the latest firmware versions www mytekdigital...

Страница 15: ...with one wider than the other A grounding type plug has two blades and a third grounding prong The wide blade or the third prong are provided for your safety If the provided plug does not fit into you...

Страница 16: ...1 this device may not cause harmful interference and 2 this device must accept any interference received including interference that may cause undesired operation This product with the CE marking comp...

Отзывы: