Beyond the Basics
Your machine has a number of security features to keep your private fax documents
private, avoid unwanted outside communication and even protect against unautho-
rized use of your machine.
These security features include: (1) security reception, (2) PIN mask, (3) security
transmission, (4) closed network, (5) block junk fax, and (6) department codes.
The passcode
Your machine has a passcode protection system which must be turned on in order to
use the security features listed above.
To set your machine’s passcode:
1
Decide on the four-digit passcode (0001–9999) you want to use. Write it down,
and put it in a safe place.
Important: Do not use 0000. This turns off passcode protection.
2
Press
MENU
, [Mach Set].
3
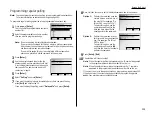
Select “B. Protect Passcode” and then
press [Enter]. The
LCD
shows (see right):
4
If you are creating a passcode, use the
numeric keypad to enter 0000.
If you are changing an existing passcode,
enter the existing passcode.
5
Press [Enter].
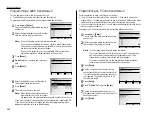
6
Enter the new four-digit passcode.
For example, we’ve entered 1234:
7
Press [Enter] to save the passcode.
Note: Any time you want to turn off the passcode,
change the passcode back to 0000 by repeat-
ing steps 2–7 and entering 0000 in step 6.
Security reception
Security reception tells your machine to keep all received faxes in memory (but not
print them). Then you can print them out later, at your convenience. For example,
you could use this if you’re concerned about workers reading documents intended
for your eyes only.
Important: For this feature to work, you must have activated the passcode protec-
tion as described on left column. You must also know the passcode.
Note: In the following instructions, your machine’s
LCD
shortens the word
Transmission to Tx and the word Receive to Rx.
Activating security reception
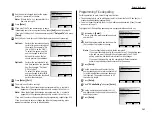
1
Press
MENU
,
N
, [Enter]. The
LCD
shows
(see right):
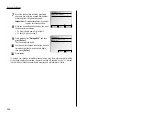
2
Use the numeric keypad to enter the protec-
tion passcode. Here we’ve entered 1234:
3
Press [Enter].
4
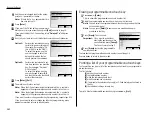
Select “On”, then press [Enter].
The
LCD
shows the machine’s current clock setting:
5
If you want security reception to begin now
(and at this same time every day), skip to
step 7.
Otherwise, go on to step 6.
6
Use the numeric keypad to enter the time
(use a 24-hour format) when security recep-
tion should begin every day
“Type over” the numbers displayed.
To change a digit, move the cursor to that digit, then enter the correct digit.
7
Press [Enter] to save the setting.
Note: After setting for activating the security reception, you can assign the secu-
rity reception to the Soft key (see page 2.15) to turn it on and off. Turning on
the security reception by pressing a Soft key is not effected the time setting
you entered at step 6. It begins the security reception immediately.
2.44
Security features
Содержание MFX-2500
Страница 1: ...Muratec MFX 2500 Operating Instructions Fax Reference...
Страница 7: ...v This page intentionally blank...
Страница 73: ...Beyond the Basics This page intentionally blank 2 51...
Страница 84: ...Trouble Shooting Troubleshooting 4 1 Common questions 4 6...
Страница 93: ...Trouble Shooting This page intentionally blank 4 9...
Страница 94: ...Appendix and index Glossary AI 1 Index AI 5...
Страница 101: ...This page intentionally blank Appendix and index AI 7...
Страница 102: ...This page intentionally blank Appendix and index AI 8...


