


Chapter 4 – Configuration Examples
Multi-Tech Systems, Inc. RouteFinder RF850/860 User Guide (PN S000400E)
32
Example 2, Side A
VPN Setup (Continued)
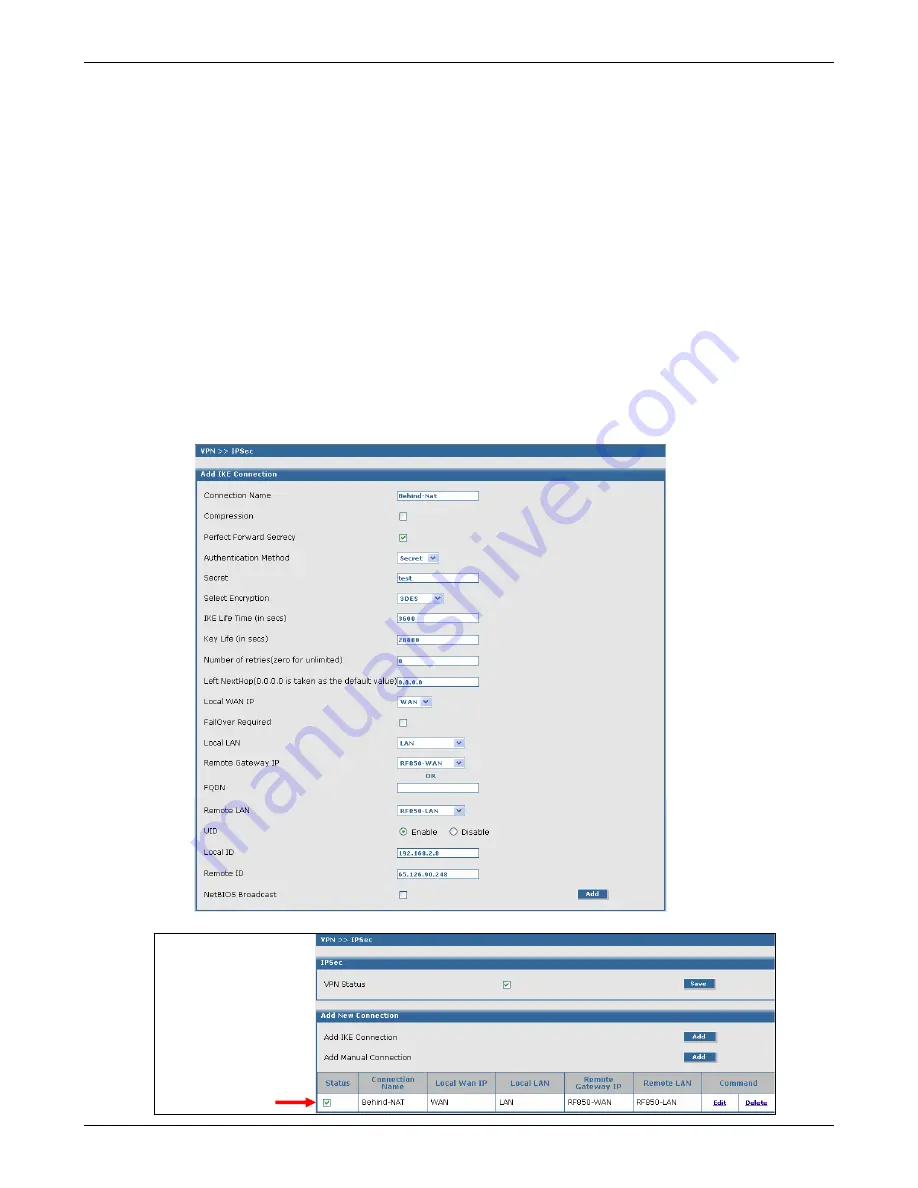
The
Add IKE Connection
screen displays. All settings can be left at the default unless otherwise
indicated:
1.
Connection Name:
Enter a name for the VPN tunnel you want to create. For this example,
enter
Behind-NAT
.
2.
Secret:
Enter the
Secret
password (which has to match on both ends of the tunnel). For this
example, enter
test
.
3.
Select Encryption:
Select
3DES
.
4.
Local WAN IP:
Select
WAN
.
5.
Local LAN:
Select
LAN
.
6.
Remote Gateway IP:
Select
RF850-WAN
.
7.
Remote LAN:
Select
RF850-LAN
.
8.
UID:
Click the
Enable
button (must be enabled when using NAT).
9.
Local ID:
Enter the local security gateway ID (required when using NAT). For this example,
enter 192.168.2.8
10.
Remote ID:
Enter the remote security gateway ID (required when using NAT). For this example,
enter 65.126.90.248
11.
Click the
Add
button to save your tunnel.
The
VPN > IPSec
Status screen displays; this time showing the newly-created VPN tunnel.
Important Note:
Make sure to
check the
Status box for
this VPN tunnel
in order to
activate it.


