Page 506
3. Remove the Allen wrench.
4. Jog the pump momentarily using the
on/off buttons if so equipped.
5. This should “break” the impeller
loose without damage, unless foreign
material has entered the pump.
This procedure will flush residue from
the close fitting impeller surfaces. If not
immediately successful, refer to Section
1, 1C Placing Stored Pumps Into
Service.
Because of the large areas of close
fitting surfaces inside these pumps, it
takes only microscopic residue to
produce resistance to rotation. Once
loosened, this material is quickly
dispersed and the impellers will find
their hydraulic center. If these proce-
dures are followed carefully, no
damage will result from "breaking loose"
the impeller.
3F Cooling Water
When the pump is used to transfer hot
fluids, consideration should be given to
cooling the seals and/or selecting
materials that will give satisfactory seal
life. The actual temperature at the seal
faces, the most critical area, will always
exceed the surrounding fluid temperature.
3G Priming
Pumps should not be operated
unless they are completely filled with
liquid. Damage to parts of the pump that
depend on liquid for their lubrication can
occur. Impellers can seize quickly when a
pump is run dry. Without lubrication, seal
faces can be damaged from heat buildup.
3H Starting
Before starting a pump for the first time,
be sure that all the preceding operations
have been carried out. Proper rotation,
priming, and a free turning pump are most
important.
1. Start the pump with the minimum
possible line restriction.
2. Open discharge valves before
pressing the starter.
3. Start the pump and let the system
clear of air.
4. Listen for foreign material being
carried through the pump.
5. Slowly close necessary valves or
otherwise place the pump into
service.
6. Listen for indications of undue load
or other sounds indicating problems.
7. Use a clip-on ammeter to check for a
steady load after approximately
fifteen minutes of operation.
3I Stopping
It is best to stop the pump with the least
discharge head possible both for
minimizing strain on components, and
to be in low power mode in anticipation
of restarting.
4.
Service
T41 SERIES
PUMP ENDS
A. Preliminary
B. Disassembly C3 & P3
C. Disassembly C15 & P15
D. Inspection of Components
E. Reassembly C3 & P3
F. Reassembly C15 & P15
G. Testing and Final Adjustments
4A Preliminary
Before attempting any service on the
pump or motor, disconnect the electrical
power to the motor. If the pump and
motor are to be removed as a unit, note
the wiring configuration.
1. Disconnect the inlet and outlet piping
before unbolting the pump and
motor.
2. Unbolt the motor from the base and
remove the unit. All work on the unit
should be performed on an elevated
workbench whenever possible.
The disassembly and reassembly
procedures are broken into four
sections covering the following units:
4B — Disassembly of the C3 and P3
Units (3 hp and under)
4C — Disassembly of the C15 and P15
Units (5 hp and up)
4E — Reassembly of the C3 and P3 Units
4F — Reassembly of the C15 and P15
Units
Exploded views of each unit, Figures 4-4,
4-5, 4-11, and 4-12, are provided for
referencing the numbers in the following
procedures, i.e. (#1), motor bracket.
4B Disassembly (C3 and P3)
The following tools and equipment are
needed for disassembly of C3 and P3
units.
1. Soft plastic or wooden mallet.
2. 9/16" wrench or socket.
3. 5/32" hex wrench.
4. Penetrating oil.
5. 1" wood dowel (Approx. 6" long).
6. Thin blade screwdriver.
7. Two large blade screwdrivers.
8. Cealube G or similar glycol base
lubricant. (DO NOT use petroleum
products.)
To disassemble the pump:
Refer to Figures 4-4 and 4-5 for reference
to the numbered parts in the procedures
below.
1. Remove all liquid from the pump. Air
blown through the pump will remove
the water quickly.
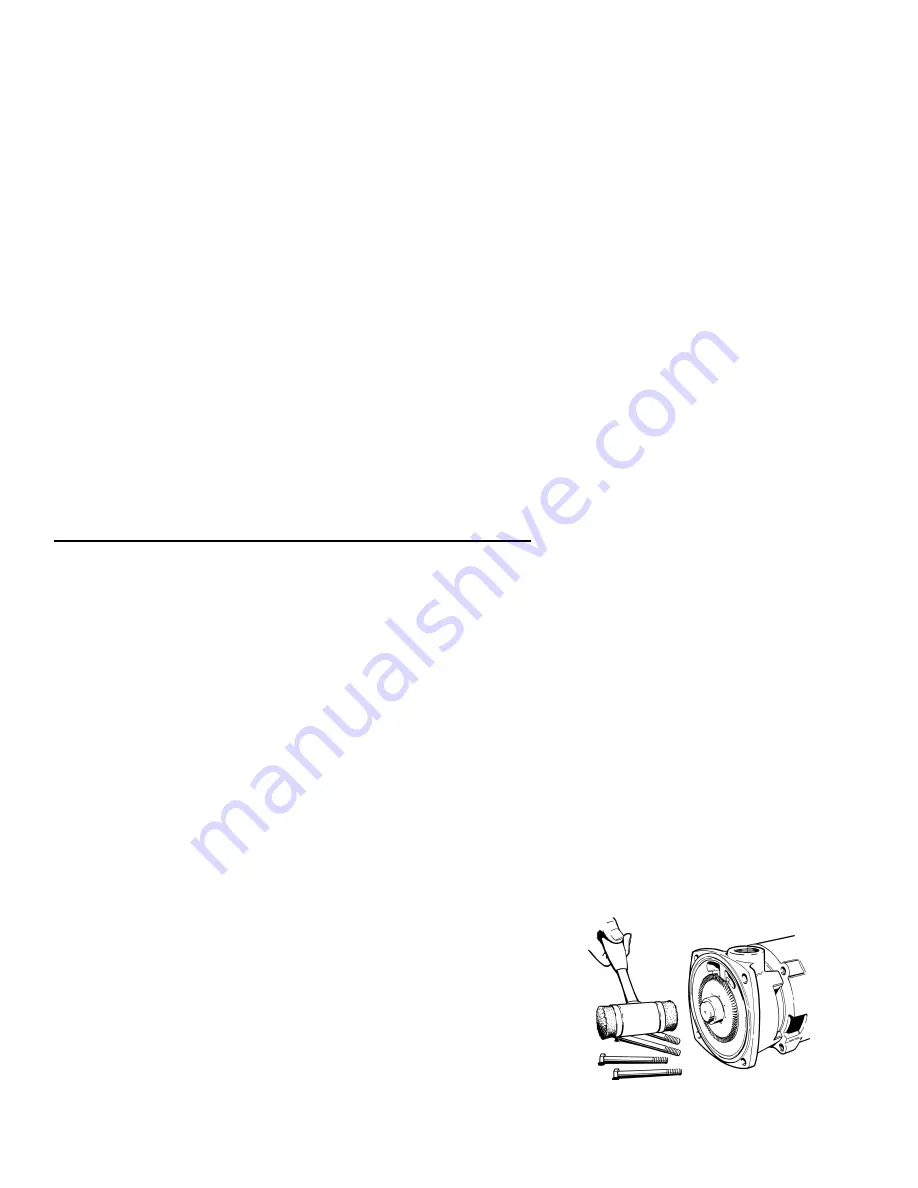
2. Remove the four (4) 3/8" X 4" bolts
(#19) from the cover (#2).
3. Remove the cover. In some cases
light tapping with a plastic or wooden
mallet on the outside diameter of the
cover may be required to loosen it
from the motor bracket. Care should
be taken if a screwdriver is needed
to pry between the cover and motor
bracket. Damage to the “O” ring
(#7) and/or impeller can result.
4. Remove the impeller (#11), refer to
Figure 4-1. The impeller is a slip fit
and, under normal conditions, can
be removed by gently tapping on the
end of the shaft sleeve with a mallet.
Leave the impeller key (#23) in
place. Striking the sleeve too hard
could damage the seat or rotating
element.
Figure 4-1


