background image

D 26

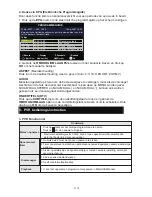
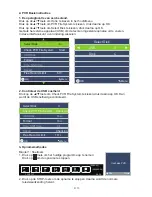
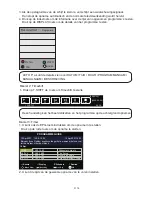
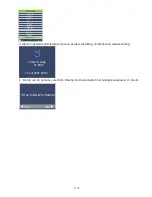
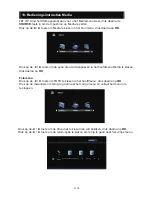
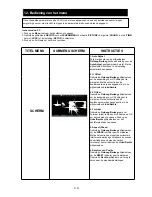
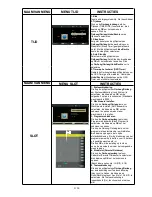
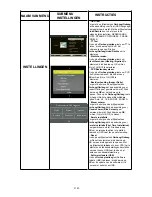
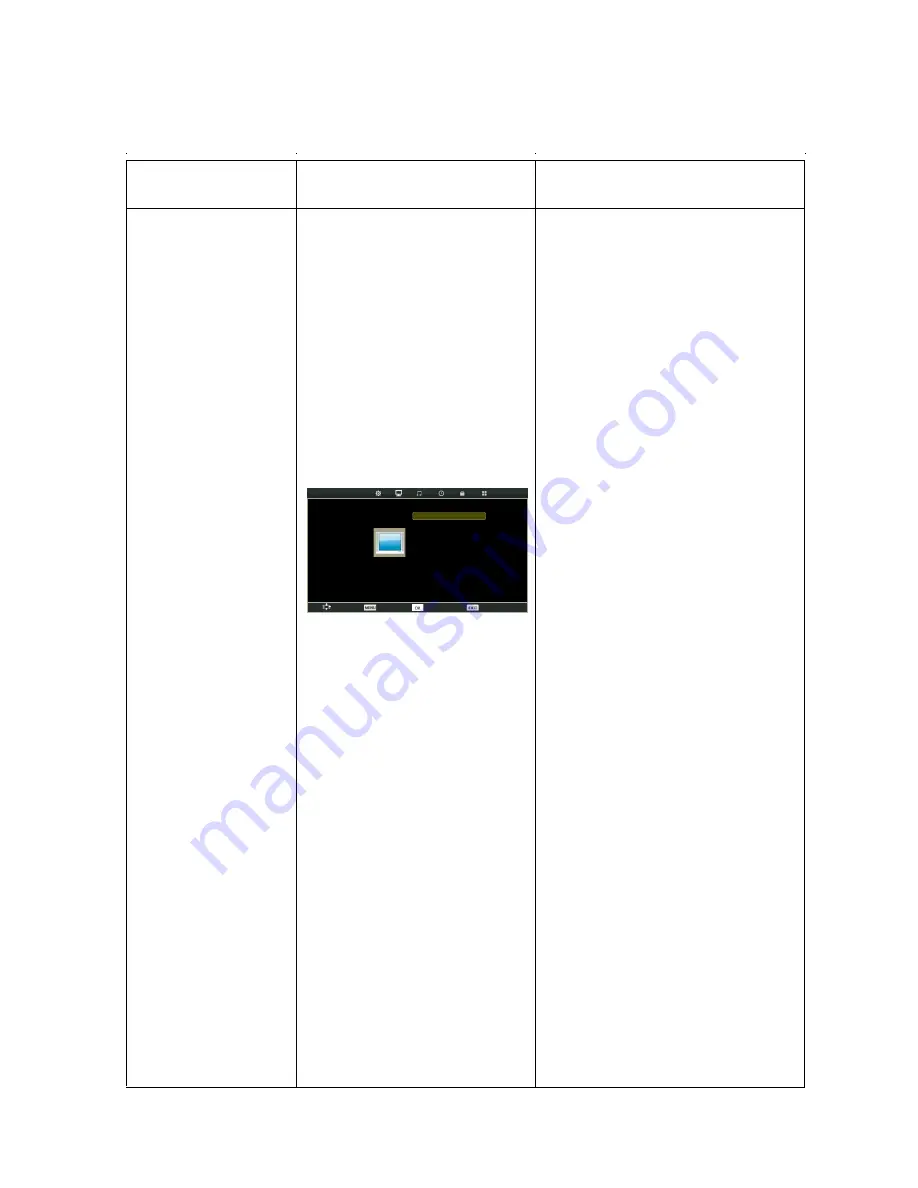
Invoer-modus: AV/SCART/HDMI/DVD/Component/MEDIA

1.Druk op de 

MENU

 toets om het hoofdmenu weer te geven.

2.Gebruik de 

RECHTS 

pijltjestoets om het menu voor beeld (

Picture

), het geluid (

Sound

), de tijd (

Time

), het 

slot (

Lock

) of de instellingen (

SETUP

) te kiezen.

3.Druk op 

EXIT

 om het menu te verlaten.

ANNEL

Brightnes

0

Colour                                         50

Tint                                              50

Sharpness                                  30

PICTURE

Move

Return

Select

Exit

Contrast                                      50                                      

Picture mode

Standard

Colour Temp                           Normal

Noise Reduction                     Middle

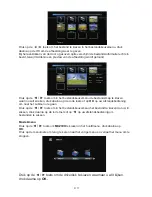
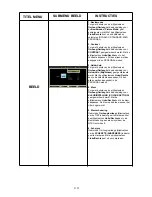
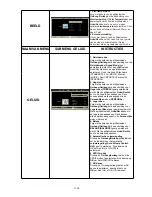
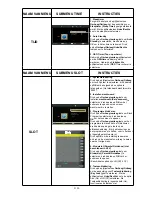
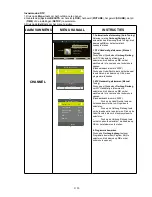
TITEL MENU

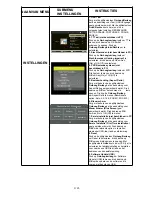
SUBMENU BEELD 

INSTRUCTIES

BEELD

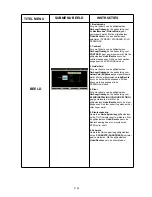
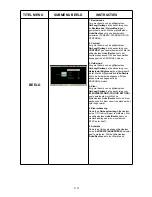
1. Beeldmodus

Zorg met behulp van de pijltjestoetsen 

Omhoog/Omlaag

 dat de aanduiding voor 

de 

Beeldmodus

 (

Picture Mode

) geel 

gemarkeerd wordt. Met de pijltjestoetsen 

Links/Rechts

 kunt u een beeldmodus 

selecteren (DYNAMIC, STANDARD, MILD,

PERSONAL).

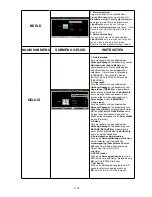
2. Contrast

Zorg met behulp van de pijltjestoetsen 

Omhoog/Omlaag

 dat de aanduiding voor 

CONTRAS

T geel gemarkeerd wordt. Met de 

pijltjestoetsen 

Links/Rechts

 kunt u het 

contrast aanpassen. Dit kan alleen worden 

aangepast in de PERSONAL-modus.

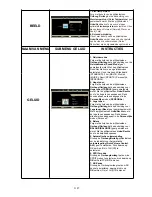
3. Helderheid

Zorg met behulp van de pijltjestoetsen 

Omhoog/Omlaag

 dat de aanduiding voor 

Helderheid (Brightness)

 geel gemarkeerd 

wordt. Met de pijltjestoetsen

 Links/Rechts 

kunt u de helderheid aanpassen. Dit kan 

alleen worden aangepast in de 

PERSONAL-modus.

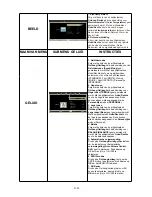
4. Kleur

Zorg met behulp van de pijltjestoetsen 

Omhoog/Omlaag

 dat de aanduiding voor 

KLEURINSTELLING (COLOUR SETTING)

geel gemarkeerd wordt. Met de 

pijltjestoetsen 

Links/Rechts

 kunt u de kleur 

aanpassen. De kleur neemt toe wanneer het 

cijfer hoger wordt.

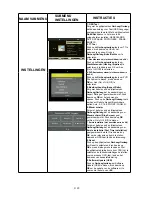
5. Kleurschakering

Gebruik de 

Omhoog/omlaag

 pijltjestoetsen 

om de TINT indicator geel te markeren. Met 

de pijltjestoetsen 

Links/Rechts

 past u de 

kleurschakering aan als uw systeem de 

NTSC-norm heeft.

6. Scherpte

Gebruik de Omhoog/omlaag pijltjestoetsen 

om de 

SCHERPTE (SHARPNESS)

 indicator 

geel te markeren. Met de pijltjestoetsen 

Links/Rechts

 past u de scherpte aan.

Содержание LE-207784MT

Страница 1: ...GEBRUIKSHANDLEIDING INSTRUCTION MANUAL Model Nr LE 207784MT ...

Страница 2: ...teek geen voorwerpen metalen of brandbare voorwerpen in de tv deze kunnen elektrische schokken of brand veroorzaken Plaats de LED tv niet in de nabijheid van meubels bekleding of elektronische producten Het product is niet ontworpen voor inbouw en mag daarom niet in een omsloten ruimte worden geplaatst zonder deugdelijke ventilatie Plaats het apparaat niet in de nabijheid van direct zonlicht of wa...

Страница 3: ...videosignaal 3 Geschikt voor HDMI signaal 4 Geschikt voor ontvangst SCART signaal 5 Geschikt voor ontvangst tv signaal 6 Twee ingebouwde 5W luidsprekers twee sets audioaansluitingen 7 Infraroodafstandsbediening voor alle functies 8 Coax audio uitgang 9 Ondersteuning USB voor PVR harddisk videorecorder en Mediaspeler 10 Ondersteuning CI slot common interface 11 Ondersteuning van DVD playback Onjuis...

Страница 4: ...e batterijen afdankt dient u daarbij de plaatselijk geldende voorschriften in acht te nemen Gooi batterijen niet weg bij het huishoudafval 1 Functies controlepaneel 1 SOURCE Selecteer het binnenkomend signaal ATV DTV Media AV PC Component DVD SCART HDMI1 HDMI2 2 MENU Toegang tot het MENU 3 VOL Volume omlaag 4 VOL Volume omhoog 5 CH TV kanaal omlaag 6 CH TV kanaal omhoog 7 STANDBY Schakelt de TV na...

Страница 5: ...w versterker 8 Uitgang voor hoofdtelefoon 9 YPbPr Componentingang Sluit hier uw AV systeem op aan 10 CVBS Composiet video ingang Sluit hier uw AV systeem op aan 11 Ingang rechter linker audiokanaal voor Composiet video en S Videomodus 12 Antenne uitgang 75 Ω Sluit een antennekabel of antenne aan om een kabelsignaal antennesignaal te ontvangen 13 PCMCIA ingang voor de kaartlezer CI Common Interface...

Страница 6: ...de TV automatisch uitschakelt 17 PMODE Beeldmodus selecteren 18 SMODE Geluidsmodus selecteren 19 TEXT Teletekst in en uitschakelen 20 SUBTITLE Ondertiteling inschakelen 21 HOLD Huidige teletekstpagina vastzetten EPG druk op deze toets voor de EPG functie 22 TV RADIO TV of Radio instellen 23 INDEX Indexpagina opvragen 24 SUBPAGE Ga naar subpagina s 25 SIZE Paginagrootte aanpassen 26 REVEAL Verborge...

Страница 7: ...al U kunt uw LED tv gebruiken als monitor voor uw pc met behulp van een VGA kabel niet bijgeleverd D 6 1 VGA ingang vergeet niet de schroeven aan te draaien 2 PC Audio ingang 3 DC 12V voedings ingang 3 2 1 DC IN USB HDMI1 HDMI2 SCART PC AUDIO VGA COAX YPbPr CVBS R L RF IN CI SLOT ...

Страница 8: ...eo ingang 3 YPbPr componentingang 4 Voedingsingang gelijkstroom 12 V C Aansluiting voor tv signaal 1 Ingang kabel antenne 75 Ω 2 Voedingsingang gelijkstroom 12 V D 7 4 2 3 1 DC IN USB HDMI1 HDMI2 SCART PC AUDIO VGA COAX YPbPr CVBS R L RF IN CI SLOT 2 1 DC IN USB HDMI1 HDMI2 SCART PC AUDIO VGA COAX YPbPr CVBS R L RF IN CI SLOT ...

Страница 9: ...nt een blauw scherm met een rondgaand grijs scherm met de tekst NO SIGNAL tv geen signaal In het LED menu kunt u lezen hoe de zenders kunnen worden geprogrammeerd via automatisch of handmatig zoeken Het is aan te bevelen om de zenders eerst automatisch te laten zoeken Met behulp van de CH CH toetsen of de numerieke toetsen op de afstandsbediening kunt u het gewenste kanaal selecteren Stappen voor ...

Страница 10: ...m de video ingangsmodus van de LED TV in te stellen op Media modus Stappen voor het aansluiten Lees de bij uw externe apparaat geleverde gebruikershandleiding door en vergewis u ervan dat deze apparatuur een HDMI aansluiting heeft Vergewis U ervan dat de stroomtoevoer van de LED TV is uitgeschakeld Verbind een HDMI kabel met de corresponderende interfaceconnector aan de achterkant van de LED TV Sc...

Страница 11: ... bronnen ATV DTV Media AV PC Component DVD SCART HDMI1 HDMI2 Als u op de SOURCE toets drukt wordt het menu voor de inputmodus weergegeven In het menu kunt u vervolgens op drukken om een inputbron te kiezen Druk op de Enter toets om uw selectie te bevestigen 1 Druk op de toets VOL om het volume toe te laten nemen Er verschijnt een getal op het scherm dat het geluidsniveau aangeeft 2 Druk op de toet...

Страница 12: ... op de afstandsbediening wanneer u een van de kanalen van 1 tot en met 9 wilt kiezen als u bijvoorbeeld kanaal 8 wenst drukt u op toets 8 Kies het DTV kanaal dat u wenst Er zijn meerdere manieren om het kanaal van uw keuze te selecteren 1 Door de kanaallijst heen lopen Druk op de CH toets om naar boven en op de CH toets om naar beneden door de beschikbare kanalen heen te gaan 2 Kiezen met het numm...

Страница 13: ... eenmalige opname 3 Als de ingestelde tijd van opname strijdig is met een eerdere instelling verschijnt een waarschuwing 1 Kan een enkel bestand wissen 2 Geeft disk formatteerfuncties 1 U kunt het opgenomen programma terugspelen in Media USB kanaal Meteen opnemen Opnemen met timer Diskmanager Playback Record Move View Prev Day OK Display Schedule Remind Next Day 14 00 15 00 Midsomer nurders 2 Gebr...

Страница 14: ...arna op OK Dan wordt de USB snelheid gecontroleerd 3 Opnamemethodes Manier 1 Sneltoets 1 Druk op toets om het huidige programma op te nemen Druk op om de opname te stoppen 2 Druk op de STOP toets om de opname te stoppen daarna wordt de normale televisieuitzending hervat Select Disk C Check PVR File System Start Format Free Record Limit 6 Hr USB Disk Time Shift Size Speed u n e M K O Select Disk C ...

Страница 15: ...arte Deze handeling kan het beeld stilzetten en het programma op de achtergrond opnemen Manier 3 Timer 1 U kunt ook de EPG toets indrukken om de opname in te stellen Druk op de rode toets om de opname te starten 2 U kunt de tijd van de gewenste opname van te voren instellen PROGRAMME GUIDE 10 Apr 14 E4 The Force Double Indemnity Surprisel Brilliant Creatu 15 00 16 00 16 00 17 00 17 00 18 00 28 ITV...

Страница 16: ...ng 4 De tijd van de opname verschijnt Daarna komt automatisch het huidige kanaal weer in beeld RECORDER 1 YLE TV1 15 Minute 03 Minute 07 Date 07 Date End Time Start Time 08Hour 09 Hour Dec Month Dec Month Mode once k c a B K O 3 Sec to Switch channel Yes No Timer Overlay 21 TMF 13 Jul 2007 03 00 ...

Страница 17: ... de toets om de optie die u wilt aanpassen in het hoofdmenu Media te kiezen druk daarna op OK Fotomenu Druk op de toets om FOTO te kiezen in het hoofdmenu druk daarna op OK Druk op de menutoets om terug te gaan naar het vorige menu en verlaat het menu om te stoppen Druk op de toets om de drive disk te kiezen die wilt bekijken druk daarna op OK Druk op de toets om de return optie te kiezen om terug...

Страница 18: ... Delete Flower00 jpg Druk op de toets om in het bestandskeuzemenu de bestandsmap te kiezen waarin u wilt zoeken druk daarna op de rode toets of op OK op uw afstandsbediening om naar het submenu te gaan Druk op de toets om in het bestandskeuzemenu het bestand te kiezen dat u wilt wissen druk daarna op de rode toets of op op uw afstandsbediening om bestanden te wissen Muziekmenu Druk op de toets om ...

Страница 19: ...eeld terwijl er muziek middenin het beeld verschijnt O Album 2005 01 Title 1khz 10db Bit Rate 320K Artist BCD103 Sampling 44K Year 2005 Size 2426KBytes Delete best mp3 thank mp3 try mp3 Maybet mp3 Record Win angel mp3 happy mp3 C 1 1 Druk op de toets om in het bestandskeuzemenu het bestand te kiezen dat u wilt zien druk daarna op OK om het bestand aan de afspeellijst toe te voegen ...

Страница 20: ...ppen Druk op de toets om de drivedisk te kiezen die u wilt zien druk daarna op OK Druk op de toets om de return optie te kiezen en terug te keren naar het vorige menu Bij het aanklikken van de door u gekozen optie verschijnt de bestandsinformatie rechts in beeld terwijl de filmpreview middenin het beeld verschijnt Druk op de mediatoets om de gekozen film af te spelen Druk op de display toets om he...

Страница 21: ...bpage toets Subpagina Wanneer de teletekstinformatie op meerdere pagina s wordt weergegeven kan het enige tijd duren voordat de door u gewenste subpagina automatisch wordt weergegeven U kunt het nummer van de gewenste subpagina invoeren en naar het tv programma blijven kijken tot de desbetreffende subpagina wordt gevonden Selecteer het paginanummer met behulp van de cijfertoetsen 0 9 Indien boveni...

Страница 22: ... H Offset Gebruik de Omhoog Omlaag pijltjestoetsen om de aanduiding voor H Positie geel te markeren Met deze functie kan de beeldbreedte worden aangepast d m v de pijltjestoetsen Links Rechts 3 V Offset Gebruik de Omhoog Omlaag pijltjestoetsen om de aanduiding voor V Positie geel te markeren Met deze functie kan de beeldhoogte worden aangepast d m v de pijltjestoetsen Links Rechts 4 Formaat Gebrui...

Страница 23: ...NAL modus 3 Helderheid Zorg met behulp van de pijltjestoetsen Omhoog Omlaag dat de aanduiding voor Helderheid Brightness geel gemarkeerd wordt Met de pijltjestoetsen Links Rechts kunt u de helderheid aanpassen Dit kan alleen worden aangepast in de PERSONAL modus 4 Kleur Zorg met behulp van de pijltjestoetsen Omhoog Omlaag dat de aanduiding voor KLEURINSTELLING COLOUR SETTING geel gemarkeerd wordt ...

Страница 24: ...en uit Standaard STANDARD Film MOVIE Muziek MUSIC Sport SPORTS Persoonlijk PERSONAL 2 Hoge tonen Zorg met behulp van de pijltjestoetsen Omhoog Omlaag dat de aanduiding voor Hoge tonen TREBLE geel gemarkeerd wordt Met de pijltjestoetsen Links Rechts kunt u de hoge tonen aanpassen Deze kunnen alleen worden aangepast in de Persoonlijke modus PERSONAL 3 Lage tonen Zorg met behulp van de pijltjestoetse...

Страница 25: ...pties te laten gelden Het standaard wachtwoord is 0000 2 Instellen wachtwoord Druk op de Omhoog omlaag toets om Instellen wachtwoord Set password te selecteren druk daarna op OK om het submenu te openen om een nieuw wachtwoord in te stellen 3 Programma blokkeren niet beschikbaar in PC Druk op de Omhoog omlaag toets om Block Program te selecteren druk daarna op OK om het submenu te openen Druk op d...

Страница 26: ...ruk daarna op OK om Aan On of Uit Off te selecteren 5 Beeldverhouding Aspect Ratio Zorg met behulp van de pijltjestoetsen Omhoog Omlaag dat de aanduiding voor Aspect Ratio geel gemarkeerd wordt Druk daarna op OK om het submenu te openen Druk op de Omhoog Omlaag toets om Aspect Ratio te kiezen Beschikbare opties Auto 4 3 16 9 ZOOM1 ZOOM 2 6 Blauw scherm Zorg met behulp van de pijltjestoetsen Omhoog...

Страница 27: ...r CONTRAST geel gemarkeerd wordt Met de pijltjestoetsen Links Rechts kunt u het contrast aanpassen Dit kan alleen worden aangepast in de PERSONAL modus 3 Helderheid Zorg met behulp van de pijltjestoetsen Omhoog Omlaag dat de aanduiding voor Helderheid Brightness geel gemarkeerd wordt Met de pijltjestoetsen Links Rechts kunt u de helderheid aanpassen Dit kan alleen worden aangepast in de PERSONAL m...

Страница 28: ... aanduiding voor Hoge tonen TREBLE geel gemarkeerd wordt Met de pijltjestoetsen Links Rechts kunt u de hoge tonen aanpassen Deze kunnen alleen worden aangepast in de Persoonlijke modus PERSONAL 3 Lage tonen Zorg met behulp van de pijltjestoetsen Omhoog Omlaag dat de aanduiding voor Lage tonen Bass geel gemarkeerd wordt Met de pijltjestoetsen Links Rechts kunt u de lage tonen aanpassen Deze kunnen ...

Страница 29: ...e laten gelden Het standaard wachtwoord is 0000 2 Instellen wachtwoord Druk op de Omhoog omlaag toets om Instellen wachtwoord Set password te selecteren druk daarna op OK om het submenu te openen om een nieuw wachtwoord in te stellen 3 Programma blokkeren niet beschikbaar in de AV Druk op de Omhoog omlaag toets om Block Program te selecteren druk daarna op OK om het submenu te openen Druk op de Om...

Страница 30: ... op OK om Aan On of Uit Off te selecteren 5 Beeldverhouding Aspect Ratio Zorg met behulp van de pijltjestoetsen Omhoog Omlaag dat de aanduiding voor Aspect Ratio geel gemarkeerd wordt Druk daarna op OK om het submenu te openen Druk op de Omhoog Omlaag toets om Aspect Ratio te kiezen Beschikbare opties Auto 4 3 16 9 ZOOM1 ZOOM 2 6 Blauw scherm Zorg met behulp van de pijltjestoetsen Omhoog Omlaag da...

Страница 31: ... Handmatig afstemmen te selecteren druk daarna op OK om het wachtwoord in te voeren en het submenu te openen Standaardwachtwoord is 0000 3 ATV Handmatig afstemmen Druk op de pijltjestoetsen Omhoog Omlaag om ATV Handmatig afstemmen te selecteren druk daarna op OK om het wachtwoord in te voeren en het submenu te openen Standaardwachtwoord is 0000 4 Programma bewerken Druk op de Omhoog omlaag toets o...

Страница 32: ...NAL modus 3 Helderheid Zorg met behulp van de pijltjestoetsen Omhoog Omlaag dat de aanduiding voor Helderheid Brightness geel gemarkeerd wordt Met de pijltjestoetsen Links Rechts kunt u de helderheid aanpassen Dit kan alleen worden aangepast in de PERSONAL modus 4 Kleur Zorg met behulp van de pijltjestoetsen Omhoog Omlaag dat de aanduiding voor KLEURINSTELLING COLOUR SETTING geel gemarkeerd wordt ...

Страница 33: ...aanduiding voor Hoge tonen TREBLE geel gemarkeerd wordt Met de pijltjestoetsen Links Rechts kunt u de hoge tonen aanpassen Deze kunnen alleen worden aangepast in de Persoonlijke modus PERSONAL 3 Lage tonen Zorg met behulp van de pijltjestoetsen Omhoog Omlaag dat de aanduiding voor Lage tonen Bass geel gemarkeerd wordt Met de pijltjestoetsen Links Rechts kunt u de lage tonen aanpassen Deze kunnen a...

Страница 34: ...nde drie opties te laten gelden Het standaard wachtwoord is 0000 2 Instellen wachtwoord Druk op de Omhoog omlaag toets om Instellen wachtwoord Set password te selecteren druk daarna op OK om het submenu te openen om een nieuw wachtwoord in te stellen 3 Programma blokkeren Druk op de Omhoog omlaag toets om Block Program te selecteren druk daarna op OK om het submenu te openen Druk op de Omhoog omla...

Страница 35: ... On of Uit Off te selecteren 5 Beeldverhouding Aspect Ratio Zorg met behulp van de pijltjestoetsen Omhoog Omlaag dat de aanduiding voor Aspect Ratio geel gemarkeerd wordt Druk daarna op OK om het submenu te openen Druk op de Omhoog Omlaag toets om Aspect Ratio te kiezen Beschikbare opties Auto 4 3 16 9 ZOOM1 ZOOM 2 6 Blauw scherm Zorg met behulp van de pijltjestoetsen Omhoog Omlaag dat de aanduidi...

Страница 36: ...mmen Manual Tuning Druk op de pijltjestoetsen Omhoog Omlaag om DTV Handmatig afstemmen te selecteren druk daarna op OK om het wachtwoord in te voeren en het submenu te openen Standaardwachtwoord is 0000 Druk op de Links Rechts toets om het kanaal te selecteren druk daarna op OK om een programma te zoeken 3 ATV Handmatig afstemmen Manual Tuning Druk op de pijltjestoetsen Omhoog Omlaag om ATV Handma...

Страница 37: ...huidige kanaal als favoriet in te stellen Als het huidige kanaal al een van uw favorieten is drukt u nogmaals op de FAV toets om het kanaal als normaal kanaal te kiezen 5 Signaalinformatie Druk op de Omhoog Omlaag toets om Signaalinformatie Signal information te selecteren druk daarna op OK om signaalgegevens weer te geven waaronder kanaalnummer frequentie kwaliteit en sterkte 6 CI informatie Druk...

Страница 38: ...NAL modus 3 Helderheid Zorg met behulp van de pijltjestoetsen Omhoog Omlaag dat de aanduiding voor Helderheid Brightness geel gemarkeerd wordt Met de pijltjestoetsen Links Rechts kunt u de helderheid aanpassen Dit kan alleen worden aangepast in de PERSONAL modus 4 Kleur Zorg met behulp van de pijltjestoetsen Omhoog Omlaag dat de aanduiding voor KLEURINSTELLING COLOUR SETTING geel gemarkeerd wordt ...

Страница 39: ...aanduiding voor Hoge tonen TREBLE geel gemarkeerd wordt Met de pijltjestoetsen Links Rechts kunt u de hoge tonen aanpassen Deze kunnen alleen worden aangepast in de Persoonlijke modus PERSONAL 3 Lage tonen Zorg met behulp van de pijltjestoetsen Omhoog Omlaag dat de aanduiding voor Lage tonen Bass geel gemarkeerd wordt Met de pijltjestoetsen Links Rechts kunt u de lage tonen aanpassen Deze kunnen a...

Страница 40: ...selecteren 1 Systeemblokkering Druk op de pijltjestoetsen Omhoog Omlaag om Systeemblokkering Lock System te selecteren druk daarna op OK om de volgende 3 opties in te schakelen Standaard wachtwoord is 0000 2 Wachtwoord instellen Druk op de Omhoog Omlaag toets om Wachtwoord instellen Set Password te selecteren druk daarna op OK om het submenu te openen om een nieuw wachtwoord in te stellen 3 Progra...

Страница 41: ... On of Uit Off te selecteren 5 Beeldverhouding Aspect Ratio Zorg met behulp van de pijltjestoetsen Omhoog Omlaag dat de aanduiding voor Aspect Ratio geel gemarkeerd wordt Druk daarna op OK om het submenu te openen Druk op de Omhoog Omlaag toets om Aspect Ratio te kiezen Beschikbare opties Auto 4 3 16 9 ZOOM1 ZOOM 2 6 Blauw scherm Zorg met behulp van de pijltjestoetsen Omhoog Omlaag dat de aanduidi...

Страница 42: ...41 LED LED 1366 768 48 1366 768 Afstandsbediening voedingsadapter voedingskabel twee AAA batterijen instructiehandle Schroevendraaier met schroeven 3 stuks TV voet iding garantiekaart 2 x 5 Watt 33 W AUTO ...

Страница 43: ...D 42 ...

Страница 44: ...D 43 E ...

Страница 45: ...D 44 ...

Страница 46: ...D 45 OK OK ...

Страница 47: ...D 46 ...

Страница 48: ...D 47 Repeat ...

Страница 49: ...D 48 D DISP D DISP D DISP D DISP D DISP D DISP D DISP D DISP D DISP D DISP ...

Страница 50: ...D 49 Subtitles 8 9 10 ...

Страница 51: ...D 50 12 ...

Страница 52: ...D 51 13 ...

Страница 53: ...D 52 10 10 ...

Страница 54: ...D 53 ...

Страница 55: ...D 54 4 OK OK ...

Страница 56: ...D 55 SCREEN SAVER Selecteer de screensaver aan of uit ...

Страница 57: ...D 56 OK ...

Страница 58: ...D 57 PORTUGEES OK OK OK ENGLISH GERMAN SPANISH PRENCH PORTUGUESE DUTCH ...

Страница 59: ...D 58 PORTUGEES PORTUGEES OK OK OK OK ENGLISH GERMAN SPANISH PRENCH PORTUGUESE DUTCH ENGLISH GERMAN SPANISH PRENCH PORTUGUESE OFF DUTCH ...

Страница 60: ...D 59 PORTUGEES OK OK ENGLISH GERMAN SPANISH PRENCH PORTUGUESE DUTCH ...

Страница 61: ...D 60 ...

Страница 62: ...hroefgaten voor bevestiging aan de wand Draai de vier schroeven los om de standaard te verwijderen 1 Bevestiging van de voet Om de voet te bevestigen plaatst u de voet aan de onderzijde van de TV en bevestigt u de 3 schroeven met een schroevendraaier 2 Wandmontage ...

Страница 63: ... wijze waarop het product moet worden weggegooid De materialen zijn recycleerbaar zoals door de desbetreffende markeringen wordt aangeduid Door recyclen het recyclen van materialen of andere vormen van hergebruik van oude apparatuur levert u een belangrijke bijdrage aan de bescherming van het milieu Raadpleeg de lokale instanties voor meer informatie over de officiële locatie waar het apparaat kan...

Страница 64: ...se overheating and or shorten the life of the product Do not insert any foreign objects metals or flammable objects into the TV which may cause electric shock or fire Do not place the LED TV close to other furniture furnishing or electronic products This product is not designed for built in installation do not place in an enclosed place without proper ventilation Keep this product away from direct...

Страница 65: ... play 10 Support CI slot 11 Support DVD playback The remote unit is operated with 2 x AAA size batteries 1 Push and hold the hook the battery cover is opened 2 Insert batteries according to the polarity marks 3 Replace the cover Remarks Battery replacement is necessary when the remote control fails to operate the TV set Battery Cautions Incorrect use of batteries can cause chemical leakage which w...

Страница 66: ...to your household waste 4 Product Overview 5 Control Panel Overview E 3 1 Control Panel Functions 1 SOURCE Select the input signals ATV DTV Media AV PC Component DVD SCART HDMI1 HDMI2 2 MENU Enter into MENU 3 VOL Volume down Left orientation 4 VOL Volume up Right orientation 5 CH TV channel down 6 CH TV channel up 7 STANDBY Switches the TV to standby and on again 8 OPEN CLOSE in DVD mode 9 PLAY PA...

Страница 67: ...posite video component mode 5 Audio input for VGA mode connects to your PC audio output 8 Headphone output 12 75 Ω aerial input connects antenna connector or aerial interface here to receive cable aerial signal 1 2 3 4 5 6 7 8 9 10 11 12 13 Indicator Light Status When the unit is on the indicator light turns blue The indicator light is red when the TV is in standby mode DC IN USB HDMI1 HDMI2 SCART...

Страница 68: ...E 5 OK ...

Страница 69: ...terface connector on the PC Then connect the other end to the VGA video interface connector on the back of the LED TV Tighten the screws on the VGA connectors once they are firmly connected Connect the DC 12V power input with the adaptor come with your LED TV Turn on the power of the LED TV first and then turn on the power of the PC Press the SOURCE button to set the video input mode of the LED TV...

Страница 70: ...e are off Connect a Composite video cable not supplied to the yellow composite video connector input on the back of the LED TV Now insert the other end of the composite cable into the yellow composite connector output on the AV device Connect a YPBPR Cable not supplied provide better image quality to the YPBPR connector on the back of the LED TV Now insert the other end of the YPBPR cable into the...

Страница 71: ... with the text NO SIGNAL On the LED MENU you can read how the channels can be programmed auto search or manual search It is recommended first to let the channels automatically to be searched You can use key CH CH button or the number keys on the remote control to select the channel you want to watch D Connect with SCART signal 1 Scart input 2 DC 12V power input Connection steps Read the user guide...

Страница 72: ...s and ensure that it has a HDMI connector Make sure that the power of the LED TV is off Connect a HDMI cable to the corresponding interface connector on the back of the LED TV Turn on the power of the LED TV Press the SOURCE button to set the video input mode of the LED TV to HDMI1 or HDMI2 mode 2 1 DC IN USB HDMI1 HDMI2 SCART PC AUDIO VGA COAX YPbPr CVBS R L RF IN CI SLOT 2 1 DC IN USB HDMI1 HDMI...

Страница 73: ...uts Press the Source button to display the inputs mode menu then press key to select a input source and press OK key to confirm Audio control 1 Press the VOL button to increase the volume A number will appear on screen indicating the volume level 2 Press the VOL button to decrease the volume A number will appear on screen indicating the volume level E 10 ATV DTV Media AV PC Component DVD SCART HDM...

Страница 74: ...ny channel from 1 to 9 For example if you want to choose channel 8 just press the key number 8 E 11 Select the DTV channel you want There are four ways of channel selection as follows 1 Stepping through the channel list Press the CH button to browse up and the CH button to browse down the available channels 2 Selection by number Enter the complete channel number directly using the numerical button...

Страница 75: ... 10 Apr 2007 14 00 15 00 10 Apr 2007 14 23 Barnaby John Nettles questions the guilt of a woman who is on trial for the murder of her best friend SUBTITLES DTV Press the SUBTITLE button to display Subtitle Language and use UP DOWN arrows to select subtitle language or Off then press OK button to confirm it 9 PVR operating instructions 1 PVR Function list Item 1 Press button to record the current pr...

Страница 76: ... OK button to enter Then it will check the USB speed 3 Recording methods Mode1 Shortcut key 1 Press button to record the current program Press to stop recording 2 Press STOP button to stop recording then it will return to normal broadcast television Select Disk C Check PVR File System Start Format Free Record Limit 6 Hr USB Disk Time Shift Size Speed OK Menu Select Disk C Check PVR File System Che...

Страница 77: ...is operation can make the frame still and record program in the background Mode3 Timer 1 You can also press EPG button to set record Press the red button to start recording 2 You can choose the time of the appointment to record you want PROGRAMME GUIDE 10 Apr 14 E4 The Force Double Indemnity Surprisel Brilliant Creatu 15 00 16 00 16 00 17 00 17 00 18 00 28 ITV4 32 Fitm4 1 75 CITV 10 Apr 2007 14 00...

Страница 78: ... time of the record is coming appearing it will change to current channel automatically RECORDER 1 YLE TV1 15 Minute 03 Minute 07 Date 07 Date End Time Start Time 08Hour 09 Hour Dec Month Dec Month Mode once k c a B K O 3 Sec to Switch channel Yes No Timer Overlay 21 TMF 13 Jul 2007 03 00 ...

Страница 79: ...o enter Press button to select the option you want to adjust in the main Media menu then press OK button to enter Photo Menu Press button to select PHOTO in the main menu then press OK button to enter Press exit button to return back to the previous menu Press button to select drive disk you want to watch then press OK button to enter Press button to select return option to go back to the previous...

Страница 80: ... Time 16 13 25 Delete Flower00 jpg Press button to select the file folder you want to search in the file selecting menu then press OK button on your remote control to enter sub menu Press button to select the file you want to delete in the file selecting menu then press red button on your remote control and press button to delete files Music Menu Press button to select MUSIC in the main menu then ...

Страница 81: ... Rate 320K Artist BCD103 Sampling 44K Year 2005 Size 2426KBytes Delete best mp3 thank mp3 try mp3 Maybet mp3 Record Win angel mp3 happy mp3 C 1 1 Press button to select the file you want to listen in the file selecting menu then press OK button to play Press button to select menu in the bottom you want to run then press OK button to operate Press exit button to return back to the previous menu ...

Страница 82: ...vious menu Press button to select drive disk you want to watch then press OK button to enter Press button to select return option to go back to the previous menu When highlighting the option you select the file information will appear on the right and movie will be previewed in the center Press OK button to play the selected movie ...

Страница 83: ... showing how this service can be accessed For most channels that have this digital teletext service is accessed by pressing the RED or TEXT button Once started follow the on screen instruction to navigate through the available information The standard navigation method is using theUP DOWN LEFT RIGHT ARROW buttons and the OK button Some services will offer shortcuts via the coloured buttons on the ...

Страница 84: ...ress Up Down button to select Size then press OK button to enter sub menu Press Left Right button to adjust display size Auto Adjust 0 ard Exit Auto Adjust V Offset 50 Size 50 Phase 50 Position Reset H Offset 50 SCREEN SCREEN SCREEN LED H Offset V Offset V Offset H Offset ...

Страница 85: ...Tint 50 Sharpness 30 PICTURE Move Return Select Exit Contrast 50 Picture mode Standard Colour Temp Normal Noise Reduction Middle Dynamic Standard Mild Personal This can only be adjusted in the PERSONAL mode This can only be adjusted in the PERSONAL mode ...

Страница 86: ...Return Treble 50 Sound Mode Standard Balance 0 Auto Volume Off SPDIF Mode Off AD Switch Off Select Exit Auto Volume Press UP Down button to select Auto Volume then press OK button to select On or Off 6 SPDIF MODE Press UP Down button to select SPDIF MODE then press OK button to select Auto PCM Off 7 AD Switch Press UP Down button to select AD Switch then press OK button to select On or Off Standar...

Страница 87: ...ton to select Parental Guidance then press OK button to enter sub menu to select Available options are Off 4 18 5 Key Lock Press Up Down button to select Key Lock then press Left Right button to select On or Off The key board will invalid if you set Key Lock On 3 Block Program not available in PC Press Up Down button to select Block Program then press OK button to enter sub menu Press Up Down butt...

Страница 88: ...ct Aspect Ratio then press OK button to enter sub menu Press Up Down button to select aspect ratio Available options are Auto 4 3 16 9 Zoom1 Zoom2 6 Blue Screen Press Up Down button to select Blue Screen then press OK button to select On or Off 7 First Time Installation not available in PC Press Up Down button to select First Time Installation then press OK button to set relevant options including...

Страница 89: ...s 0 Colour 50 Tint 50 Sharpness 30 PICTURE Move Return Select Exit Contrast 50 Picture mode Standard Colour Temp Normal Noise Reduction Middle AV SCART HDMI Component Media LOCK the SETUP menu This can only be adjusted in the PERSONAL mode ...

Страница 90: ...eturn Treble 50 Sound Mode Standard Balance 0 Auto Volume Off SPDIF Mode Off AD Switch Off Select Exit Auto Volume Press UP Down button to select Auto Volume then press OK button to select On or Off 6 SPDIF MODE Press UP Down button to select SPDIF MODE then press OK button to select Auto PCM Off 7 AD Switch not available in AV Press UP Down buttonto select AD Switch then press OK button to select...

Страница 91: ...on to select Parental Guidance then press OK button to enter sub menu to select Available options are Off 4 18 5 Key Lock Press Up Down button to select Key Lock then press Left Right button to select On or Off The key board will invalid if you set Key Lock On 3 Block Program not available in AV Press Up Down button to select Block Program then press OK button to enter sub menu Press Up Down butto...

Страница 92: ... press OK button to enter sub menu Press Up Down button to select aspect ratio Available options are Auto 4 3 16 9 Zoom1 Zoom2 6 Blue Screen Press Up Down button to select Blue Screen then press OK button to select On or Off 7 First Time Installation not available in AV Press Up Down button to select First Time Installation then press OK button to set relevant options including OSD language countr...

Страница 93: ...ning then press OK button to enter password to enter sub menu Default password is 0000 4 Program Edit Press Up Down button to select Program Edit then press OK button to enter sub menu Program Edit Menu Fav OK D Rename elete Move Skip 1 C 03 2 C 04 3 C 045 This option has five functions Use Red button to Delete the current channel Use Green button to Rename the current channel Use Yellow button to...

Страница 94: ...Tint 50 Sharpness 30 PICTURE Move Return Select Exit Contrast 50 Picture mode Standard Colour Temp Normal Noise Reduction Middle Dynamic Standard Mild Personal This can only be adjusted in the PERSONAL mode This can only be adjusted in the PERSONAL mode ...

Страница 95: ...ND Move Return Treble 50 Sound Mode Standard Balance 0 Auto Volume Off SPDIF Mode Off AD Switch Off Select Exit Auto Volume Press UP Down button to select Auto Volume then press OK button to select On or Off 6 SPDIF MODE Press UP Down button to select SPDIF MODE then press OK button to select Auto PCM Off 7 AD Switch not available in ATV Press UP Down button to select AD Switch then press OK butto...

Страница 96: ...s Up Down button to select Parental Guidance then press OK button to enter sub menu to select Available options are Off 4 18 5 Key Lock Press Up Down button to select Key Lock then press Left Right button to select On or Off The key board will invalid if you set Key Lock On 3 Block Program Press Up Down button to select Block Program then press OK button to enter sub menu Press Up Down button to s...

Страница 97: ... OK button to enter sub menu Press Up Down button to select aspect ratio Available options are Auto 4 3 16 9 Zoom1 Zoom2 6 Blue Screen Press Up Down button to select Blue Screen then press OK button to select On or Off 7 First Time Installation Press Up Down button to select First Time Installation then press OK button to set relevant options including OSD language country and tuning 8 Reset Press...

Страница 98: ...ssword to enter sub menu Default password is 0000 Press Left Right button to select channel number you want to store Press Up Down button to select the second option Press Left Right button to select audio system Press Up Down button to select search then press OK button to start tuning 4 Program Edit Press Up Down button to select Program Edit then press OK button to enter sub menu Auto Tuning AT...

Страница 99: ...annel to your favorite channel If the current channel already is one of your favorite channels press FAV button again to set it to a normal channel 5 Signal Information Press Up Down button to select Signal Information then press OK button to display signal details including Channel Number Frequency Quality and Strength 6 CI Information Press Up Down button to select CI Information then press OK b...

Страница 100: ...Tint 50 Sharpness 30 PICTURE Move Return Select Exit Contrast 50 Picture mode Standard Colour Temp Normal Noise Reduction Middle Dynamic Standard Mild Personal This can only be adjusted in the PERSONAL mode This can only be adjusted in the PERSONAL mode ...

Страница 101: ...ND Move Return Treble 50 Sound Mode Standard Balance 0 Auto Volume Off SPDIF Mode Off AD Switch Off Select Exit Auto Volume Press UP Down button to select Auto Volume then press OK button to select On or Off 6 SPDIF MODE Press UP Down button to select SPDIF MODE then press OK button to select Auto PCM Off 6 AD Switch Press UP Down button to select AD Switch then press OK button to select ON or OFF...

Страница 102: ...o select Set Password then press OK button to enter sub menu to set new password 4 Parental Guidance Press Up Down button to select Parental Guidance then press OK button to enter sub menu to select Available options are Off 4 18 5 Key Lock Press Up Down button to select Key Lock then press Left Right button to select On or Off The key board will invalid if you set Key Lock On 3 Block Program Pres...

Страница 103: ...ress OK button to enter sub menu Press Up Down button to select aspect ratio Available options are Auto 4 3 16 9 Zoom1 Zoom2 6 Blue Screen Press Up Down button to select Blue Screen then press OK button to select On or Off 7 First Time Installation Press Up Down button to select First Time Installation then press OK button to set relevant options including OSD language country and tuning 8 Reset P...

Страница 104: ...6 768 Features Input interface Left right audio input interface Headphone Output Accessories Audio 1 Left right audio input interface Audio 2 High Quality Audio Video input socket for connecting an external device fitted with an HDMI output 48 Rated power consumption 33 W Portuguese PAL B G AUTO SECAM L 2 x 5 W ...

Страница 105: ...E 42 ...

Страница 106: ...E 43 E the rear of the TV When inserting the Disc incorrectly you may damage the DVD Press OK or play button to star from the highlighted content ...

Страница 107: ...E 44 ...

Страница 108: ...E 45 OK OK ...

Страница 109: ...E 46 ...

Страница 110: ...E 47 D DISP D DISP ...

Страница 111: ...E 48 D DISP 8 Audio ...

Страница 112: ...E 49 9 Language 10 Subtitle 11 Mute ...

Страница 113: ...E 50 12 Repeat A B 13 Volume ...

Страница 114: ...E 51 Press numeric buttons to select the contents directly For number over 10 press 10 button first e g File number 15 press 10 then 5 ...

Страница 115: ...E 52 ...

Страница 116: ...E 53 4 OK OK Press button to move and highlight between different sub menu Press ...

Страница 117: ...E 54 SCREEN SAVER Select the screen saver on or off ...

Страница 118: ...E 55 OK ...

Страница 119: ...E 56 PORTUGUESE OK OK OK GERMAN SPANISH FRENCH PORTUGUESE DUTCH The default language setting is DUTCH ...

Страница 120: ...E 57 OK OK OK OK GERMAN GERMAN SPANISH FRENCH PORTUGUESE DUTCH GERMAN ENGLISH SPANISH FRENCH PORTUGUESE DUTCH The default language setting is DUTCH The default language setting is DUTCH ...

Страница 121: ...E 58 OK OK The default language setting is DUTCH GERMAN SPANISH FRENCH PORTUGUESE DUTCH ...

Страница 122: ...E 59 ...

Страница 123: ...ions Screw taps x 4 for wall mounting Remove the stand by taking out the 4 screws 1 Attaching the TV Stand To attach the stand place the stand on the nect of the TV insert and tighten the 3 screws with the screwdriver 2 Wall Mount instructions ...

Страница 124: ...he instructions for use or the packing will inform about methods for disposal The materials are recyclable as mentioned in its marking By recycling material recycling or other forms of re utilization of old appliances you are making an important contribution to protect our environment Please inquire at the community administration for the authorized disposal location Instructions on environment pr...

Отзывы: