Moxa MxNVR Industrial Video Recorder
Getting Started
3-13
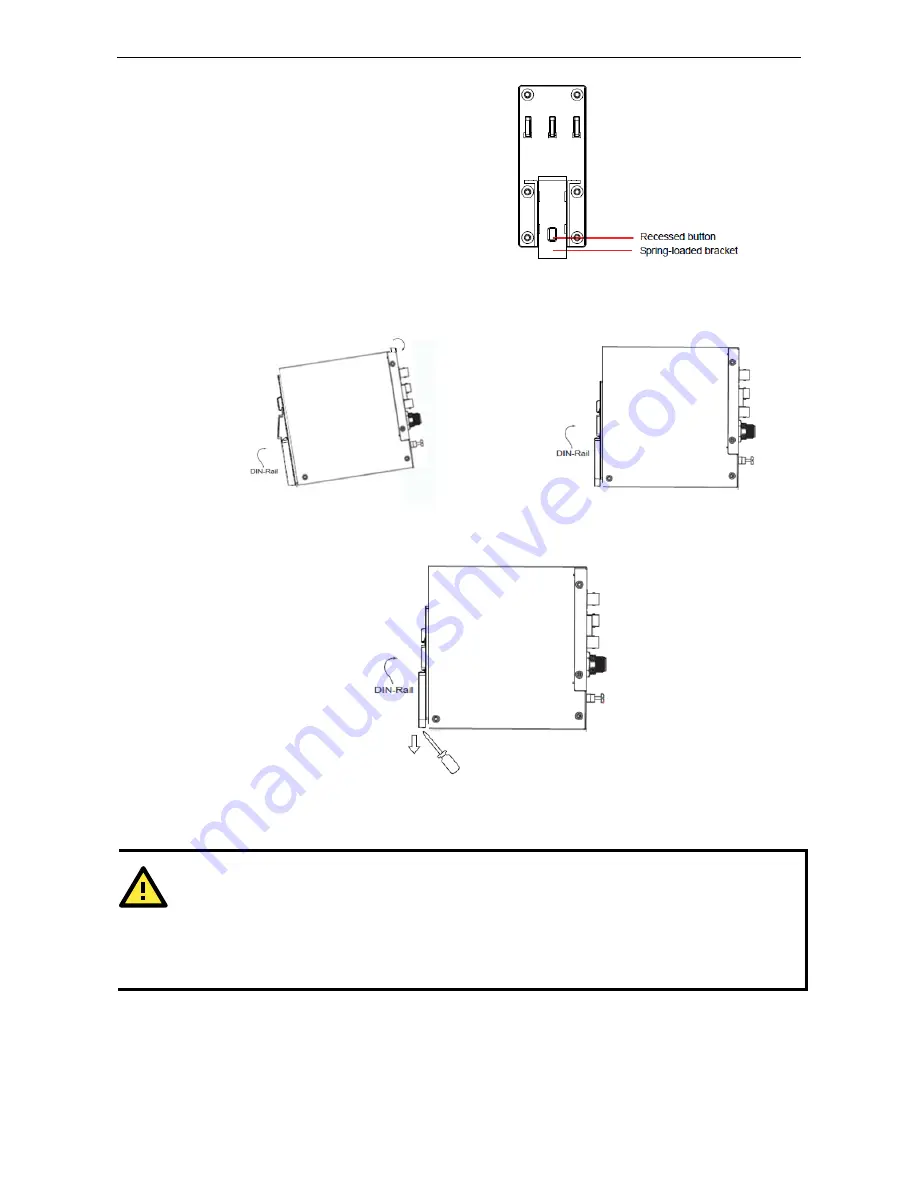
STEP 2:
I
f the spring-loaded bracket is locked in place, push the
recessed button to release it. Once released, you should
feel some resistance from the spring as you slide the
bracket up and down a few millimeters in each direction.
STEP 3:
Position the MxNVR on the DIN-Rail, tilting the switch to
hook the clamps over the top edge of the rail.
STEP 4:
Swing the switch into a vertical position until both
clamps latch completely to the DIN-Rail,.
To remove the MxNVR-MO4 from the DIN-Rail, use a screwdriver to pull out the two spring-loaded brackets
from the bottom until they are fixed in the “locked” position. Next, reverse Steps 3 and 4 above.
Wiring Requirements
ATTENTION
Be sure to disconnect the power cord before installing and/or wiring your Moxa MxNVR-MO4.
Calculate the maximum possible current in each power wire and common wire. Observe all electrical codes
dictating the maximum current allowable for each wire size.
If the current goes above the maximum ratings, the wiring could overheat, causing serious damage to your
equipment.
You should also pay attention to the following:
•
Use separate paths to route wiring for power and devices. If power wiring and device wiring paths must
cross make sure the wires are perpendicular at the intersection point.
NOTE: Do not run signal or communications wiring and power wiring in the same wire conduit. To avoid
interference, wires with different signal characteristics should be routed separately.


