ioPAC 5500 Hardware
Installation
2-12
Serial Console (Debug Port)
The serial console gives users a convenient way of connecting to the RTU controllers. This method is
particularly useful when using the computer for the first time. The serial console is also effective for connecting
the Moxa RTU controllers when you do not know target network settings and IP addresses.
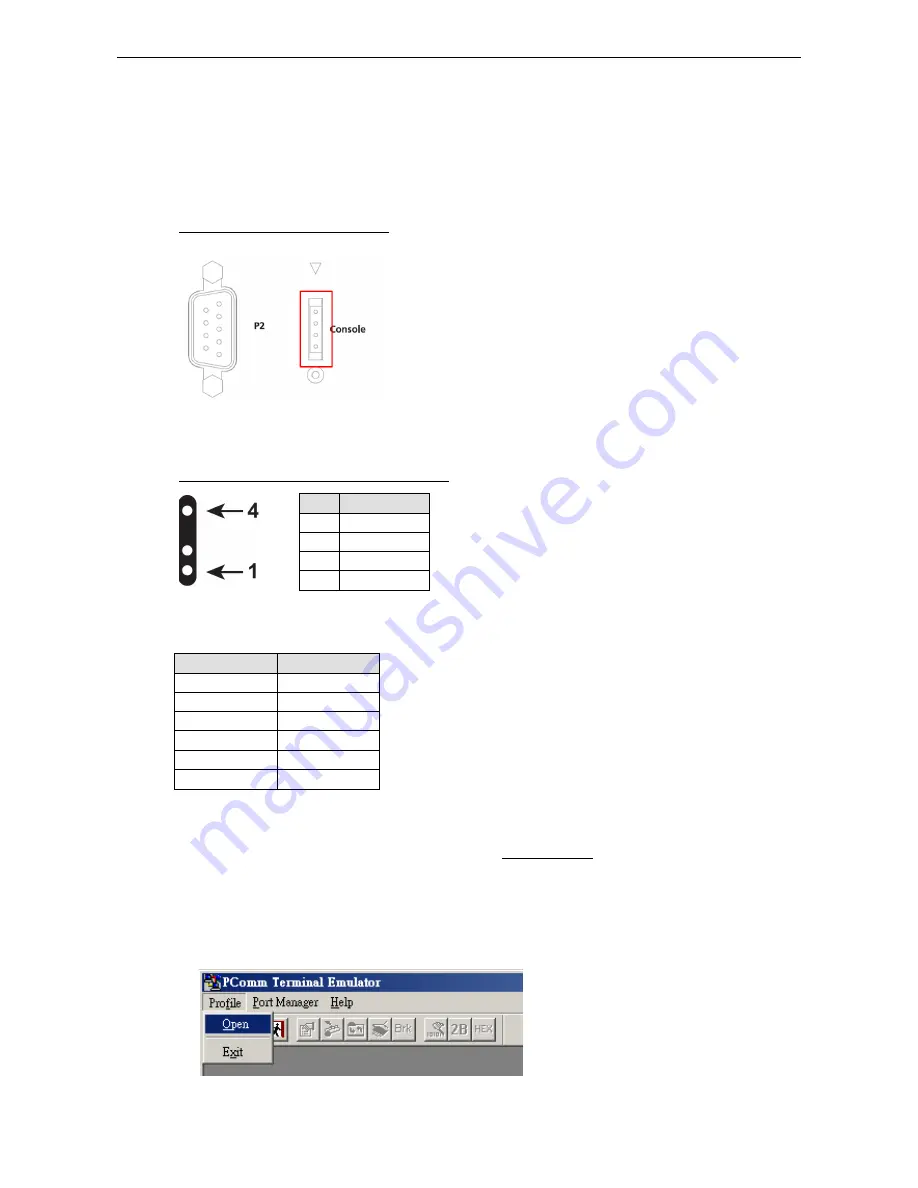
Step 1: To use the serial console, remove the cover from the front/top panel first.
Console Port for the ioPAC Series
Step 2: Attach the 4-pin serial console cable to the console port. The following diagram shows the 4-pin serial
connector and pin connections.
Pin Assignment for the Serial Console Port
Pin
Definition
1
TxD
2
RxD
3
NC
4
GND
Serial Console Default Settings
Parameter
Value
Baudrate
115200 bps
Parity
None
Data bits
8
Stop bits
1
Flow Control
None
Terminal
VT100
We recommend using Moxa PComm Terminal Emulator to connect to the serial console. The following steps
describe how to connect the console.
1.
Download Moxa PComm Lite from the Moxa website (www.moxa.com) or copy it from the following folder
on the Documentation and Software CD: Software\utility\PComm\.
2.
Install Moxa PComm Lite to the host Windows PC.
3.
Run PComm Lite Terminal Emulator from Start
Programs
PComm Lite Ver 1.x
Terminal
Emulator.
4.
Click Profile
Open.
Содержание ioPAC 5500 series
Страница 4: ......
Страница 9: ...ioPAC 5500 Hardware Introduction 1 5 I O Board 3G Board ...
Страница 21: ...ioPAC 5500 Hardware Installation 2 9 Digital Input Digital Output Analog Input Voltage Analog Input Current ...
Страница 36: ...ioPAC 5500 Hardware The RTUxpress Utility 3 10 Reboot Device Reboot the ioPAC Programmable Controller ...


