Page 7
M-880 (Gen2) Series Digital Game Camera
SETTING MOTION DETECT OPTIONS (cont)
D
Page 10
M-880 (Gen2) Series Digital Game Camera
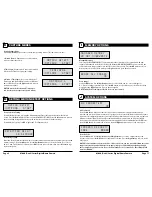
PIR SENSITIVITY
HIGH
PIR Sensitivity
PIR Sensitivity allows you to control as to how much movement and at what distance the camera
will trigger. HIGH sensitivity will allow for more distance, but will make the camera slightly more
susceptible to false triggers and is ideal for open areas such as fields and food plots. LOW sensitivity
will shorten the distance but lower the chance of false triggers and is ideal for close range traps and
deeply wooded areas. Press the
OK
button. Use the
Up/Down
buttons to choose between
(HIGH or LOW). Press
OK
to lock in your selection, then press
Left
button to go to the next option.
Setting Multi-Shot
Press the
OK
button. Use the
Up/Down
buttons to choose between settings. Choose how many
pictures you would like captured in a sequence when the camera is triggered (1 or 3).
Available options are:
1 (OFF)
- Single photo taken per event.
3 BURST
- Three rapidly captured photos taken per event. All 3 photos are captured within one second.
NOTE: Burst mode is only capable of up to 4MP captures, regardless of your resolution setting.
3 TRIGGERED
- Up to three photos are captured per event with an approximate one second delay
between each capture. Each subsequent photo after the first requires an individual trigger. This
allows for multiple potential image captures of the same event while reducing the chance of empty
images if the subject moves out of the field of view after the first shot.
Press
OK
to lock in your selection, then press
Left
button to go to the next option.
MULTI-SHOT
1 (OFF)
PHOTO OR VIDEO
PHOTO
Setting Photo or Video
Press the
OK
button. Use the
Up/Down
buttons to choose between Photo, Video or Both. Press the
OK
button. Press
Left
button to go to the Main Screen.
Reset Options
Press the OK button. Use the Up/Down buttons to choose between a set of predefined configurations
for the motion detect capture mode to quickly configure your camera for certain levels of performance.
Press
OK
to lock in your selection, then press
Left
button to go to the next option.
RESET OPTIONS?
DO NOT RESET
SETTING PHOTO/VIDEO OPTIONS
H
Setting Photo Quality
Press the
OK
button. Use the
Up/Down
buttons to choose between 4 image resolution settings.
1. Enhanced:
3840 x 2160
2. High:
2688 x 1512
3. Medium:
1920 x 1080
4. Low:
1280 x 720
Press the
OK
button to confirm the selection. Press the
Right
button to move to the next option.
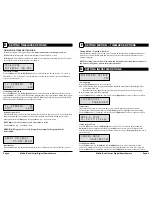
PHOTO QUALITY
HIGH(4MP)
Setting Video Quality
Press the
OK
button. Use the
Up/Down
buttons to choose between 2 image quality settings.
1. HD:
1280 x 720
2. VGA: 640 x 480
Press the
OK
button to confirm the selection. Press the
Right
button to move to the next option.
VIDEO QUALITY
HD (1280X720)
MOTION FREEZE
ON (FAST FLASH)
Setting Motion Freeze
This feature maximizes the image clarity during night photos. When this feature is on the camera
will adjust the exposure time to reduce blur associated with motion. Other adjustments are made to
increase the brightness and clarity of the photo. When this feature is turned off the camera will use a
maximum exposure time that will not reduce blur, but will increase the effective flash range and image
brightness of night photos. Press the
OK
button to confirm the selection. Press the
Right
button to
move to the next option.
VIDEO LENGTH
10 SECONDS
Setting Video Length
Press the
OK
button. Use the
Up/Down
buttons to choose between 5 video length settings
(5, 10, 30, 60 or 90 seconds). Press the
OK
button to confirm the selection. Press the
Right
button to
move to the next option.
NOTE: Night videos are limited to a maximum of 30 seconds.

