


TR
66
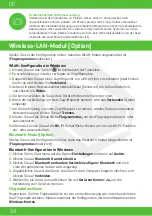
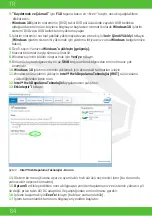
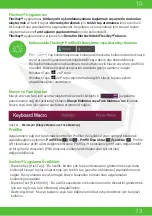
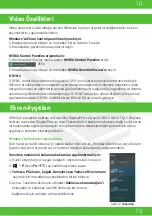
1.
Dizüstü bilgisayarınızı başlatın ve
BIOS’a
girmek ve
Kurulum Yardımcı Programına
gitmek için
F2
tuşuna basın.
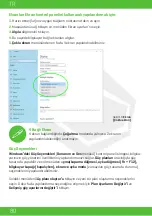
2.
Gelişmiş
menüsünü seçin.
3.
SATA Modunu
seçin, Enter tuşuna basın ve
Intel RST Premium...
’u seçin ve <Tamam>’a
tıklayın.
4.
Kaydetmek ve Çıkmak
için
F10
tuşuna basın ve <Evet>’i seçin.
5.
Bilgisayar yeniden başladıktan sonra tekrar
BIOS’a
girmek ve Kurulum Yardımcı
Programı’na gitmek için
F2
tuşuna basın.
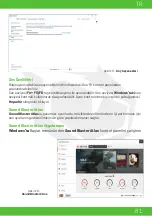
6.
Intel (R) Hızlı Depolama Teknolojisine (Gelişmiş menüsünde)
gidin ve
RAID Birimi
Oluştur’u
seçin.
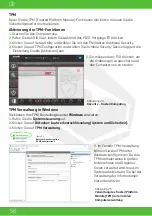
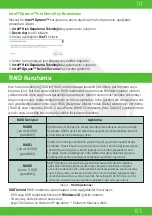
7.
Artık yüklü SSD’leri kullanarak RAID biriminizi kurabilirsiniz.
8.
Ad’ı
seçin ve RAID biriminiz için istediğiniz adı yazın ve <Evet>’i seçin.
9.
RAID Seviyesine
tıklayın ve gerekli RAID Seviyesini seçin ve Enter tuşuna basın.
•
RAID 0 (Şerit)
•
RAID 1 (Yansıtma)
•
RAID 5 (Parite)
10.
Disk Seç:
altında listelenen disklerden birine gidin ve bir disk adı seçin.
11.
Gerekli diski seçmek için
X’e
tıklayın.
12.
RAID biriminizi oluşturmak için iki veya üç özdeş SSD seçmelisiniz.
13.
RAID 0 (Şerit)
seçtiyseniz, Şerit Boyutunu gereksinimlerinize göre ayarlayabilirsiniz
(“Şerit Boyutu”nu 128KB olarak ayarlamanız önerilir).
14.
Birim Oluştur’u
seçin (disklerinizi seçtiğinizden emin olun).
15.
Sistem RAID biriminizi listeler.
16.
“
Kaydetmek ve Çıkmak
” için
F10
tuşuna basın ve <Evet>’i seçin, ancak aşağıdakilere
dikkat edin.
•
Windows 10 işletim sisteminin (DVD) takılı DVD sürücüsünde veya bir USB bellekte
olduğundan emin olun, böylece bilgisayar başlarken otomatik olarak Windows 10
işletim sistemi DVD veya USB bellekten önyükleme yapar.
17.
İşletim sistemini normal şekilde yüklemeye devam etmek için İleri> Şimdi Yükle’yi
tıklayın (Windows işletim sistemini yüklemek için yardıma ihtiyacınız varsa Windows
belgelerinize bakın).
18.
Windows 10 işletim sistemini yüklemek için ekrandaki talimatları izleyin.
19.
Windows sürücülerini yükleyin.
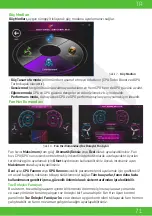
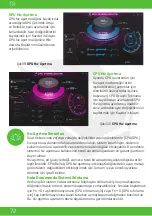
Intel® Hızlı Depolama Teknolojisi (IRST)
sürücüsünü
yüklediğinizden emin olun.
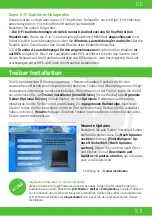
RAID Kurulum Prosedürü
Beklenmeyen sistem davranışını önlemek için RAID’deki tüm SSD’ler
aynı olmalıdır (aynı boyutta ve markada).
NOT


