21
9. Wire Connections
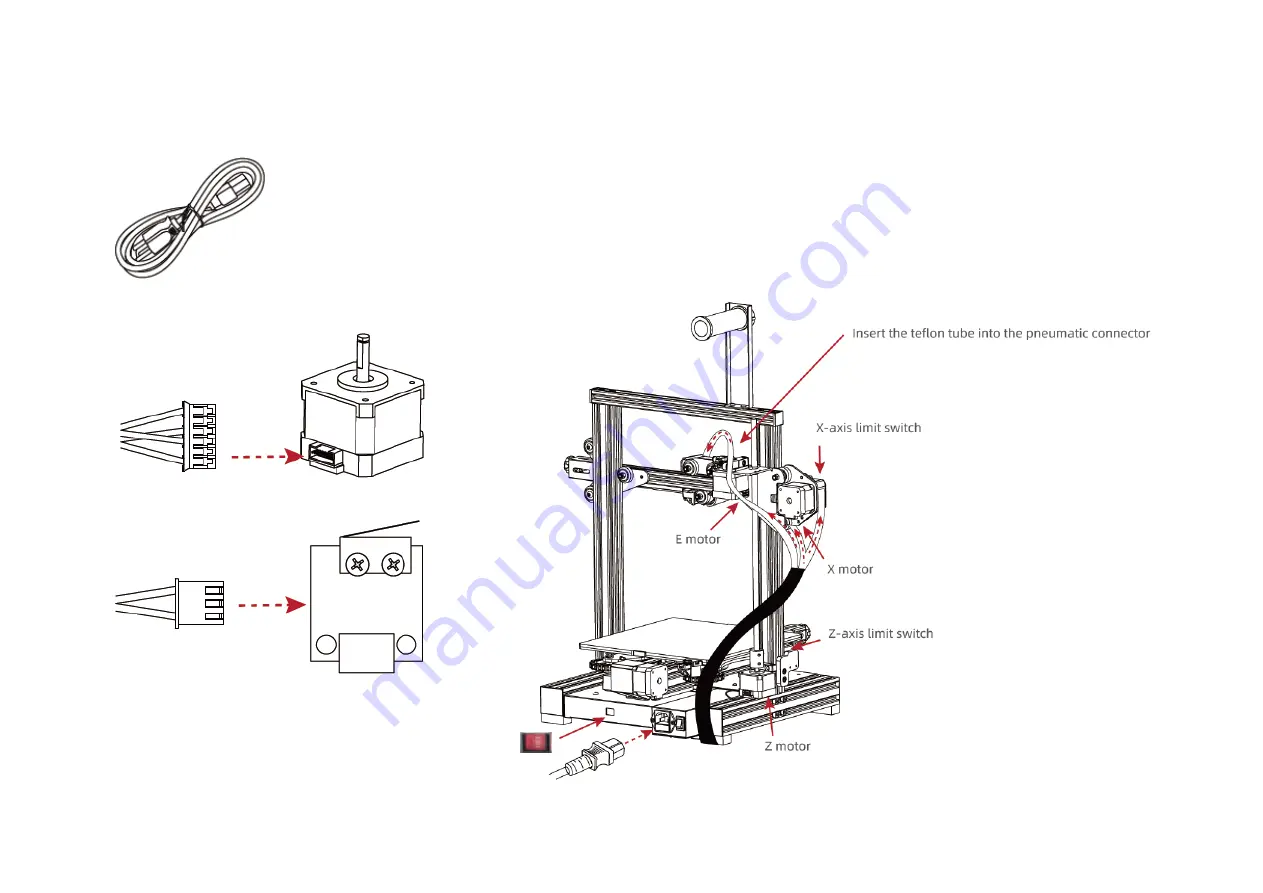
Step 9: Referring to the yellow labels on each connector, plug the 6-pin connectors
into the X, Z, and E axis motors and the 3-pin connectors into the X and Z Limit
Switches. Check the Voltage Switch and set it to your local main voltage, if necessary.
Plug one end of the AC Power Cord into the Power Socket, then plug the other end
into a nearby AC power outlet. Flip the Power Switch to turn on the printer.
1x AC Power Cord
X, Z, and E axis Motor Connections
X and Z axis Limit Switches
Содержание 43363
Страница 1: ...Joule 3D Printer DIY Assembly Kit P N 43363 User s Manual ...
Страница 11: ...11 ...


