12
RYDIS
MR6550
User Manual
ENGLISH
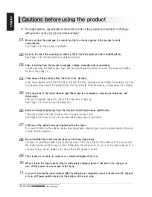
Cautions before using the product
When opening the package, be careful so that no shock applies to the product and its
components.
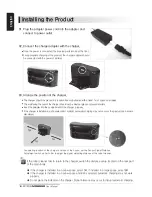
See Page 16 for the product installation.
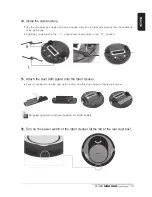
Be sure to check the mounting locations (L/R) for the side brushes before installing them.
See Page 17 for the side brushes installation method.
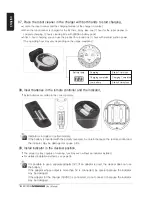
After removing from the product package, charge manually before operating.
In initial opening, the battery may have become discharged and may not work. For manual charging
method, see page 18.
Clear away all large debris from the floor to be cleaned.
Clear away objects, which might break or fall, from the floor. Carpets with decorative embroidery such as
long tassels, may hinder the product from moving normally. Fold the tassels or clear away the carpets.
If the dust box of the robot cleaner gets filled, and is not emptied, cleaning performance will
deteriorate.
After each cleaning operation, check if the dust box is filled up.
See Page 33 for how to clean the dust box.
Remove foreign substances from the location-detecting sensors and wheels.
They may prevent the robot cleaner from moving or cause errors.
See Page 35 for how to clean the location-detecting sensor and wheels.
Children or the elderly may get frightened by the robot.
To prevent children or the elderly nearby from being taken aback, make sure to explain details of product
to them before operation.
Be careful that the robot cleaner does not fall from high places.
If shoes or something similar are put side by side on the shoe shelf at the entrance of the living room,
the robot might see the shoes as floor, falling from the living room. Do not use the robot cleaner in a
narrow site (e.g. desks, tables, etc.) where the robot cleaner can fall.
The cleaner is not able to cross over a threshold higher than 1cm.
When storing the robot cleaner that is completely charged, leave it docked to the charger or
turn off the power from rear part of the body.
In case of storing the robot cleaner after its charging is completed, leave it docked on the charger
or turn off Power switch located at the bottom of the rear side.
※ The appearance, specifications and other parts of the product are subject to change
without prior notice for product improvement.
01.
02.
03.
04.
05.
06.
07.
08.
09.
10.
11.


