54D5031
41
TROUBLESHOOTING
STANDING PILOT IGNITION
SYMPTOM POSSIBLE
CAUSE
ACTION
1. Spark ignitor will
not light pilot after
repeated triggering of
piezo.
2. Pilot will not stay lit
after carefully follow-
ing lighting instruc-
tions.
. Pilot burning, valve
knob turned to “ON”,
switch is turned to
“ON” or “RS”, but
burner will not ignite.
A. Wire disconnected.
B. Defective ignitor.
C. No gas or low gas pressure.
D. No Propane/LPG in tank
A. Defective thermocouple
B. Defective valve
A. Defective switch, wall
switch, remote control or
wire
B. Pilot flame too small
C. Defective or malfunction-
ing thermopile
D. Defective valve
A. Open door and check to make sure wire is connected to ignitor.
B. Check for spark at electrode and pilot. If no spark and electrode
wire is properly connected, replace pilot assembly.
C. Check remote/manual shut off valve from fireplace. Low pres-
sure can be caused by bent lines, restricted lines, low pressure
line pressure. Consult with plumber or gas supplier.
D. Check Propane/LPG tank. Refill tank.
A. Check that thermocouple flame impinges on thermocouple.
Clean and/or adjust pilot for maximum flame impingement.
Ensure that the thermocouple connection at the gas valve is fully
inserted and tight.
Disconnect the thermocouple from the valve, place one millivolt
lead wire on the tip of the thermocouple and the other meter lead
wire on the thermocouple copper lead. Start the pilot and hold
the valve knob in. If the millivolt reading is less than 15 mV,
replace pilot assembly.
B. If thermocouple is producing more than 15 mV, replace faulty
valve.
A. Check switch and wire for proper connection. Place jumper
wires across terminals of switch. If burner comes on, replace
defective switch.If the switch is OK, repeat the same procedure
on remote control If burner comes on, replace remote control.
Place jumper wire across wire at gas valves (terminals marked
TH and TP/TH). If burner comes on, wires are faulty or connec-
tions are bad. Replace wire.
B. If pilot flame is not close enough to the thermopile, adjust pilot
flame.
C. Check thermopile wire connections to make sure all are tight
and that the thermopile is fully inserted into pilot assembly.
Check thermopile with a millivolt meter. Connect leads to TP
and TP/TH terminals on the control valve. If meter reading is
below 325 mV, replace pilot assembly.
D. Turn valve knob to “On” and switch to “ON.” Take a reading at
the thermopile leads (TP & TP/TH) on the valve. If the meter
reads greater than 175 mV and the burner does not light, replace
defective valve.
Содержание Direct Vent Gas Fireplace HBDV300
Страница 43: ...54D5031 43 1 2 3 5 6 7 10 4 9 11 REPLACEMENT PARTS FIREPLACE COMPONENTS ...
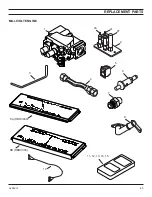
Страница 45: ...54D5031 45 8A HBDV400 8B HBDV300 11 12 13 14 15 3 4 5 6 7 8 2 1 2T 2I 2C 10 REPLACEMENT PARTS MILLIVOLT ENGINE ...
Страница 51: ...54D5031 51 NOTES ...
Страница 52: ...52 54D5031 NOTES ...
Страница 53: ...54D5031 53 NOTES ...


