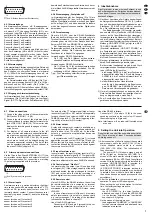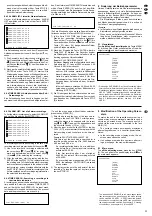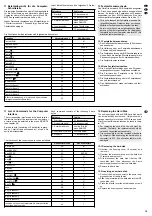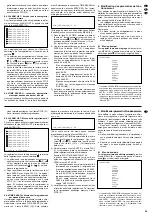
VLOSS ALARM (Buzzer und Alarmrelais aktiviert/
deaktiviert bei Ausfall eines Videosignals)
Mit der Taste + oder - die Einstellung ON oder
OFF wählen. Ist ON gewählt, ertönt der interne
Alarmsummer (sofern die Zeile BUZZER auf ON
gestellt ist) und das Alarmrelais schaltet (sofern
die Zeile EXT ALARM auf ON gestellt ist), wenn
an einem Kamerakanal das Videosignal ausfällt.
Ist OFF gewählt, sind bei Ausfall eines Videosig-
nals der Alarmsummer und das Relais deakti-
viert.
KEY MUTE (Signalton bei Tastendruck ein/aus)
Mit der Taste + oder - die Einstellung YES oder
NO wählen. Ist NO gewählt, ertönt bei jedem
Tastendruck ein kurzes akustisches Signal. Ist
YES gewählt, wird kein Ton beim Drücken der
Tasten abgegeben.
HDD OVERWRITE (Überschreibfunktion ein/aus)
Mit der Taste + oder - die Option NO oder YES
einstellen. Wird YES eingestellt, überschreibt der
Recorder die ältesten Aufnahmen ohne weitere
Warnung, sobald die Festplatte voll ist (Endlos-
Aufzeichnung). Ist NO eingestellt, zeigt das Ge-
rät akustisch und optisch an, wenn nur noch
wenig Speicherplatz auf der Festplatte vorhan-
den ist (siehe Kap. 7) und stoppt die Aufnahme,
wenn die Festplatte voll ist.
MESSAGE LATCH (ständige optische Alarmanzeige
bei externem Alarm und Ausfall eines Videosignals)
Mit der Taste + oder - die Option NO oder YES
einstellen.
Bei der Einstellung YES wird
– für jeden Kanal, an dem keine Kamera ange-
schlossen ist, „LOSS“ eingeblendet,
– bei einem Videosignalausfall, unabhängig von
der eingestellten Alarmdauer, so lange „LOSS“
im betroffenen Kamerabild eingeblendet, bis
wieder ein Videosignal anliegt,
– bei einem externen Alarm, unabhängig von der
eingestellten Alarmdauer, das Symbol
im
betroffenen Kamerabild eingeblendet, solange
das Alarmsignal an der Buchse EXTERNAL
I/O (17) anliegt.
Bei der Einstellung NO werden Kanäle ohne Ka-
mera-Anschluss nicht durch „LOSS“ gekenn-
zeichnet und die Alarmmeldungen bleiben nur für
die eingestellte Alarmdauer eingeblendet.
DATE DISPLAY (Einstellung der Datumsdarstellung)
Mit der Taste + oder - die Darstellungsart des
Datums, d. h. die Reihenfolge von Tages-, Mo-
nats- und Jahreszahl einstellen:
Y – M – D (Jahr – Monat – Tag)
M – D – Y (Monat – Tag – Jahr)
D – M – Y (Tag – Monat – Jahr)
OFF (keine Einblendung von Datum und Uhrzeit)
DATE (Einstellung des Datums)
Nacheinander mit der Taste
oder
die 4 Stel-
len für das aktuelle Datum (Tag, Monat, Jahr,
Wochentag) anwählen und mit der Taste + oder -
die Einstellungen vornehmen.
TIME (Einstellung der Uhrzeit)
Nacheinander mit der Taste
oder
die 3 Stel-
len für die aktuelle Zeit (Stunden, Minuten, Se-
kunden) anwählen und mit der Taste + oder - die
Einstellungen vornehmen.
CLEAR HDD (Löschen der Daten auf der Festplatte)
1) Mit der Taste + oder - die Option YES anwählen.
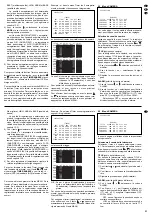
2) Die Taste ENTER drücken. Es erscheint die
folgende Abfrage:
3) Soll die Aufforderung, alle Daten zu löschen, wie-
der zurückgenommen werden, die Taste
drü-
cken. Die Daten werden dann nicht gelöscht. Um
die Daten zu löschen, die Taste
drücken. Auf
dem Bildschirm wird kurz „HDD CLEARING“ ein-
geblendet und nach dem Löschen der Daten kurz
„HDD CLEAR OK“.
SYSTEM RESET (Zurücksetzen aller Einstellungen)
1) Sollen die ab Werk programmierten Voreinstel-
lungen wieder aufgerufen werden, mit der Taste +
oder - die Option YES anwählen.
2) Die Taste ENTER drücken. Es wird kurz „RESET-
TING“ eingeblendet, ein Signalton wird abgege-
ben und alle Menü-Einstellungen werden auf die
Voreinstellungen zurückgesetzt. Das Datum, die
Uhrzeit und die im Menü USER eingestellten
Passwörter bleiben jedoch unverändert.
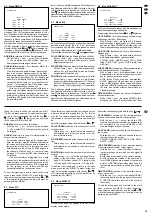
Zum
Verlassen der Menüseite
und Zurückkehren in
das Hauptmenü die Taste MENU drücken. Um wei-
tere Einstellungen vorzunehmen, mit der Taste
oder
ein anderes Untermenü anwählen oder zum
Speichern der Einstellungen
das Hauptmenü durch
Drücken der Taste MENU verlassen.
Hinweis: Die Einstellungen in Zeile DATE und TIME
werden schon gespeichert, wenn das
Menü SYSTEM durch Drücken der Taste
MENU verlassen wird.
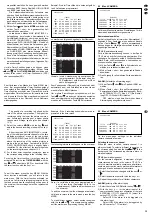
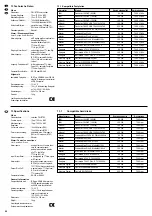
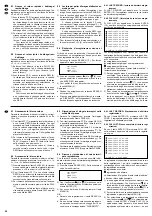
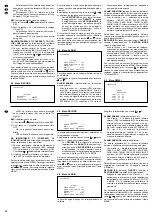
9.12 Menü EVENT
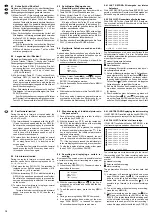
Bei Aufruf dieses Menüs erscheint eine mehrseitige
Liste, in der aufgetretene Ereignisse aufgeführt sind,
wie z. B.
K UNLOCKS 2004-SEP-16 03:00:07
PWR REST 2004-SEP-14 08:02:04
C4 VLOSS 2004-SEP-09 21:43:27
C2 ALARM 2004-AUG-23 03:10:33
xxxxxxxxx xxxx-xxx-xx xx:xx:xx
xxxxxxxxx xxxx-xxx-xx xx:xx:xx
xxxxxxxxx xxxx-xxx-xx xx:xx:xx
xxxxxxxxx xxxx-xxx-xx xx:xx:xx
xxxxxxxxx xxxx-xxx-xx xx:xx:xx
xxxxxxxxx xxxx-xxx-xx xx:xx:xx
xxxxxxxxx xxxx-xxx-xx xx:xx:xx
xxxxxxxxx xxxx-xxx-xx xx:xx:xx
xxxxxxxxx xxxx-xxx-xx xx:xx:xx
xxxxxxxxx xxxx-xxx-xx xx:xx:xx
xxxxxxxxx xxxx-xxx-xx xx:xx:xx
xxxxxxxxx xxxx-xxx-xx xx:xx:xx
+ :CLEAR
ALL DATA IN HDD
WILL BE CLEARED
ARE YOU SURE?
[
:NO
:YES]
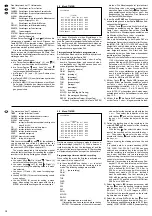
ALARM is set to ON). With OFF selected, the
buzzer and the alarm relay are deactivated in
case of video signal loss.
KEY MUTE (signal sound on/off if a key is pressed)
With the key + or -, select YES or NO. With NO
selected, a short acoustic signal will sound each
time a key is pressed. With YES selected, there
will be no sound when a key is pressed.
HDD OVERWRITE (overwrite function on/off)
With the key + or -, select YES or NO. With YES
selected, the recorder will overwrite the earliest
recordings without any warning as soon as the
hard disk is full (continuous recording). With NO
selected, the recorder will give an acoustic and
optical warning that there is only little storage
capacity left on the hard disk (see chapter 7) and
stop the recording if the hard disk is full.
MESSAGE LATCH (permanent optical alarm indi-
cation in case of external alarm and video signal
loss)
With the key + or -, select YES or NO. With YES
selected
– “LOSS” will be inserted for each channel to
which no camera is connected.
– in case of video signal loss and regardless of
the alarm duration set, “LOSS” will be inserted
in the camera picture concerned until a video
signal is available again.
– in case of an external alarm and regardless of
the alarm duration set, the symbol
will be
inserted in the camera picture concerned as
long as the alarm signal is available at the jack
EXTERNAL I/O (17).
With NO selected, the channels without camera
connection will not be marked by “LOSS” and the
alarm messages will only be inserted for the alarm
duration set.
DATE DISPLAY (setting the date display)
With the key + or -, set the display mode for the
date, i.e. die order of day, month, and year:
Y – M – D
M – D – Y
D – M – Y
OFF (no insertion of date and time)
DATE (setting the date)
Successively select the 4 places for the current
date (day, month, year, weekday) with the key
or
, then make the settings with the key + or -.
TIME (setting the time)
Successively select the 3 places for the current
time (hours, minutes, seconds) with the key
or
, then make the settings with the key + or -.
CLEAR HDD (deleting the data on the hard disk)
1) With the key + or -, select YES.
2) Press the key ENTER. The following request will
appear:
3) To cancel the request of deleting all data, press
the key
. The data will not be deleted. To delete
the data, press the key
. “HDD CLEARING” will
shortly be inserted on the screen and after dele-
tion of the data shortly “HDD CLEAR OK”.
SYSTEM RESET (reset of all settings)
1) To recall the factory settings, select YES with the
key + or -.
2) Press the key ENTER. “RESETTING” will shortly
be inserted, a signal will sound, and all menu set-
tings will be reset to the factory settings. How-
ever, the date, the time, and the passwords set in
the menu USER remain unchanged.
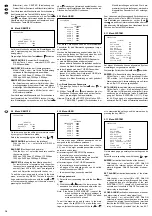
To
exit the menu page
and to return to the main
menu, press the key MENU. To make further set-
tings, select another submenu with the key
or
,
or to
memorize the settings,
exit the main menu by
pressing the key MENU.
Note: The settings in the line DATE and TIME will
already be memorized when exiting the menu
SYSTEM by pressing the key MENU.
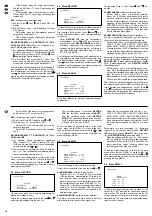
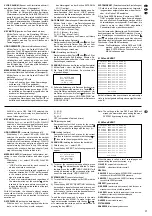
9.12 Menu EVENT
When this menu is called, a list of several pages will
appear listing the events occurred, e. g.
C1 ALARM
: external alarm for channel 1
C3 VLOSS:
video signal loss for channel 3
DISK FULL
K UNLOCK S
(keys unlocked: SUPERVISOR): unlocking of
control keys with the SUPERVISOR password
K UNLOCK 1
(keys unlocked: USER1): unlocking of control
keys with the USER1 password
PWR REST
(power restored)
M HD REMS
(master hard disk removal): hard disk was re-
moved or no access to a hard disk possible
M HD REPL
(master hard disk replacement): hard was rein-
stalled or access to a hard disk possible again
M HD WARM
(master hard disk warning)
M HD ERR
(master hard disk error)
SYSTEM ERROR
DMA ERROR
(direct memory access error)
K UNLOCKS 2004-SEP-16 03:00:07
PWR REST 2004-SEP-14 08:02:04
C4 VLOSS 2004-SEP-09 21:43:27
C2 ALARM 2004-AUG-23 03:10:33
xxxxxxxxx xxxx-xxx-xx xx:xx:xx
xxxxxxxxx xxxx-xxx-xx xx:xx:xx
xxxxxxxxx xxxx-xxx-xx xx:xx:xx
xxxxxxxxx xxxx-xxx-xx xx:xx:xx
xxxxxxxxx xxxx-xxx-xx xx:xx:xx
xxxxxxxxx xxxx-xxx-xx xx:xx:xx
xxxxxxxxx xxxx-xxx-xx xx:xx:xx
xxxxxxxxx xxxx-xxx-xx xx:xx:xx
xxxxxxxxx xxxx-xxx-xx xx:xx:xx
xxxxxxxxx xxxx-xxx-xx xx:xx:xx
xxxxxxxxx xxxx-xxx-xx xx:xx:xx
xxxxxxxxx xxxx-xxx-xx xx:xx:xx
+ :CLEAR
ALL DATA IN HDD
WILL BE CLEARED
ARE YOU SURE?
[
:NO
:YES]
17
GB
D
A
CH

