background image


After you finish “

Reorder

”ing your presentation, the 

Reorder

 option 

changes to a 

Restore

 option, allowing you to return to your original 

presentation with a simple menu click. 

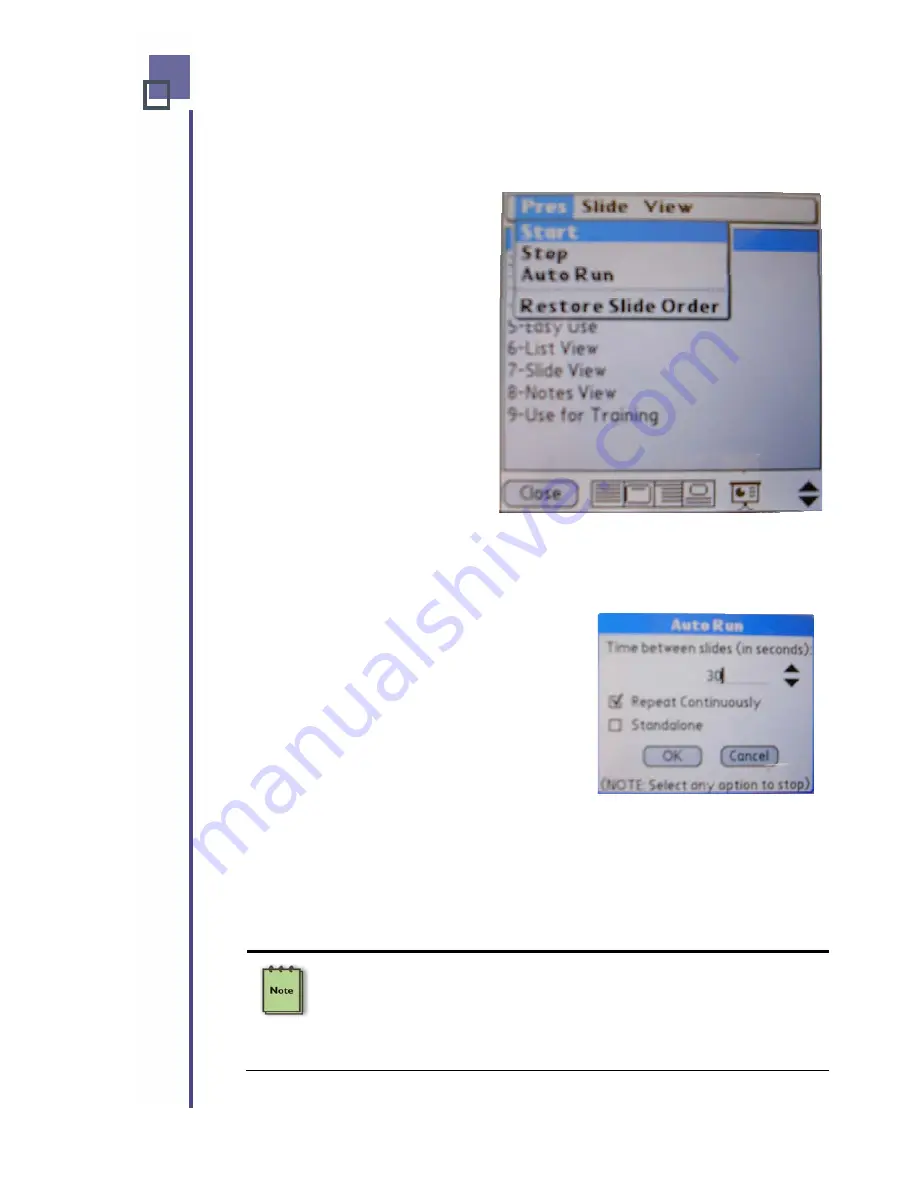
Pres Menu 


This menu allows you to 

Start


and 

Stop

 your presentation by 

simply tapping the 

Start

 or 

Stop


options with the stylus. 
 
The 

Auto Run

 option on this 

menu allows your Pitch Duo to 
run unattended. Just like 
PowerPoint slide shows on your 
host computer, the 

Auto Run


option allows you to configure 
the amount of time you want 
between slides. 
 
The 

Restore Slide Order

 option i

the Slide menu after you reorder slides in your presentation. It has been 
added here for your convenience and will also restore your slide 
presentation to its original order. 

s a duplicate of the one that appears on 

 
To configure your presentation for “hands-
free” operation, you can adjust the amount of 
time between slides by using the  

or 


arrows to increase or decrease the amount of 
time between slides.  
 
If you want your presentation to repeat itself in 
a continuous loop, place a 

;

 in the box for 

Repeat Continuously

.  

 
If you want Pitch to run your presentation “without any Mobile Device 
attached,” place a 

;

 in the box for 

Standalone

. If you check both boxes, 

Pitch will continuously your presentation in a totally unattended fashion as 
long as the Pitch has power. 
 
Tap 

OK

 when you are finished. Be sure to return to the 

Pres Menu

 and 

tap on the 

Start

 option to begin your hands-free presentation. 


Once the presentation is running is a standalone mode, you may use your 
Mobile Device for anything else you need. Pitch will continue to run your 
presentation – completely unattended. To stop Pitch from operating in a 
standalone mode, simply reconnect a Mobile Device to regain control. For 
your convenience, any Mobile Device running a current version of QPLite 
can perform this task. Alternately, you can simply unplug Pitch to clear it. 

A Guide to Pitch Duo 

17

Содержание iGo Pitch Duo PS6B1V

Страница 1: ...l Number PS6B1V Pitch Duo is a complete presentation solution for Palm Mobile Devices running Palm OS 4 0 and later and provides connection to your projection device via Bluetooth or USB The solution...

Страница 2: ...A Guide to Pitch Duo i...

Страница 3: ...with Pitch Duo 9 Using USB 10 Using Bluetooth 11 Chapter 3 Preparing For Your Presentation 12 Chapter 4 Giving Your Presentations 13 Managing Your Presentation 14 Managing Individual Slides 14 View M...

Страница 4: ...A Guide to Pitch Duo iii...

Страница 5: ...ivity SVGA DB 15 pin cable Computer running Windows 2000 XP with an Internet connection and the HotSync application installed Product Registration Thank you for purchasing Pitch Duo We strongly encour...

Страница 6: ...the correct version of HotSync installed on your host computer you will need to connect your Mobile Device to your computer via the USB cable and perform a HotSync operation Keep the device connected...

Страница 7: ...s you changed to a new location Find the SETUP EXE file and double click it to start the installation On some systems you may receive the a pop up Caution message warning you about unsafe software Cli...

Страница 8: ...oftware has been found on your computer If you are having problems and need to repair your installation click on the Repair Pitch selection and then click the Next button to continue If you wish to re...

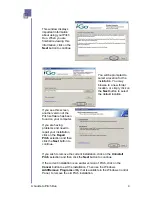
Страница 9: ...ave defined your installation click on the Next button to begin the installation Confirm that the User Profile displayed is the one desired If not click on the to display a list of User Profiles to ch...

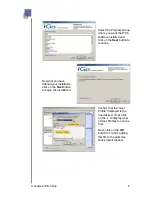
Страница 10: ...ile to be installed during your next HotSync will be confirmed Click on the OK button to continue A second file will then be prepared for installation via the palmOne Quick Install Manager Again confi...

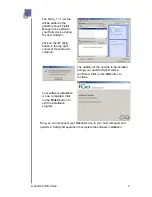
Страница 11: ...to continue The addition of the new file to be installed during your next HotSync will be confirmed Click on the OK button to continue Your software installation is now completed Click on the Finish...

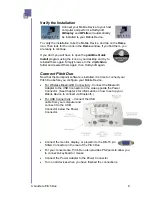
Страница 12: ...point software is installed it is time to connect your Pitch Duo before you configure your Mobile Device For Wireless Bluetooth Connectivity Connect the Bluetooth Adapter to the USB Connector on the s...

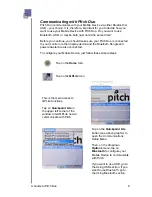
Страница 13: ...ower adapter are also connected To configure your Mobile Device just follow these simple steps Tap on the Home Icon Tap on the QPLite Icon This is the main access to QPLite functions Tap on Quickpoint...

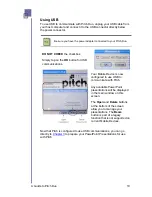
Страница 14: ...ile Device is now configured to use USB to communicate with Pitch Any available PowerPoint presentations will be displayed in the main window on this screen The Open and Delete buttons at the bottom o...

Страница 15: ...to turn Bluetooth on and continue The next window shows you a list of Bluetooth devices visible to your Mobile Device Tap on your Pitch Duo then tap on the OK button to continue If there a quite a fe...

Страница 16: ...ogram Group On your computer Use the Select File button on the pop up Quickpoint Lite for Desktop window to locate a PowerPoint presentation file PPT or drag drop the file onto this window to start th...

Страница 17: ...at the bottom of the window You may also simple click on the slide in the display window This feature allows you to quickly return to a specific slide whenever you need revisit a topic or point Next...

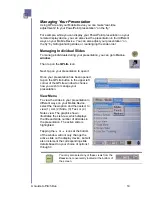
Страница 18: ...on has been opened tap on the QPLite button in the upper left corner of the QPLite window to choose how you wish to manage your presentation View Menu To view the slides in your presentation in differ...

Страница 19: ...at the slide number and title appears at the top with the thumbnail view shown in the main window To change slides in this view tap on the and select another slide from the drop down list You may also...

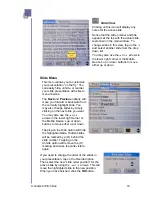
Страница 20: ...options will move you forward or backward from the currently highlight slide You may also change slides by simply clicking on the next slide you want You may also use the or arrows in the lower right...

Страница 21: ...t of time between slides by using the or arrows to increase or decrease the amount of time between slides If you want your presentation to repeat itself in a continuous loop place a in the box for Rep...

Страница 22: ...ir Mobile Devices emulating your every action To set up your Mobile Device to use Pitch s remote display feature follow these simple steps Go to the Home Tap on the QPLite icon to bring up the Quickpo...

Страница 23: ...the distance between Pitch and your Mobile Device would like exceed Bluetooth s typical range of 30 feet 10 meters you can configure Pitch to function as a standalone device Use Quickpoint s Auto Run...

Страница 24: ...d device status pairing to communicate with Bluetooth Mobile Devices The only requirement is to enable and set up Bluetooth connectivity on the Mobile Device The software applications will initiate th...

Страница 25: ...n reception which can be determined by turning the equipment off and on the user is encouraged to try to correct the interference by one or more of the following measures Reorient or relocate the rece...

Страница 26: ...A Guide to Pitch Duo 22...

Страница 27: ...A Guide to Pitch Duo 23...

Страница 28: ...and Pitch is a trademark of Mobility Electronics Inc All other brand names and logos are trademarks or registered trademarks of their respective owners United States and foreign patents pending Specif...

Отзывы: