24
25
ENGLISH
ENGLISH
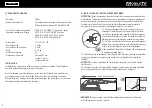
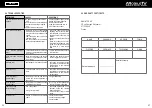
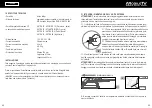
1.5 TECHNICAL SPECIFCATIONS
• Satellite dish
• Search system
• Settable satellites only Factory
• Power supply
• Absorbed current
• Current absorbed in stand-by
• Weight
• Protection fuse
• Size (when closed)
offset
fully automatic NID recognition according to
the DVB-SI EN 300 468 specifications
Depending on the model for the country:
ASTRA 19 - HOTBIRD 13 (Germany - Italy)
ASTRA 19 - ATLANTIC BIRD (France)
ASTRA 19 - ASTRA 23.5 (Netherlands)
ASTRA 19 - ASTRA 28 (England)
OPTUS D1-T1 (New Zeland)
OPTUS D3-T1 (Australia)
12 V DC -20 + 30%
Max 3 Ampere
≤ 5mA
≤ 8,5 kg
3A
Height: 195 mm
Width: 610 mm
Length: 650 mm
INSTALLATION
Only specialised personnel should install the satellite dish. Incorrect installation may
damage the system.
Before installation, open the carton packaging and make sure that the satellite dish is in
good condition. Make sure that all parts described in the instruction manual are present.
(MobileTV does not accept any claims for damage caused by transport or missing material
after the satellite dish has been installed).
2.1 ASSEMBLY INSTRUCTIONS OF THE EXTERNAL UNIT
CAUTION! Read carefully the safety standards concerning installation before installing the
device. The non-observance of these instructions may lead to damage or serious injuries.
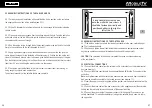
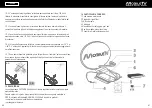
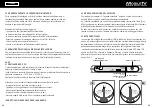
2.1.1 On the roof of the vehicle, find a sufficiently large area of roof (preferably at the sides
of the roof) that allows for the positioning of the satellite dish (see picture 2)
2.1.2 Clean carefully the area of the roof selected for the installation of the external unit
(remove oil, grease and dust). Carefully clean the lower part
of the fastening plate in order to remove any trace of dust and
grease.
2.1.3 With a silicon gun apply a homogenous layer of
structural polyurethane adhesive at ambient temperature
in the lower part of the fastening plate (dekasyl MS-2
OR MS-5 glue is recommended; keep to the instructions
for application).
2.1.4 Position the external unit on the previously cleaned roof
area. Push strongly on it in order to ensure a good distribution
and adhesion of the glue.
CAUTION! When assembling the external unit, ensure that the bottom of the dish when
closed is facing the direction of travel (see picture 3).
To complete the installation of the external unit, apply a layer of adhesive around the faste-
ning plate in order to make it totally waterproof (see picture 4).
Note: Leave the adhesive to set for 24 hours before moving the vehicle.
2.1 Assembly instructions of the external unit
CAUTION!
Read carefully the safety standards concerning installation before in -
stalling the device. The non-observance of these instructions may lead to dam -
age or serious injuries.
2.1.1
On the roof of the vehicle, find a sufficiently large area of roof (preferably
at the sides of the roof ) that allows for the positioning of the satellite dish (see
picture 2 )
2.1.2
Clean carefully the area of the roof selected for the in-
stallation of the external unit (remove oil, grease and
dust). Carefully clean the lower part of the fastening
plate in order to remove any trace of dust and grease.
2.1.3
With a silicon gun apply a homogenous layer of struc-
tural polyurethane adhesive at
ambient temperature
in the lower part of the fastening plate (dekasyl MS-2
OR MS-5 glue is recommended; keep to the instruc-
tions for application).
2.1.4
Position the external unit on the previously
cleaned roof area. Push strongly on it in order to ensure
a good distribution and adhesion of the glue.
CAUTION!!!
When assembling the external unit, ensure that the bottom of the dish when
closed is facing the direction of travel (see picture 3)
To complete the installation of the external unit, apply a layer of adhesive around the fas -
tening plate in order to make it totally waterproof (see picture 4)
2
DIRECTION OF TRAVEL
Note: leave the adhesive to set for 24 hours before moving the vehicle
GLUE
ROOF
3
4
7
2
1000
GB
2
2.1 istruzioni di montaggio dell’
unità esterna
ATTENZIONE
!
Prima di procedere al montaggio leggere attentamente le norme
di
sicurezza relative all’ installazione, eventuali errori nell’ osservanza delle istruzioni
possono provocare danni a persone o cose anche gravi
2.1.1
Individuare sul tetto dell’ automezzo una porzione libera sufficientemen-
te ampia (possibilmente ai lati del tetto ) per permettere il posizionamento
dell’ antenna ( vedi immagine 2)
2.1.2
Pulire accuratamente il tetto In corrispondenza della
zona
prescelta per l’ installazione dell’unità esterna
(eliminare
qualsiasi traccia di unto, grasso e polvere).
Pulire
accuratamente anche la parte inferiore della pia-
stra
di fissaggio per eliminare qualsiasi traccia residua
di polvere e grasso .
2.1.3
Mediante una pistola da silicone applicare a tempera -
tura
ambiente nella parte inferiore della piastra di fis-
-
saggio
uno strato uniforme di adesivo poliuretanico
strutturale
( si consiglia l’ uso del collante sikaflex 292 e
il Rispetto delle sue norme di applicazione.
2.1.4
Posizionare quindi l’unità esterna sul tetto nella zona precedentemente individuata
e pulita spingendo con forza su di essa per garantire una buona adesione e distribuzione
del collante.
ATTENZIONE !!
nel montaggio dell’unità esterna rispettare il senso di marcia (vedi imma-
gine 3) Per ultimare e finire il fissaggio dell’unità esterna applicare tutto intorno alla piastra
di fissaggio uno strato di collante per renderla completamente stagna (vedi immagine 4)
N.B. lasciare riposare all’ asciutto e a temperatura ambiente il collante per 24 ore prima di
muovere il Mezzo
2
DIREZIONE DI MARCIA
COLLA
TETTO
3
4
2
7
IT
2
1000
2.1 istruzioni di montaggio dell’
unità esterna
ATTENZIONE
!
Prima di procedere al montaggio leggere attentamente le norme
di
sicurezza relative all’ installazione, eventuali errori nell’ osservanza delle istruzioni
possono provocare danni a persone o cose anche gravi
2.1.1
Individuare sul tetto dell’ automezzo una porzione libera sufficientemen-
te ampia (possibilmente ai lati del tetto ) per permettere il posizionamento
dell’ antenna ( vedi immagine 2)
2.1.2
Pulire accuratamente il tetto In corrispondenza della
zona
prescelta per l’ installazione dell’unità esterna
(eliminare
qualsiasi traccia di unto, grasso e polvere).
Pulire
accuratamente anche la parte inferiore della pia-
stra
di fissaggio per eliminare qualsiasi traccia residua
di polvere e grasso .
2.1.3
Mediante una pistola da silicone applicare a tempera -
tura
ambiente nella parte inferiore della piastra di fis-
-
saggio
uno strato uniforme di adesivo poliuretanico
strutturale
( si consiglia l’ uso del collante sikaflex 292 e
il Rispetto delle sue norme di applicazione.
2.1.4
Posizionare quindi l’unità esterna sul tetto nella zona precedentemente individuata
e pulita spingendo con forza su di essa per garantire una buona adesione e distribuzione
del collante.
ATTENZIONE !!
nel montaggio dell’unità esterna rispettare il senso di marcia (vedi imma-
gine 3) Per ultimare e finire il fissaggio dell’unità esterna applicare tutto intorno alla piastra
di fissaggio uno strato di collante per renderla completamente stagna (vedi immagine 4)
N.B. lasciare riposare all’ asciutto e a temperatura ambiente il collante per 24 ore prima di
muovere il Mezzo
2
COLLA
TETTO
3
4
2
7
IT
2


