MANUAL DE INSTRUCCIONES / INSTRUCTION MANUAL / MANUALE D’UTILISATION
San Fermin, Bahia, Olivo, Marisma, Acueducto
ESPAÑOL
ENGLISH
FRANÇAIS
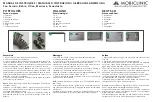
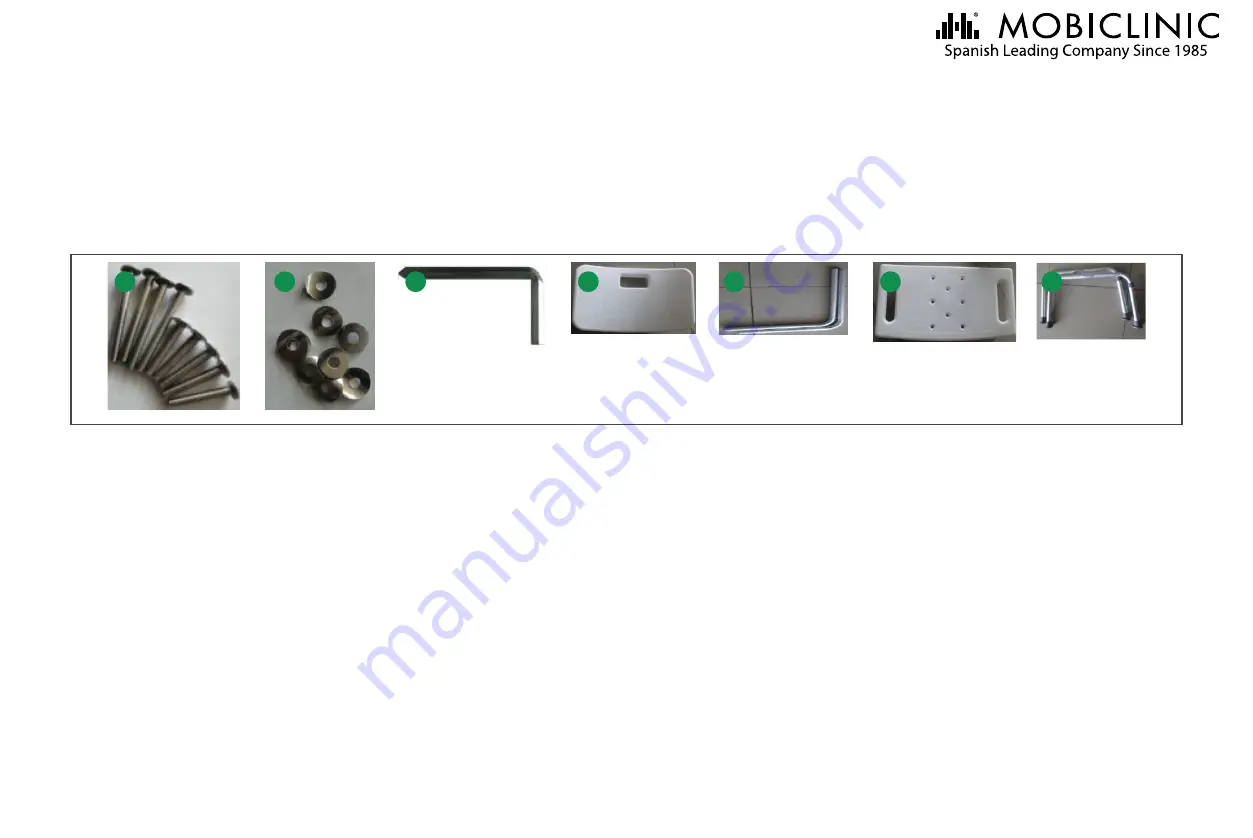
Piezas e imágenes
1. Tornillos
2. Arandelas
3. Llaves
4. Respaldo
5. Barras para el respaldo
6. Asiento
7. Barras para el asiento
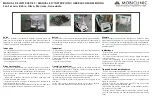
Montaje
1. Abra el paquete y extraiga todas las piezas de la bolsa
2. Coloque las arandelas en los tornillos.
3. Coloque el asiento sobre una silla y ponga la parte superior miran-
do hacia abajo. Coloque las barras del asiento en las ranuras
e introduzca el tornillo corto en el orificio del centro donde se cruzan
ambas patas. Asegure el tornillo con la llave.
4. Si se trata de los modelos Olivo o Marisma, deberá montar el
respaldo. Cada barra del respaldo cuenta con dos orificios en
cada extremo. Compruebe el extremo con mayor distancia entre los
agujeros y coloque este extremo sobre las barras del asiento
y asegure con los tornillos.
5. Ponga la silla de baño en el suelo y fije las barras del respaldo al
respaldo con los tornillos.
Nota
: utilice la llave incluida para fijar los tornillos. Peso máximo
soportado: 100 kg.
Cuidado y mantenimiento: limpie el producto únicamente con jabón
y agua, no utilice ninguna sustancia química. Protéjalo de condicio-
nes climáticas desfavorables.
Destinado a uso doméstico, no usar en ambiente húmedo o de forma
permanente en el exterior si se desea ampliar la duración del produc-
to.
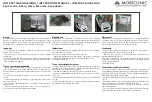
How to make the assembly
1. Open the packing and take out all parts from the polybag.
2. Put the washer in the screws.
3. Place the seat on a chair with upside down and place the seat
supports on the slots. Put the short bolt into the hole in the center
where two leg pipes cross and lock the bolt with the tool.
4. If your model is Olivo or Marisma, you must assembly the
backrest. There are two holes on each end of the backrest supports.
Check the end with bigger distance between two holes and place this
end on to the seat supports and lock it with bolts.
5. Put the shower chair on the floor and put the backrest and backrest
tubes together with the bolts.
Remark
: Lock all bolts with the key available from the tool kit. Weight
capacity: 100kg.
Care and maintenance: clean the product only with soap and water,
do not use any chemical substance. Protect from unfavourable
weather.
Intended for domestic use, please do not use in wet environment or
permanently outdoor if you want to extend their service life.
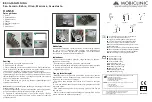
Assemblage
1. Ouvrez le paquet et retirez toutes les pièces de la bourse.
2. Placez la rondelle sur la vis.
3. Placez le siège sur une chaise et mettez la partie supérieure vers
le bas. Placez les barres du siège dans les rainures et
introduisez la vis courte dans le trou central où les deux pieds de
chaise se croisent. Resserrez le trou avec la clé.
4. S’il s’agit des modèles Olivo ou Marisma, vous devrez assembler
le dossier. Chaque barre du dossier a deux trous à chaque
extrémité. Choisissez l’extrémité dont les trous sont plus éloignés et
placez cette extrémité sur les barres du siège. Ensuite, serrez
les vis.
5. Mettez la chaise de toilette au sol et fixez les barres du dossier au
dossier avec l’aide des vis.
Important
: utilisez la clé qui est incluse pour fixer les vis. Poids
maximum supporté : 100 kg.
Entretien et maintenance nettoyez le produit uniquement avec de
l'eau et du savon. N'utilisez aucune substance chimique. Protégez-le
des conditions météorologiques défavorables.
Destiné à un usage domestique, ne pas utiliser dans un environne-
ment humide ou à l'extérieur en permanence si vous souhaitez
prolonger la durée du produit.
Parts listing and images
1. Bolts
2. Washers
3. Key
4. Backrest
5. Backrest supports
6. Seat
7. Seat support
Pièces et images
1. Vis
2. Rondelles
3. Clé
4. Dossier
5. Barres pour le dossier
6. Siège
7. Barres pour le siège
1
2
3
4
6
7
5
Última revisión: 8 de julio de 2022
Last revision date: July 8th 2022


