background image


FGC100 User Manual 


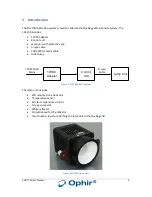
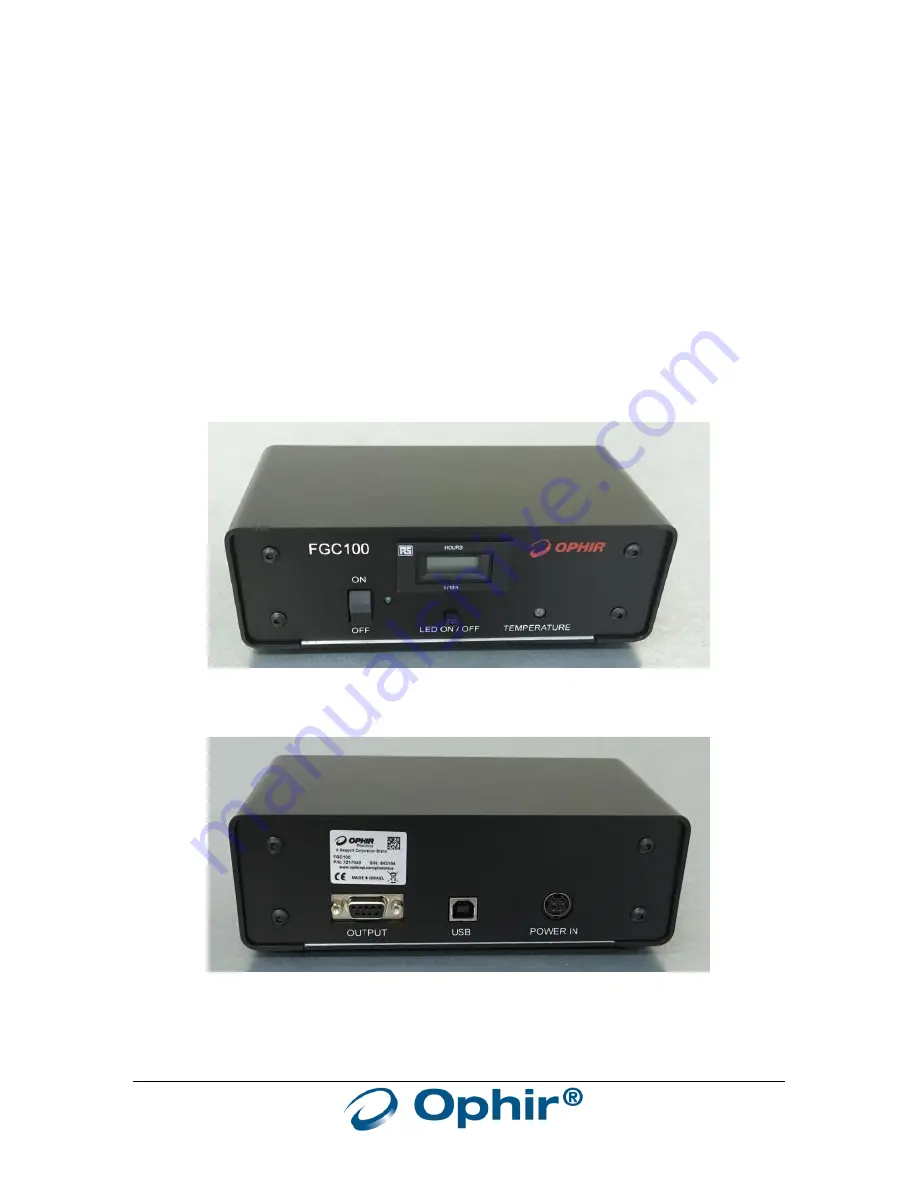
The control unit includes  

Front panel 


Fixed current source for the LED 


Temperature stabilization circuit  


General on/off switch 


Hour meter 


LED on/off push button 


LED temperature indicator light (Green/Red) 

Back Panel 


D-type connector 


USB connector (for usage at Ophir service centers only) 


DC power in connector 


Figure 3. FGC100 Control Unit – Front 


Figure 4. FGC100 Control Unit - Back 


Содержание Ophir FluxGage FGC100

Страница 1: ...Ophir Optronics Solutions Ltd FGC100 Calibration Unit FGC100 User Manual FluxGage FluxGage...

Страница 2: ...FGC100 7 4 1 Operating the FGC100 9 5 Performing Calibration of FluxGage Using FGC100 10 5 1 Calibration of the spectrum measurement and the total flux measurement 11 5 2 Calibration of the total flux...

Страница 3: ...complies with standard IEC 62471 2006 First Edition Photobiological safety of lamps and lamp systems and is classified as Low risk Risk Group 1 when used as a standalone luminaire When the FGC100 cal...

Страница 4: ...D type cable 100 230VAC mains cable Disk on key Lamp Unit Control Unit 12VDC Adapter 100 230VAC Mains D type Cable Figure 1 FGC100 Block Diagram The lamp unit includes LED mounted on a heat sink Tempe...

Страница 5: ...ature stabilization circuit General on off switch Hour meter LED on off push button LED temperature indicator light Green Red Back Panel D type connector USB connector for usage at Ophir service cente...

Страница 6: ...FGC100 User Manual 6 3 Mechanical Drawings...

Страница 7: ...e the round cover from the lid Remove the protective cover from the FGC100 lamp unit Insert the FGC100 lamp unit into the hole in the lid and secure it using the two thumb screws Connect the D type ca...

Страница 8: ...FGC100 User Manual 8 Figure 5 FGC100 connected to FuxGage...

Страница 9: ...lamp unit The temperature indicator will be red initially and will turn to green after a few minutes when the temperature of the lamp unit will be stabilized However wait at least 30 minutes before u...

Страница 10: ...FGC100 User Manual 10 5 Performing Calibration of FluxGage Using FGC100...

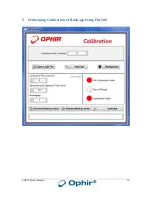
Страница 11: ...the top of the screen the measured flux of the calibration source will appear It should match the value entered in the settings area Click on the top right corner to exit the window 5 2 Calibration o...

Страница 12: ...nd wait for the operation to complete Press the push button to turn the FGC100 lamp unit on and allow enough time to reach thermal stabilization 30minutes Press Calibrate and wait for the operation to...

Отзывы: