background image

RED       EQUALIZED

BLACK   BASS ROLLOFF

BLACK   NORMAL

 -

RED       NORMAL

 +

SATELLITE XOVER BOARD

SPEAKER WIRE

BE65 XOVER BOARD

AMPLIFIER

RED       EQUALIZED

BLACK   BASS ROLLOFF

BLACK   NORMAL

 -

RED       NORMAL

 +

REMOTE INPUT

NORMAL INPUT

+    -

+    -

- +

Optional Remote Hookup and Usage

(3)

SWITCH TO THIS CONNECTION

FOR SW-85/SW-95 "NORMAL" 

MODE

SWITCH TO THIS CONNECTION

FOR SW-85/SW-95 "HIGH EFFICIENCY"

MODE

BE-65 HOOKUP WITH
OPTIONAL REMOTE SWITCHER

Allows the user to select
SW-85/SW-95 Tonal Characteristic.
(Requires 2 sets of speaker wires)

If you have a remote amplifier switcher, you can switch between tonal balances on your SW-85 or SW-95
speakers. See your SW-85 or SW-95 manual for details on wiring and the effect the use of the terminals
has on the speakers' sound.

When using a BE-65, you must connect two pairs of wires between the BE-65 and the SW-85/SW-95.
See the diagram below for details. If you have any questions about connecting your BE-65, please
contact your M&K dealer or the factory at (310) 204-2854.

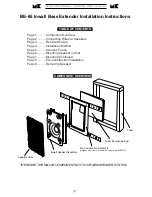
Содержание BE-65

Страница 1: ...part number SPRE 95 THESE ARE THE MAJOR COMPONENTS OF YOUR NEW SPEAKER SYSTEM 1 Foam Dampening Pad Foam TABLE OF CONTENTS Page 1 Component Overview Page 2 Connecting Wires to Speakers Page 3 Remote Ho...

Страница 2: ...h the tonal balance you have selected for your SW 85 or SW 95 speaker For more information see your SW 85 SW 95 instructions Hookup For each channel run one pair of wires from the amplifier to each BE...

Страница 3: ...REMOTE SWITCHER Allows the user to select SW 85 SW 95 Tonal Characteristic Requires 2 sets of speaker wires If you have a remote amplifier switcher you can switch between tonal balances on your SW 85...

Страница 4: ...Be careful when bending and handling the foam so that you do not rip it 8 Mount the adhesive backed foam pad in the wall behind the woofer 4 speaker wire Note Do not put any other acoustic filler wit...

Страница 5: ...ant Apply sealant Apply sealant Cut out Vanfill Foam Wall Stud Floor 7 7 16 10 3 4 4 1 4 5 Acoustic Frame Apply silicon based sealant to the foam frame joints It is very important to form an airtight...

Страница 6: ...ottom portion of the mounting arms into the wall opening 11 Tip the unit vertically and pass the top edge of the mounting arms through the wall opening allowing the unit to rest on the bottom mounting...

Страница 7: ...securely mounted on magnets by tapping on it s surface Remove the grille and reposition magnets if necessary 15 The grille can be painted with Latex paint to match the wall color if desired Make sure...

Страница 8: ...ine making sure that you are cutting inside the pre construction bracket opening Continue to cut the opening using the bracket flange as a guide Slightly angle the cut to the outside so that you can p...

Страница 9: ...ng baffle loosen screws sequentially until two inches of screw is exposed or screw stops If using a power screwdriver make sure that it is on a low torque setting to avoid stripping 2 3 Push the screw...

Отзывы: