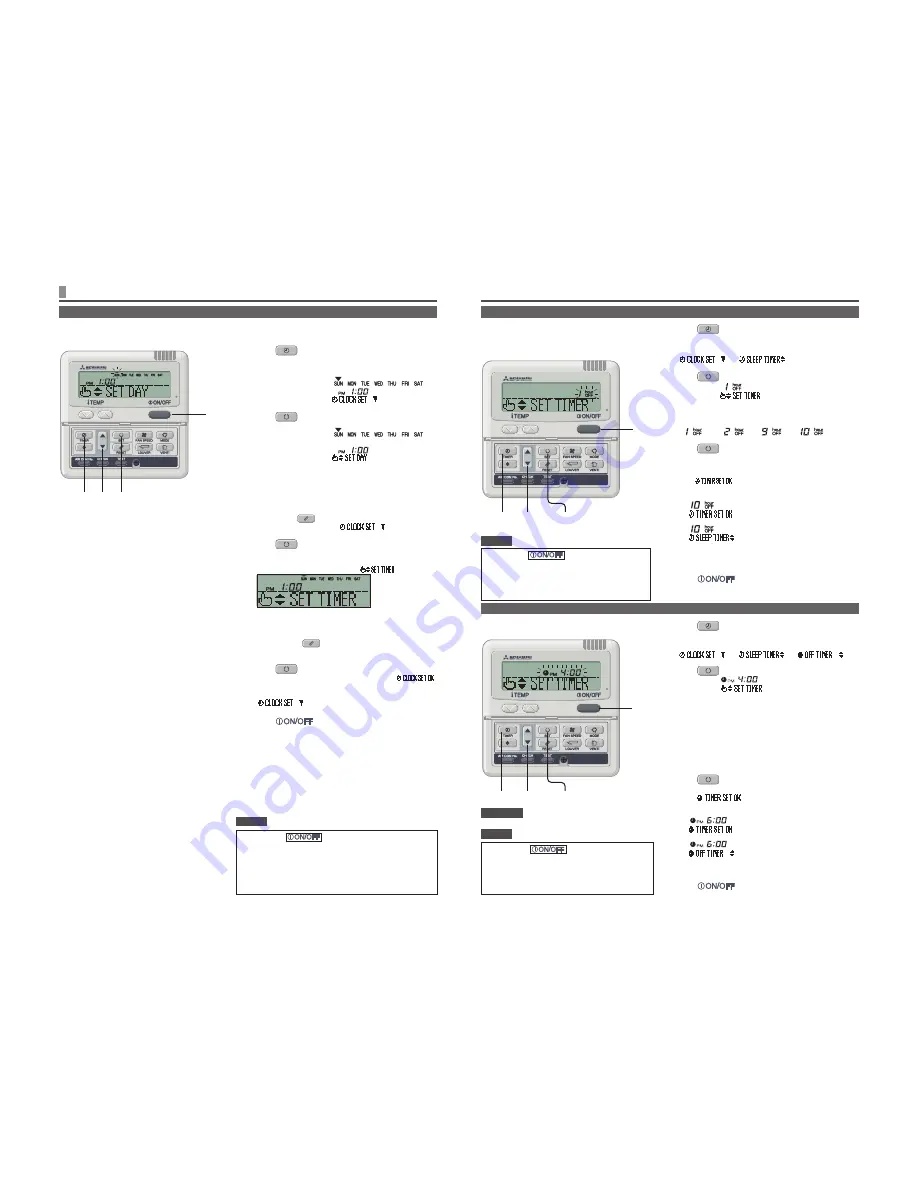
6
1
Press
TIMER button.
2
Press
▼
button once.
“
”
“
”
3
Press
SET button.
[EXAMPLE] “
” flashes,
“
” lights.
4
Press
▲
or
▼
button.
The display changes as below. Set as you like.
“
”
“
” ~ “
”
“
”
5
Press
SET button.
Sleep timer has been set.
The air conditioner will turn on if a sleep timer is set while it is
turned off.
After “
” is displayed in the display area, the display
in step
2
returns.
<When “Ten hours later OFF” is set >
“
” (lights)
“
” (lights for two seconds)
“
” (lights)
“
” (lights)
The remaining time is displayed, and changes in an hourly basis.
When the setting time elapses, the unit stops operating.
Every operation stops after a certain period of time has elapsed.
6
Press
button.
The timer mode is finished.
3•5
2•4
1
6
1
Press
TIMER button.
2
Press
▼
button twice.
[
]
[
]
[
]
3
Press
SET button.
[EXAMPLE] “
” flashes,
“
” lights.
4
Press
▲
or
▼
button.
Set the time at which you want to stop the operation.
Set “Hour”
•
If you press
▲
or
▼
button for a while, “Hour” display is changed
by one hour, and stops when you stop pressing.
Set “Minute”
•
If you press
▲
or
▼
button, the number in the display becomes
larger or smaller by ten minutes.
5
Press
SET button.
OFF timer has been set.
After “
” is displayed in the display area, the
display in step
2
returns.
<If set to 6:00 PM >
“
” (lights)
“
” (lights for two seconds)
↓
“
”(lights)
“
” (lights)
The unit stops operating at 6:00 PM.
The time display is also turned off.
6
Press
button.
The timer mode is finished.
The unit stops operating at the setting time.
This setting is effective for only once.
3•5
2•4
1
6
Once the OFF timer is set, it is not possible to
start operation. If you would like to operate the
air conditioner, press ON/OFF button before
hand to turn on.
SLEEP TIMER MODE
OFF TIMER MODE
• If you press
button while timer mode
is under setting, timer mode is canceled and the
display will return to the original one.
•
If you do not press any button for several minutes
after entering the timer mode, the timer mode
ends and the display returns to the original one.
• If you press
button while timer mode
is under setting, timer mode is canceled and the
display will return to the original one.
•
If you do not press any button for several minutes
after entering the timer mode, the timer mode
ends and the display returns to the original one.
ATTENTION
After a certain period of time has elapsed, operation
stops.
• Sleep timer
The unit stops after the set time elapses.
NOTICE
HOW TO PERFORM THE TIMER OPERATION
< WIRED REMOTE CONTROL >
1
Press
TIMER button.
The mode changes to timer mode.
“Current day of the week” and “Current time” are displayed.
Display area :
[
]
[
]
[
]
2
Press
SET button.
The display area shows : [
]
(
▼
flashes)
[
] (current time)
[
]
3
Press
▲
or
▼
button.
Place the “
▼
” mark above the day of the week to the current
day.
Press
▲
and
▼
mark to move to the right and the left respectively.
If you press the
RESET button, the remote control will return to
the previous screen and display “
”.
4
Press
SET button.
The day of the week is fixed, and the flashing of
▼
mark stops
and lights.
The “current time” value flashes, and “
” is displayed.
5
Press
▲
or
▼
button.
Set to the current time.
If you press the
RESET button, the display is returned to
the one in step
1
.
6
Press
SET button.
The flashing for time display stops and lights, and “
”
is displayed to show that the current time is set.
Two seconds later, the display in step
1
returns, and
“
” is displayed.
7
Press
button.
The timer mode is finished.
2
3
1
•
•
4
5
•
6
7
Timer operation is performed based on the time of the clock which is set by the following steps. Make sure to
set the time to the current time correctly.
SETTING THE TIME
•
If you press
button while timer mode is under
setting, timer mode is canceled and the display will return
to the original one. Note that the setting which has not been
completed is canceled.
•
If you do not press any button for several minutes after
entering the timer mode, the timer mode ends and the
display returns to the original one.
NOTICE
NOTICE
Содержание RC-E5
Страница 23: ...22 ...


