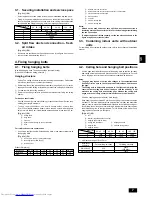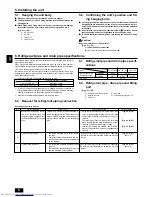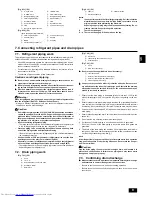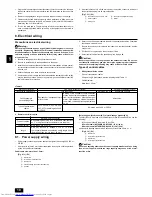
11
GB
D
F
I
NL
E
P
GR
RU
TR
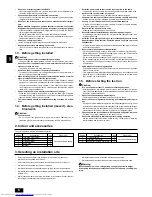
8.3. Connecting electrical connections
(Be sure to prevent terminal screws from loosening.)
1. Remove 2 screws which secures the terminal bed box cover using a screw-
driver. (
1
)
[Fig. 8.3.1] (P.4)
A
Side frame
B
Cover
C
Cover securing screw (2 places)
2. As shown at
2
, wire the power supply, transmission cable and remote control-
ler. There is no need to remove the terminal bed box.
[Fig. 8.3.2] (P.4)
<Viewed from bottom of the terminal bed box>
D
Terminal bed for transmission cable
E
Transmission cable
(To terminal bed for remote controller, indoor unit and BC controller)
F
To single-phase power supply
G
Terminal bed for power supply
H
To terminal bed for outdoor transmission cable
(Use shielding earth cable on outdoor unit side.)
I
Non-polarity
J
Network remote controller
K
DC 24 to 30 V
•
Fix power source wiring to terminal bed box by using buffer bushing for tensile
force. (PG connection or the like.) Connect transmission wiring to transmission
terminal bed through the knockout hole of terminal bed box using ordinary
bushing.
3. After wiring is complete, make sure again that there is no slack on the connec-
tions, and attach the cover onto the terminal bed box in the reverse order of
removal.
Caution:
Wire the power supply so that no tension is imparted. Otherwise disconnec-
tion, heating or fire may result.
8.4. Setting addresses
(Be sure to operate with the main power turned OFF.)
[Fig. 8.4.1] (P.4)
<Address board>
•
There are two types of rotary switch setting available: setting addresses 1 to 9
and over 10, and setting branch numbers.
1
How to set addresses
Example: If Address is “3”, remain SW12 (for 1 to 9) at “0”, and match
SW11(for over 10) with “3”.
2
How to set branch numbers (Series R2 only)
Match the indoor unit’s refrigerant pipe with the BC controller’s end con-
nection number. Remain other than R2 at “0”.
•
The rotary switches are all set to “0” when shipped from the factory. These
switches can be used to set unit addresses and branch numbers at will.
•
The determination of indoor unit addresses varies with the system at site. Set
them referring to technical data.
Note:
Please set the switch SW5 according to the power supply voltage.
• Set SW5 to 240 V side when the power supply is 230 and 240 volts.
• When the power supply is 220 volts, set SW5 to 220 V side.
8.5. Sensing room temperature with the
built-in sensor in a remote controller
If you want to sense room temperature with the built-in sensor in a remote control-
ler, set SW1-1 on the control board to “ON”. The setting of SW1-7 and SW1-8 as
necessary also makes it possible to adjust the air flow at a time when the heating
thermometer is OFF.
8.2. Connecting remote controller, indoor
and outdoor transmission cables
(Remote contoroller is optionally available.)
•
Connect indoor unit TB5 and outdoor unit TB3. (Non-polarized 2-wire)
The “S” on indoor unit TB5 is a shielding wire connection. For specifications
about the connecting cables, refer to the outdoor unit installation manual.
•
Install a remote controller following the manual supplied with the remote con-
troller.
•
Connect the “1” and “2” on indoor unit TB15 to a MA remote controller. (Non-
polarized 2-wire)
•
Connect the “M1” and “M2” on indoor unit TB5 to a M-NET remote controller.
(Non-polarized 2-wire)
•
Connect the remote controller’s transmission cable within 10 m using a 0.75 mm
2
core cable. If the distance is more than 10 m, use a 1.25 mm
2
junction cable.
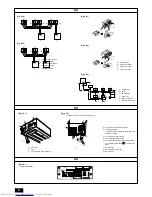
[Fig. 8.2.1]
(P.4) MA Remote controller
[Fig. 8.2.2]
(P.4) M-NET Remote controller
A
Terminal block for indoor transmission cable
B
Terminal block for outdoor transmission cable
C
Remote controller
•
DC 9 to 13 V between 1 and 2 (MA remote controller)
•
DC 24 to 30 V between M1 and M2 (M-NET remote controller)
[Fig. 8.2.3]
(P.4) MA Remote controller
[Fig. 8.2.4]
(P.4) M-NET Remote controller
A
Non-polarized
B
Upper level (TB15)
C
Remote Controller
D
Lower level (TB5)
•
The MA remote controller and the M-NET remote controller cannot be used at
the same time or interchangeably.
Note:
Ensure that the wiring is not pinched when fitting the terminal box cover.
Pinching the wiring may cut it.
Caution:
Install wiring so that it is not tight and under tension. Wiring under tension
may break, or overheat and burn.
•
Fix power source wiring to control box by using buffer bushing for tensile force.
(PG connection or the like.) Connect transmission wiring to transmission ter-
minal block through the knockout hole of control box using ordinary bushing.
•
After wiring is complete, make sure again that there is no slack on the connec-
tions, and attach the cover onto the control box in the reverse order removal.
Caution:
Wire the power supply so that no tension is imparted. Otherwise disconnec-
tion, heating or fire result.
[Fig. 8.2.5] (P.4)
<Constraints on transmission cable>
G
Outdoor unit
H
Earth
I
BC controller
J
Indoor unit
K
Remote controller
L
Non-polarized 2-wire
Notes:
*1 Put the transmission cable earth via the outdoor unit’s earth terminal
to the ground.
*2 If the remote controller cable exceeds 10 m, use a 1.25 mm
2
cable over
the exceeded portion, and add that exceeded portion to within 200 m.
*3 The BC controller is required only for simultaneous cooling and heating
series R2.


