


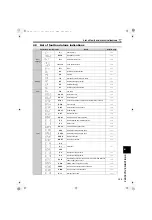


119
3
(2) AM terminal calibration
(C1 (Pr. 901))
Calibrate the AM terminal in the following procedure.
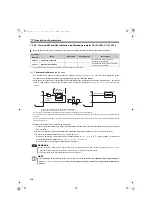
1) Connect a 0 to 10VDC meter (frequency meter) across converter terminals AM and 5. (Note the polarity. The
terminal AM is positive.)
2) Refer to the monitor description list
(page 86)
and set
Pr. 50
.
When you selected a monitor that needs full-scale setting (
Pr. 50
= "1 to 3, 5, 7"), preset power supply frequency or
current that outputs 10V signal using
Pr. 49, Pr. 51, Pr. 53, Pr. 55, and Pr. 56
.
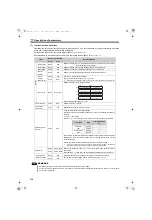
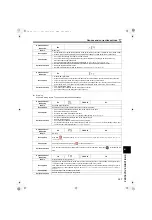
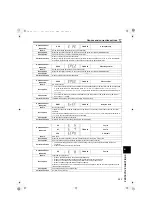
(3) How to calibrate the terminal FM when using the operation panel (FR-DU07-CNV)
Terminal AM is initially-set to provide a 10VDC output in the full-scale
status of the corresponding monitor item.
Calibration parameter C1 (Pr. 901)
allows the output voltage ratios (gains) to be adjusted according to the
meter scale. Note that the maximum output voltage is 10VDC.
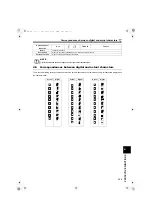
REMARKS
When outputting a signal such as input current, which cannot be adjusted to 100% easily by an operation, set
Pr. 50
= "21"
(reference voltage output) for the calibration. 10VDC is output from the terminal AM.
REMARKS
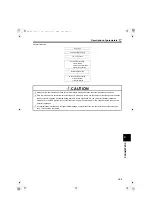
Calibration can be performed during operation.
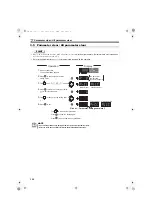
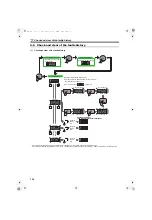
AM
Converter
DC10V
5
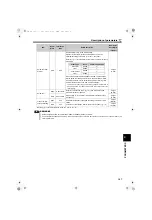
Display
Operation
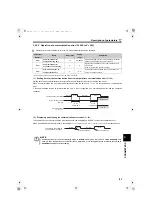
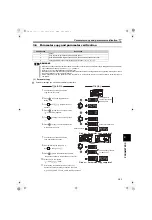
1.
Confirm the operation status indicator and
operation mode indicator
2.
Press to choose the parameter
setting mode.
The parameter
number read
previously appears.
C0 to C7
setting
is enabled.
+
-
3.
Turn until appears.
4.
Press to display .
5.
Turn until appears.
Set to
C0 FM terminal calibration
.
6.
Press to enable setting.
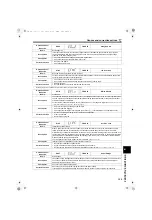
8.
Turn to adjust the indicator needle
to the desired position.
9.
Press . Setting is complete.
Press to return to the indication (step 4).
By turning , you can read another parameter.
Press twice to show the next parameter ( ).
(When
Pr. 54
= 5 (Power supply frequency))
The monitor set to
Pr. 54
FM terminal
function selection
is displayed.
Analog indicator
Flicker...Parameter setting complete!!
HC2.book 119 ページ 2012年11月19日 月曜日 午前10時52分


