


Instructions For Use – neXus Ultrasonic Surgical Aspirator
Doc #: 100-10-1000 rev A
p 34
6.8
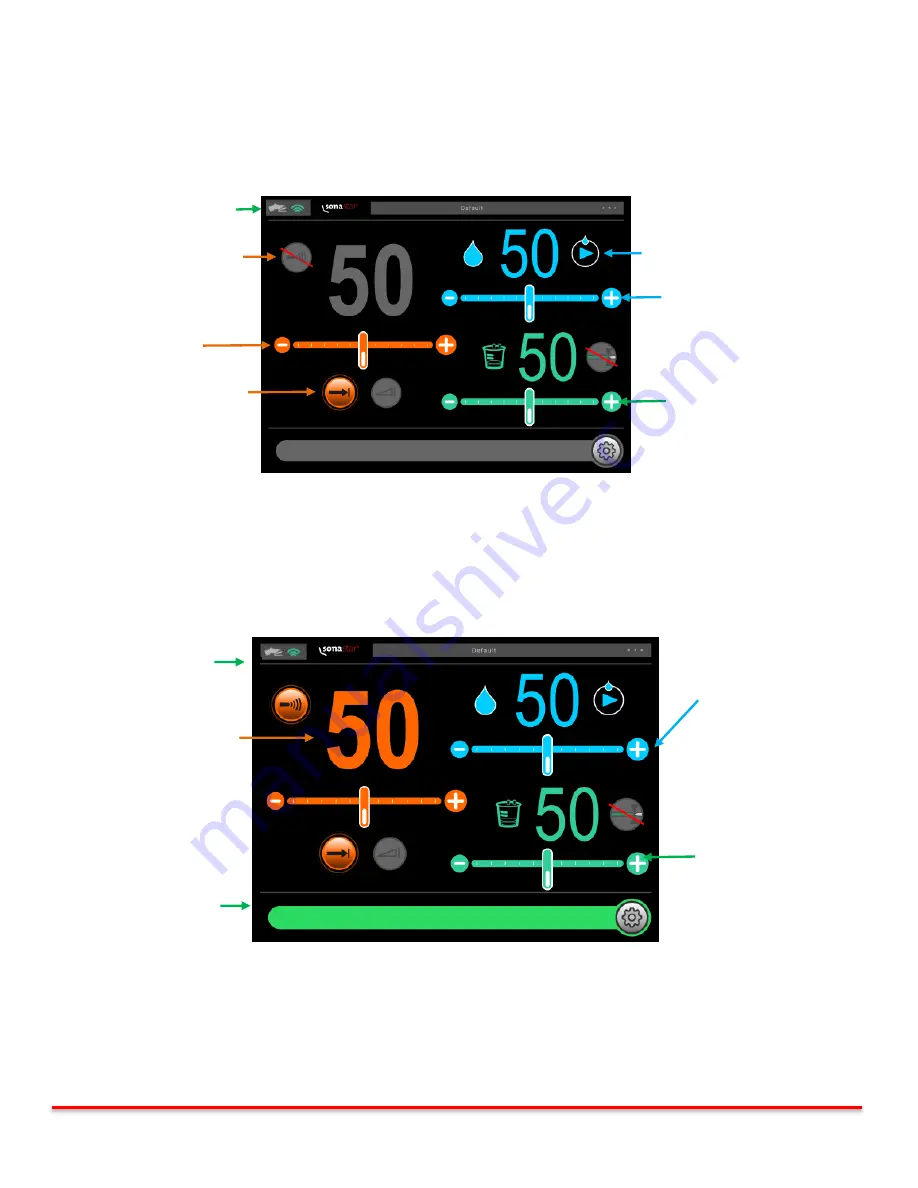
Main Screen with a Sonastar Handpiece
(e.g. SonaStar Short or SonaStar Long)
The Main Screen allows control of the main system functions such as Amplitude, Irrigation Flow and Aspiration.
Information on system status and set points for ultrasound amplitude, irrigation flow rate and aspiration with
respective controls. Additional controls for ultrasound enable/ standby are provided on the display panel.
6.8.1 Default Main Screen with a SonaStar Handpiece
(e.g. SonaStar Short or SonaStar Long)
Figure 6.5.1 Default Main Screen (Sonastar)
6.8.2 Enabling Ultrasound Control with a SonaStar Handpiece
(e.g. SonaStar Short or SonaStar Long)
Pressing the ultrasound Enable button, changes the amplitude setting from grey to orange. In this mode ultrasound is
ready for activation via footswitch. Pressing the foot pedal when the setting is orange activates ultrasound and
irrigation. Pressing the foot pedal when the setting is grey activates irrigation only.
Figure 6.5.2 Main Screen, Sonastar
Ultrasound Enable / Standby
(Grey = Standby)
Fast Flush
Preset / Linear
Aspiration Controls
Footswitch Status Window
Amplitude Controls
Irrigation Controls
Irrigation Control (see 6.4.4):
The flow can be set between 0 and
100. Press + to increase and - to
decrease the flow. The default
setting is 70%.
Footswitch Connected
to Console
Amplitude Control (see 6.4.3):
The amplitude can be set between 0
and 100. Press + to increase and - to
decrease the amplitude. The default
setting for amplitude is 70.
Aspiration Control (see 6.5.5):
The aspiration can be set between
o and 100. Press + to increase and -
to decrease the aspiration. The
default setting is 50%.
Green Ready Status Bar


