www.mirabelleproducts.com
© 2017 Ferguson Enterprises, Inc. 253537 10/09
5
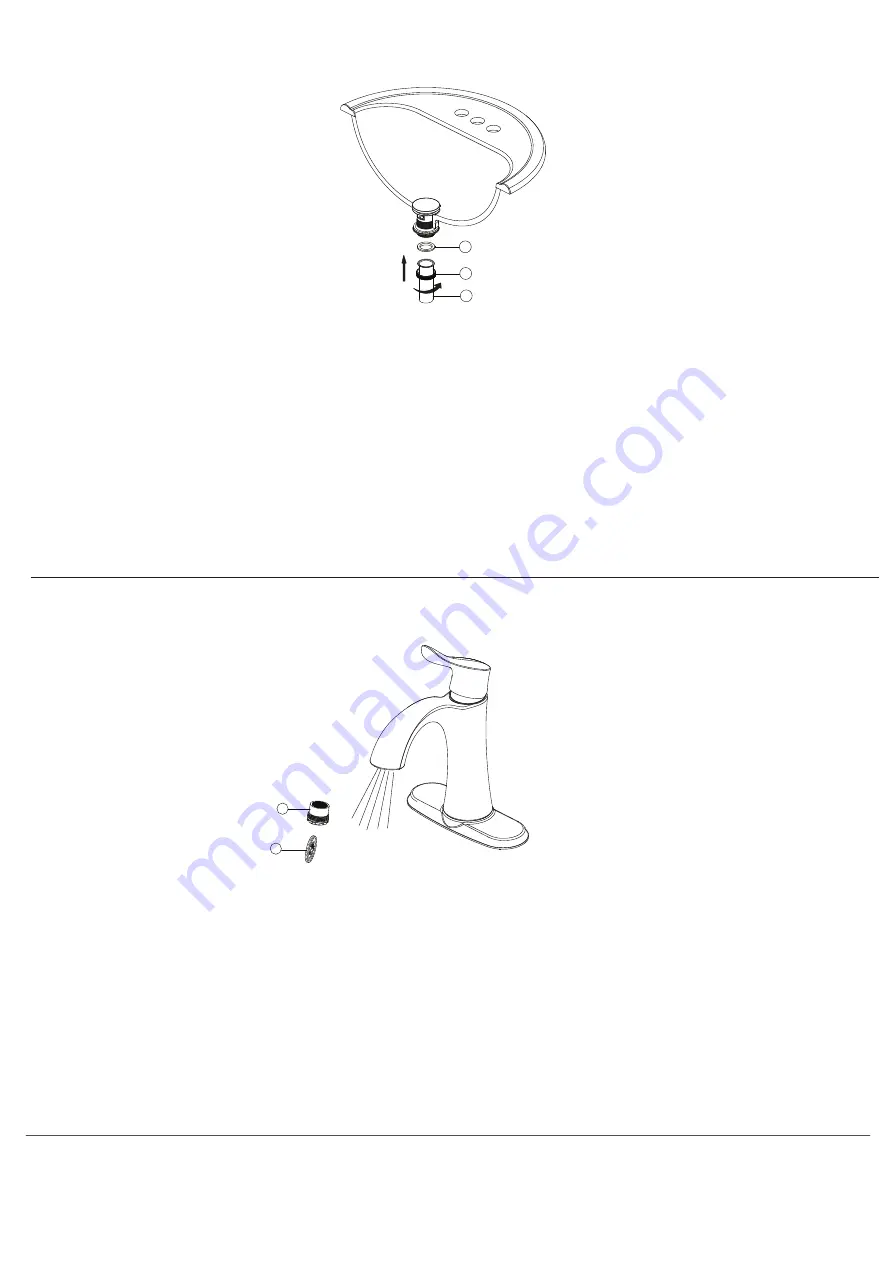
6. Slide the nut (2) over the tail pipe
(3). Place the washer (1) into the nut
and tighten. Do not over tighten.
6. Desliza la tuerca (2) sobre el tubo extensor
(3). Coloca la arandela (1) en la tuerca y aprieta.
No aprietes demasiado.
6. Faites glisser l’écrou (2) sur le tuyau
d’évacuation (3). Placez la rondelle (1) dans
l’écrou et serrez. Ne serrez pas trop.
1
2
3
2
1
7. IMPORTANT: After installation is complete,
remove the aerator (1) with a coin (2) to flush
the water lines. Turn on the water supply and
allow both hot and cold water to run for at
least one minute each. This flushes away any
debris that could cause damage to internal
parts. While the water is running, check for
leaks. Turn off the water and replace the
aerator.
7. IMPORTANT : Une fois l’installation terminée,
retirez l’aérateur (1) à l’aide d’une pièce de
monnaie (2) pour évacuer les conduites
d’alimentation en eau. Ouvrez l'alimentation en
eau et laissez couler l'eau chaude et l'eau froide
au moins une minute chacune. Ceci purge tous
les débris qui pourraient endommager les pièces
internes. Pendant que l’eau coule, vérifiez s’il y a
des fuites. Coupez l’alimentation en eau et replacez
l'aérateur.
7. IMPORTANTE: Cuando la instalación
esté completa, retire el aireador (1) con
una moneda (2) para descargar las líneas
de suministro. Abre el suministro de agua
y deja correr agua fría y caliente durante
al menos un minuto cada una. Esto
enjuagará cualquier suciedad que podría
dañar las piezas internas. Con el chorro
abierto, verifica que no haya fugas. Cierra
el suministro de agua y vuelve a colocar
el aireador.
(FIG.6)
(FIG.7)


