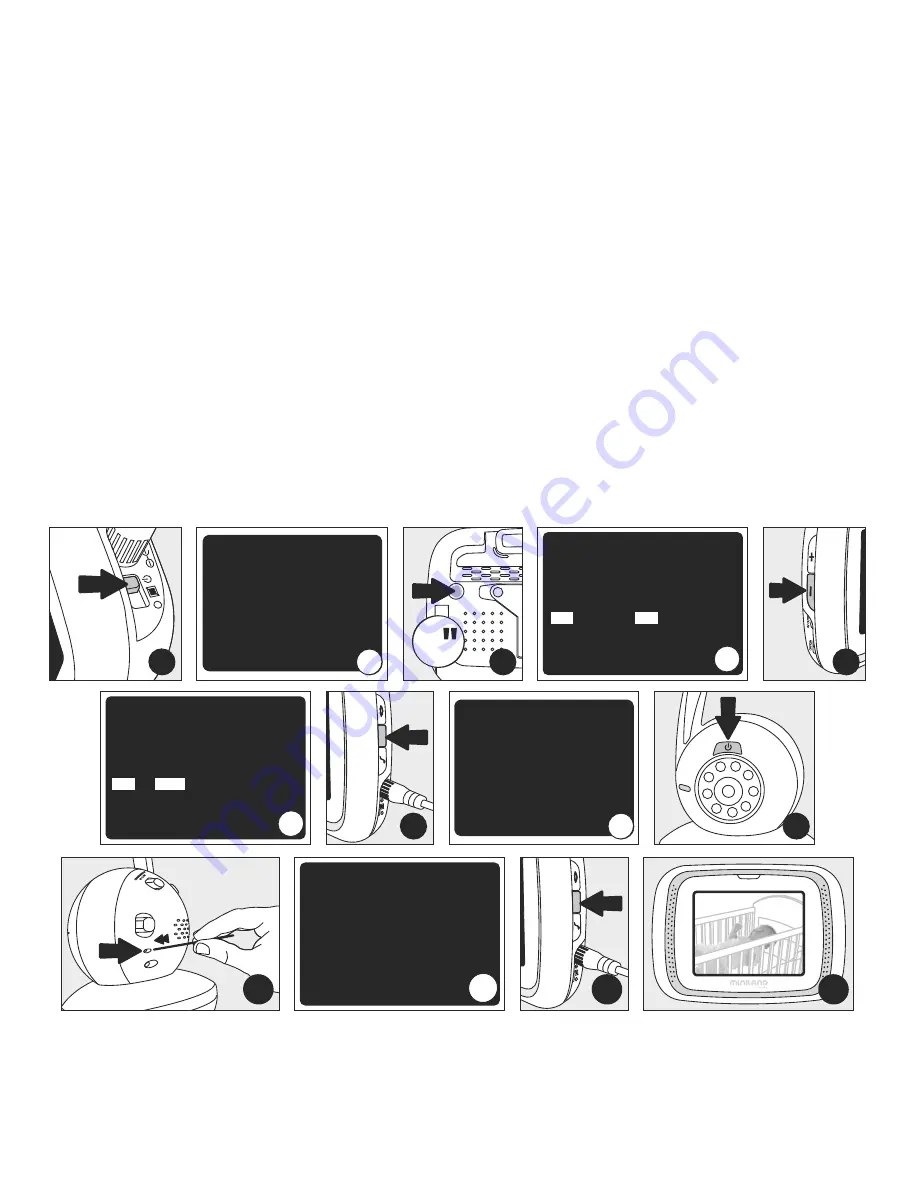
· The Camera unit will make one long beeping sound and the power LED stops flashing,
indicating successful Synchronization, while at the same time the Intercom unit's screen will
show up” PAIRING SUCCEED, CH2 SELECTED. PLEASE PRESS MODE TO
EXIT.” So, Press MODE button, you can see image instantly with CH2 displayed on screen
showing which channel you are in.
· Then Turn ON the NEW Camera. Press and hold the hidden SYNCHRONIZATION button
(10) through the small hole at the back of the Camera using a pin. The Power LED Light will
start flashing, indicating Synchronization process is activated. Remember the Intercom unit
must be ready as above mentioned.
MODE
N
IG
H
T
LI
G
H
T
O
FF
A
U
TO
O
N
MODE
1
NO Signal!
2
3
3
Press CH button to select channel
Press +/‐ button to set
Press MODE button to entry
CH1
CH2
CH3
CH4
EXIT
Pair
Pair
Pair
Pair
Del
Del
Del
Del
Status
NIL
Paired
NIL
NIL
4
5
7
Press CH button to select channel
Press +/‐ button to set
Press MODE button to entry
CH1
CH2
CH3
CH4
EXIT
Pair
Pair
Pair
Pair
Del
Del
Del
Del
Status
NIL
Paired
NIL
NIL
6
9
Pairing...
8
10
Pairing succeed, CH2 selected
Please Press MODE to exit
11
13
12
· Once channel 2 is chosen. Use Adjustment button (+) (-) (18) to choose “PAIR”. Then press
MODE button to lead the whole Intercom unit into Synchronization situation. The screen will
show up “PAIRING...” meaning it is ready to 'match' with new camera.
· Turn the Intercom ON. Keep Push the Channel button (27) at the back for about 3 sec.
Synchronization process is entered. The screen will show up” PRESS CH BUTTON TO
SELECT CHANNEL. PRESS +/- BUTTON TO SET. PRESS MODE BUTTON TO ENTRY.”
Use the channel button to choose the required channel. For example, to choose channel 2.
· For matching more additional camera, select Channel 3 or 4 by pressing Channel button
(27) of the Intercom.
21


