— 2.21 —
Installing the crease roller
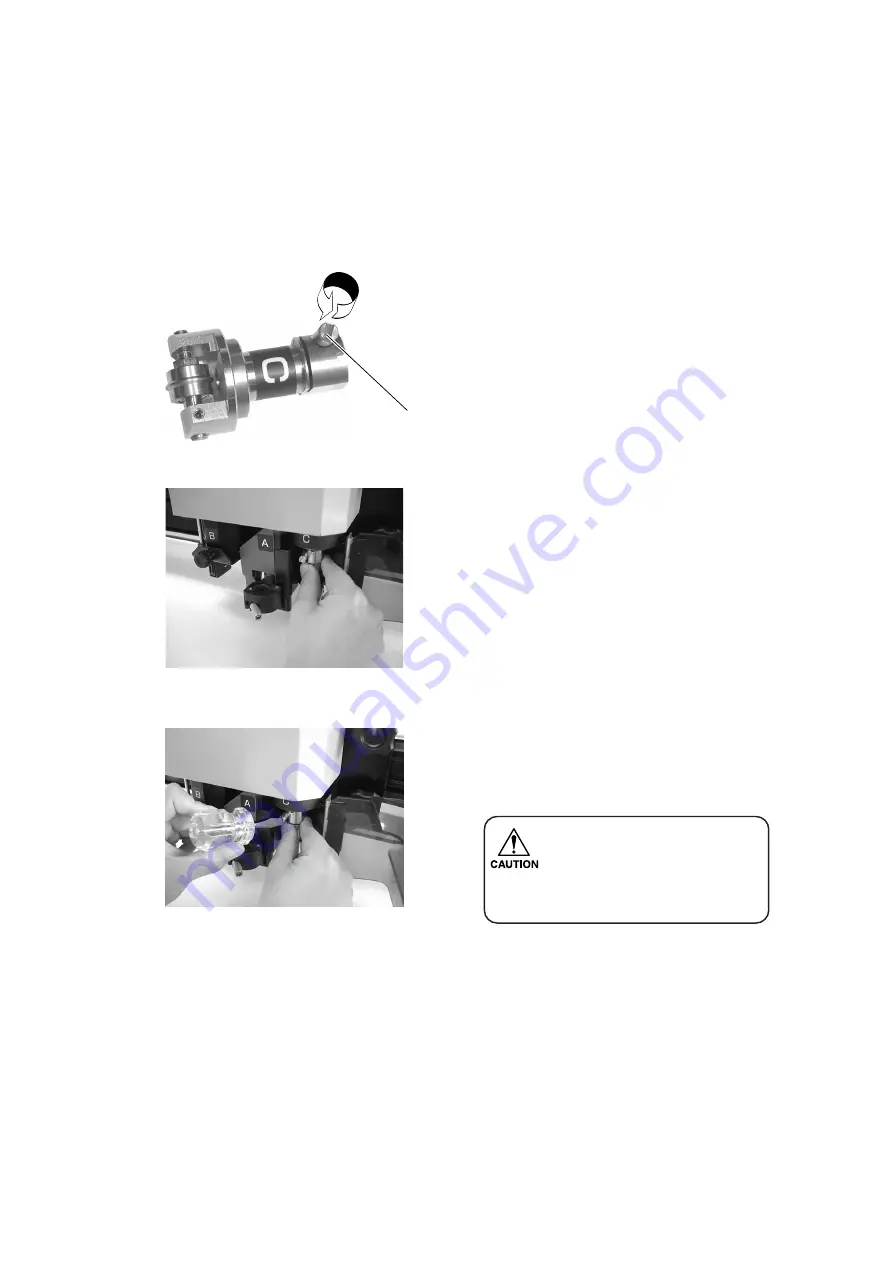
This part is used for the RC head model.
If the head is in the lower position and the crease roller cannot be installed, lift the head. (“Adjust-
ing the height of the head” See page 2.22.)
1
Loosen the stopper screw in the crease
roller.
Turn the stopper screw counterclockwise
to loosen it.
2
Insert the pin of unit C into the mark-
ing roller while fitting the pin in the
groove on the roller.
3
Tighten the stopper screw with the
screwdriver supplied with the device
as an accessory.
• Securely fix the cutter holder.
If the stopper screw is not se-
curely tightened, normal prod-
uct quality cannot be achieved.
Stopper screw
Содержание CF2 Series
Страница 26: ...1 10 Operation panel VACUUM POWER X Y PAGE C E E N D ORIGIN REMOTE LOCAL F1 F2 F3 1 2 3 4 9 8 6 5 7 10 11 12 13...
Страница 48: ...1 32...
Страница 120: ...3 24...
Страница 138: ...4 18...
Страница 176: ...A 12 C OUTPUT SAMPLES Cutting quality 1 Cutting quality 2...
Страница 177: ...A 13 ASCII dump list Sample coated...
Страница 178: ...A 14 Sample E corrugated Sample B corrugated...
Страница 179: ...A 15 Circle cutting R 3 5 10 20 50 100 Parameter dump list R 3 R 5 R 10 R 20 R 50 R 100...
Страница 185: ......
Страница 186: ...D201402 1 30 16062008 MIMAKI ENGINEERING CO LTD 2008 EM FW 2 50...


