


3
Replace
Probe
Clean
Probe
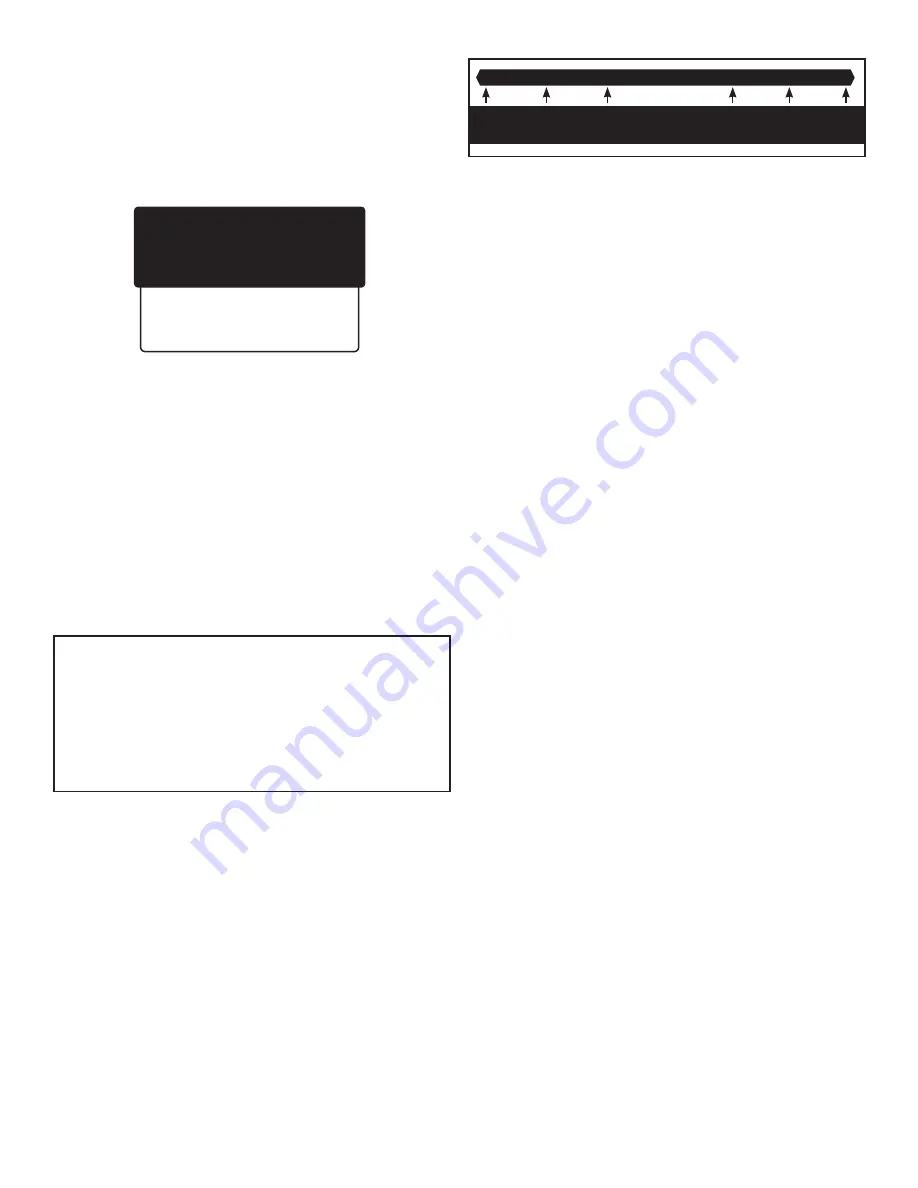
Acceptable Slope
Performance
Probe
Clean
Probe
Replace
Probe
Setting Calibration Points
Menu Button>pH>pH Calibration
Before selecting calibration point(s), you may want to review the
**Last Calib./GLP** screen. Scroll down to the “Last Calib./GLP” option
and press
SELECT. (Menu Button>pH>pH Calibration>Last Calib./
GLP)
The **Last Calib./GLP** screen will then give you the date and
time of the last calibration; indicate 1, 2, or 3 point calibration; and
give you the calibration points, as shown below.
In accordance with GLP (Good Laboratory Practices), you can
scroll down on this screen to view Acid Slope and Base Slope
once calibration is complete.
1) On **pH Calibration** screen, select 1, 2, or 3 point calibration.
2) Depending on your selection, the **1 Pt Calibration**,
**2 Pt Calibration**, or **3 Pt Calibration** screen will appear.
Each of these screens lists the calibration points - various
combinations of 4.01, 7.01, and 10.01. Place the cursor beside
your desired point or combination of points and press SELECT.
As an example, if you select 2 Point Calibration, a new screen
will appear listing 7.01 & 4.01 Calib and 7.01 & 10.01 Calib. If
you SELECT 7.01 & 4.01 Calib, another screen will appear which
will take you through the calibration process.
•
You will be instructed to “Place probe in 7.01 calibration
solution. Press Select.”
•
A “Please Wait...” message will appear on screen.
•
Once the probe calibrates in the 7.01 solution, you will then
be instructed to “Place probe in 4.01 calibration solution.
Press Select.”
•
Once the probe has calibrated in the 4.01 solution,
calibration is complete.
Using Acid/Base Slopes
to Assess pH Probe Performance
In addition to displaying date, time, number of calibration
points and specific points, the **Last Calib./GLP** screen
provides readings for Acid Slope and Base Slope. Slopes are
given as percentages and tell you how closely your freshly
calibrated pH probe is reading as compared with an “ideal”
probe.
A new probe can get very close to “ideal” probe readings, but
with aging and coating becomes less accurate. The following
graph shows the acceptable range and indicates what should
be done if the reading falls outside this range. If your probe is
good in one range (acid or base), but bad in the other, it should
be replaced.
90% 95%
102% 105%
A 3-point calibration will always give you an acid and a
base slope: however, when using 1- or 2-point calibration,
depending on points chosen, you may get an acid OR a base
slope reading. In this case, the other reading will show as a
default 99.9.
pH Probe Diagnostic
Menu Button>pH>pH Probe Diagnostic
pH probes have a limited lifetime and must be replaced
periodically to maintain accurate readings. If you suspect
incorrect readings, work your way to the pH Probe Diagnostic
screen. Press SELECT. Follow instructions on the screen and
the unit will run a diagnostic test, then a message will appear
on the screen, such as “Probe or solution is bad!” Replace
your solution, run diagnostic again, and if you get the same
message, replace the probe.
Setting up the pH Controller
The purpose of a pH controller is to constantly monitor the pH
level of a solution and to activate a dosing device when the
level strays from the setpoint. In most situations, pH levels tend
to stray either up or down, too alkaline or too acidic, but not in
both directions. The DL122 may be set to detect readings either
ABOVE or BELOW the setpoint.
This requires two settings:
• the setpoint, and
• whether the controller activates the device when the
reading goes ABOVE the setpoint or BELOW the
setpoint
Setting the pH Setpoint & Activation (Below
or Above)
Menu Button>pH>pH Controller
1) Using the breadcrumbs above, work your way to the *pH
Control Setup* screen.
2) The cursor should be at “pH Setpoint: **.**”. If a pH setpoint
has previously been set, it will appear on the screen. If this is
the setpoint you want to keep, you can “Exit” the screen or
press the Menu button to return to the primary display screen.
3) If, instead, you want to enter a new setpoint, press SELECT.
4) On the new screen, using the keypad arrows, select your
desired pH setpoint and press SELECT.
5) The SAVED! screen will appear for a few moments and the
*pH Control Setup* screen will reappear. Now scroll to the
“Activate” line and press SELECT.
6) This screen allows you to set the activation for Below or
Above. Make your selection using the up or down arrows on
the keypad, press SELECT and the SAVED! screen will appear.
Setting the pH Alerts (Caution and Critical)
The DL122 is designed to efficiently monitor and maintain the
pH value of a solution. If the pH level strays from the setpoint, the
** Last Calib./GLP **
O5/04/15 9:25
2 Point Calibration
7.01 & 4.01
Acid Slope: 000.0
Base Slope: 000.0
>Exit


