background image

P A G E  36

C O D E 

G R I P  

f o r  P I C  M C U s

   U S E R  M A N U A L

PO

WER

5.3 POWER

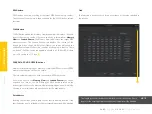
5.3.1 Outputs

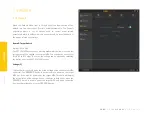
When the 

Outputs Menu item

 is clicked, the Menu item section will be 

divided into two subsections: Controls and Measurements. The Controls 
subsection offers a set of options used to control power-related 
parameters, while the Measurements subsection offers visual feedback of 
the power-related parameters. 

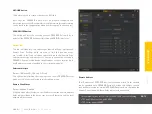
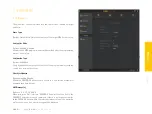
Board & Target Switch

Options:

 0V to 3.3V

The 

SET VOLTAGE

 button opens a dialog window which allows to set up the

voltage that will be applied to the target MCU. The voltage can be set from
0 to 3.3V in 0.1V steps. Once set, the voltage can be applied by switching 
the button next to the 

SET VOLTAGE

 textbox.

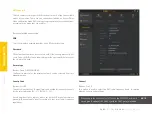
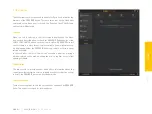
Voltage (V)

This text field is used to display the actual voltage value on the target MCU 
connector. The CODEGRIP device is not only able to power up the target 
MCU, but it can also be powered by the target MCU. This field will display 
the actual value of the voltage on the connector in both cases: when the 
CODEGRIP device is used to power the target MCU, and when connected 
host board provides power to the CODEGRIP device.

Содержание CODEGRIP FOR PIC

Страница 1: ...P A G E 1 C O D E G R I P f o r P I C M C U s U S E R M A N U A L U S ER MAN UAL for PIC MCUs...

Страница 2: ...te debugger and programmer over USB WiFi solution for embedded development Elegant on the surface yet extremely powerful on the inside we have designed it to inspire outstanding achievements And now i...

Страница 3: ...indicators 13 3 CODEGRIP Link structure 14 2 1 Link types 14 2 2 Link states 14 4 CODEGRIP Suite overview 16 4 1 Menu section 17 4 2 Menu item section 17 4 3 Shortcuts bar 17 4 4 Status bar section 1...

Страница 4: ......

Страница 5: ...y and USB C connector the task of programming of various PIC based microcontrollers becomes seamless and effortless providing users with both the mobility and the complete control over the microcontro...

Страница 6: ...CODEGRIP Suite 2 Select the destination folder 1 Start the installation The installation process is easy and straightforward Download CODEGRIP Suite software application from the link www mikroe com s...

Страница 7: ...G E 7 C O D E G R I P f o r P I C M C U s U S E R M A N U A L 6 Start the installation process 5 Select the start menu shortcuts I N STALLAT ION 7 Installation progress 8 Finish the installation proc...

Страница 8: ...nalities include wireless programming and debugging power monitoring and more The CODEGRIP device comes in two different types as a stand alone device and an integrated on board module This manual wil...

Страница 9: ...usage scenarios currently not available on any other programming debugging solution in the world The WiFi connectivity option offers a complete autonomy of the development system Running a toxic gas...

Страница 10: ...rmware upgrade process is effortless and easy On the bottom of the CODEGRIP device there is the sticker which contains additional information Supported MCU family architecture Unique serial number Uni...

Страница 11: ...bugging headers may vary across different hardware applications To ensure compatibility with various header configurations there is a set of different adapters available as an additional purchase opti...

Страница 12: ...C O D E GRIP...

Страница 13: ...ce is in the bootloader mode Steady ON LED state indicates the normal operation of the CODEGRIP device DATA Indicates the data transfer between the target MCU and the CODEGRIP device 2 5 LED indicator...

Страница 14: ...d the WiFi link Each link has several different states recognized by the CODEGRIP Suite The link is Closed the CODEGRIP device is not available over the communication interface USB or WiFi Either it i...

Страница 15: ......

Страница 16: ...which are used to display and organize all information tools and options in a consistent and comprehensible manner Besides the very informative Help system CODEGRIP Suite also offers a short descript...

Страница 17: ...e only Menu item that does not include the Shortcuts bar is the Programming Menu item since all the shortcut commands are already included there Icons on the Shortcuts bar are used to speed up the wor...

Страница 18: ...highlight it yellow indicating that it is clickable Two actions will be performed when clicking the message in the Selected Device field If the message None is displayed the Scanning Menu item will b...

Страница 19: ...ides detailed information on these tools and options 5 1 Target MCU Menu items used to interact with the target MCU the selected MCU upon which the CODEGRIP device performs various programming debuggi...

Страница 20: ...g section 5 1 1 Programming The Programming Menu item displays all the commands parameters and other information related to the programming process itself When the Programming Menu item is clicked a q...

Страница 21: ...s used to verify the MCU RESET button RESET button will perform a reset of the target MCU WRITE button WRITE button performs programming of the target MCU It will upload the program from the loaded so...

Страница 22: ...tab displays the content of the loaded bin or hex source file Note that if there is no source file loaded the Loaded Source tab will reflect this condition by changing its label to File is not loaded...

Страница 23: ...ynamically filter the MCU list showing only the MCU names containing the characters typed so far Protocol Options ICSP EJTAG This dropdown menu is used to select the programming protocol Speed Options...

Страница 24: ...extboxes used to define the minimum and the maximum value for the range MCUs with the flash memory capacity outside of the Flash Size range will be hidden from the search list The RAM Size kB field wo...

Страница 25: ...Dark or Light it s your choice...

Страница 26: ...en there is more than one device connected to a host PC The user can modify the device name Serial number This is a unique serial number associated with the CODEGRIP device Every device has its own se...

Страница 27: ...om the Remote Address fields will be included in the device scan process Otherwise only the local network will be scanned For communication over WiFi interface CODEGRIP runs the following TCP and UDP...

Страница 28: ...be changed 5 2 2 Configuration When Configuration Menu item is clicked a set of four tabs will be displayed in the Menu item section Device General WiFi General WiFi Mode and Licenses each with its ow...

Страница 29: ...been activated and are in use The Available Licenses subsection displays all licenses currently available for purchase The license activation process itself is explained in the in the chapter 5 2 3 Li...

Страница 30: ...dule can be enabled or disabled by selecting an option from this dropdown menu The Enabled option will enable the integrated WiFi module allowing it to be used The Disabled option will disable the int...

Страница 31: ...disabled by unchecking the checkbox next to the Filter MAC Address field Signal Level dBm This field displays the strength of the WiFi network signal in dBm Values around 60dBm are considered as good...

Страница 32: ...ent is required to provide a password that matches the string in this field Secure type Options Open WEP WPA WPA2 The Security protocol of the wireless network can be selected from this dropdown menu...

Страница 33: ...ty protocol used on a WiFi network to which the connection is attempted IP Settings Options Use following static IP addresses Obtain IP address automatically Use following static IP addresses allows t...

Страница 34: ...activate it User Information subsection Name A user name can be entered in this field Email An email address can be entered in this field Only a valid email address format is accepted Repeat Email Th...

Страница 35: ...n is used to add a new registration code Clicking this button opens a new dialog window that allows the registration code to be entered When a valid code is entered it can be confirmed and stored by c...

Страница 36: ...opens a dialog window which allows to set up the voltage that will be applied to the target MCU The voltage can be set from 0 to 3 3V in 0 1V steps Once set the voltage can be applied by switching th...

Страница 37: ...mplete Verification Type Options Readback Verify by Readback compares the content of the program memory with the source hex or bin file content CheckforUpdates Options Disabled Enabled If Enabled CODE...

Страница 38: ...out the CODEGRIP along with the CODEGRIP Suite update and firmware update tools 5 5 1 About By clicking on About Menu item some general information that covers the current version of the release the d...

Страница 39: ...e bottom is clicked CODEGRIP Suite will check if there is a more recent version available A new window will pop up displaying whether the CODEGRIP Suite is up to date or there is a new version availab...

Страница 40: ...MCU connected to the CODEGRIP device File not verified The content in the MCU flash differs from the contents of the source file Make sure the MCU is not read protected WW Operation failed VERIFY REA...

Страница 41: ...ODEGRIP device has already been licensed for feature corresponding to Registration Code Device doesn t support license You may have purchased the Registration Code that is not suitable for your device...

Страница 42: ...Time saving embedded tools...

Страница 43: ...oduct even if MikroElektronika has been advised of the possibility of such damages MikroElektronika reserves the right to change information contained in this manual at any time without prior notice i...

Страница 44: ...m If you are experiencing some problems with any of our products or just need additional information please place your ticket at www mikroe com support If you have any questions comments or business p...

Отзывы: