


UK
26
www.midlandeurope.com
closed after 40 seconds. If needed you can close the intercom manually without waiting
40 seconds (just press the middle button).
If needed, you can disable the VOX feature simply by pressing the Backward button for
7 sec. A voice announcement will advise you when the VOX is disabled. To turn the VOX
on again, just press the same button and a voice announcement will advise you that the
VOX is now active. This setting is remembered also if you turn off the unit.
Attention: The Voice activation (VOX) can open the intercom communication only to the
unit that was paired with the Middle button. If you choose to use a different button (Forward
or Backward ), you will be able to active the intercom only manually
.
Adjusting the volume
Your Midland BTNEXT PRO uses AGC technology, which automatically adjusts the li-
stening volume in relation to background noises.
However, it is also possible to manually adjust the volume by means of the “”
and “Volume -“buttons. The volume setting is indipendent for each audio source:
intercom, stereo music, phone call, FM radio.
Attention: volume can be adjusted only when an audio connection is active.
Set up of the AGC system
To adjust the sensitivity of the AGC system you can use the ”BT UPDATER” Pc Softwa-
re or the smartphone “BT SET-APP” application. You can choose different set up based
on your motorbike type (naked, touring, sport) or if you are riding as a passenger. You can
disable the AGC system pressing “” and “Volume -” togheter for 3 sec.
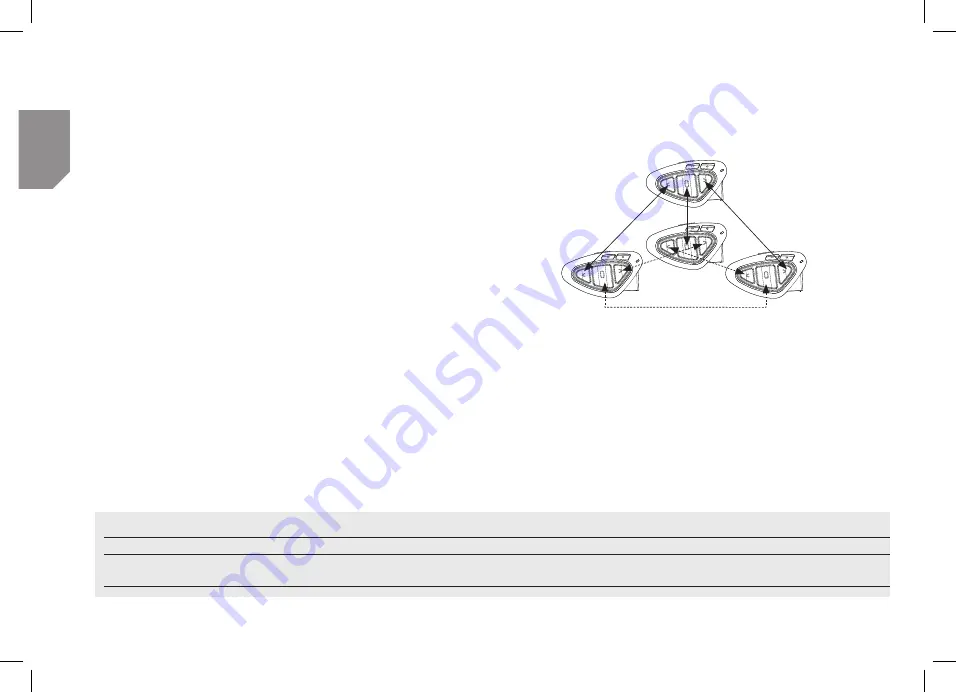
How to pair the Midland BTNEXT PRO to more than two units
One Midland BTNEXT PRO unit can be paired to maximum five other BT units, that
means six in total (3 Midland unit + 2 Ta yourself).
The Midland BTNEXT PRO has three main buttons (Forward, Middle and Rear). It is up to
you which button to use to pair and activate the intercom, you are totally free to choose the
button you like more. The same button you will use to pair the unit will be also used to activate
the intercom communication. Remember that each device can always be paired with other
3 units at your choice; as shown in the picture here below, also ‘crossed’ pairing can be done.
Rider 1
Rider 2
Rider 3
Passenger 1
For example you can decide to pair one motorbike rider unit to the Forward button, your
passenger to the Middle button and another rider to the Rear button.
In this way you can have in total 4 units paired together and talk to each person, one by
one, simply by pressing the corresponding button (the same used for the pairing). Every
time you open the intercom connection to one person, the previous connection will be
closed. The connection is not a “chain”, when two persons are talking it is not possible to
break (interrupt) the communication by one of the other two units.
Pair the Midland BTNEXT PRO to another Midland BTNEXT PRO unit
To pair the Midland BTNEXT PRO to another Midland BTNEXT PRO unit, you must first
enter the setup mode:
A- Manual activation
Mode
Forward button
Middle button
Rear button
Intercom
Short press:
Open/Close intercom to paired raider
Short press:
Open/Close intercom to paired raider
Long press:
Change mode
Short press:
Open/Close intercom to paired raider
Long press:
Toggle on/off wired
Содержание BTNEXT PRO
Страница 21: ...www midlandeurope com...


