Midland BTNEXT PRO Скачать руководство пользователя страница 16

UK

34

 www.midlandeurope.com

To exit the “Setup” mode, double click the “Middle” button. 

FM Radio with intercom

When you are in “FM Radio” mode it is not possible to manually open the intercom, you 

can only open it using VOX feature (just talk) to the unit paired on the “Middle” button. To 

manually activate the intercom you must switch to “Intercom” mode.

FM Radio in background

It is not possible to have the FM radio along with other audio sources. Any 

active audio such as Intercom or coming from the VOL+ or VOL- connection, 

will pause the FM radio.

Wired audio input

Your Midland BTNEXT PRO can be connected to a wired audio source, like an iPod (or 

any other MP3 Player).  

Listening to music

To listen to music from the wired input, connect the audio source using the optional AUX 

cable. The volume buttons (Vol + and Vol -) can be used to adjust the volume of the wired 

audio source (but not independently from the Intercom Volume). The AGC system will 

automatically increase the volume on higher speed.

Attention: never set the volume of the MP3 Player to the maximum possible. Normally the 

best level is about the 70% of the maximum.
Hint: We recommend that you perform a few tests adjusting the volume of your iPod/MP3 

player so at the normal speed the Headset volume is suited to your needs. The AGC system 

will automatically increase the volume on higher speed, so you don’t need the VOL+ or VOL- 

buttons to adjust it. 

Enabling/disabling the wired input

If needed the wired input can be enabled or disabled:

Enabling/Disabling: Make a Long press (3 sec.) on the “Forward” and “Middle” buttons 

(you will hear one audio beep tone for enabling confirmation and two audio beep tones 

for disabling). This setting is rembered also after turning On/Off the unit.

Wired audio in background

The audio from the wired connection can be in background to your Intercom or Phone 

communication. By default this option is ON. Please refer to the paragraph “Wired con-

nection always in background” below to disable it.

Note that is not possible to have the wired audio source in background to the FM radio.

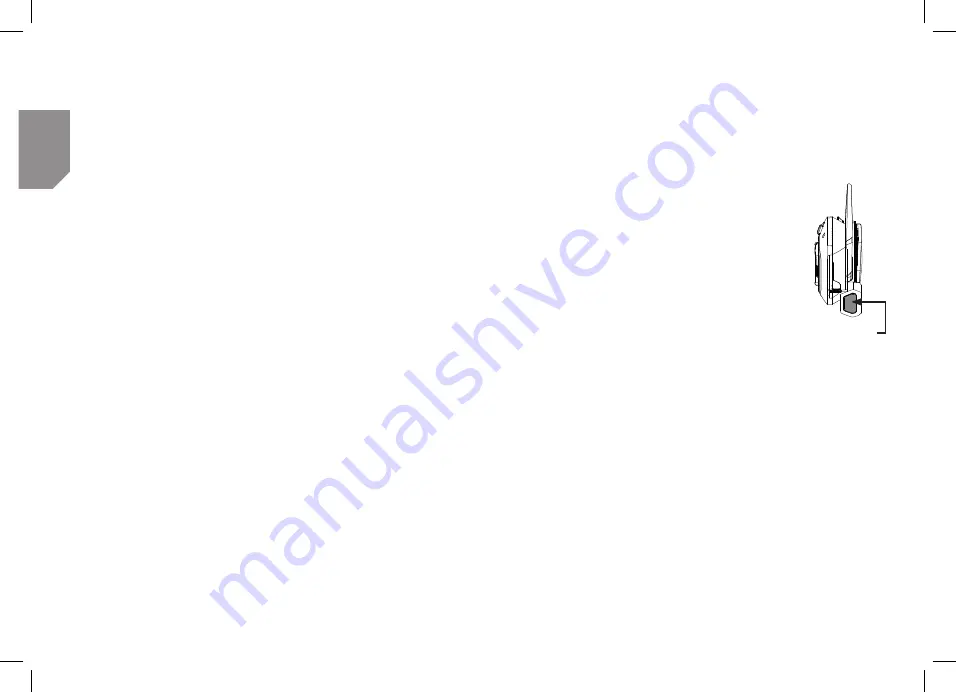
Emergency Stop light

On the back of your BTX1 PRO mounting kit you have an ultra bright 

LED emergency stop light. Every time you make a full brake, the 

stop light will turn ON to give an extra alert to the drivers behind 

you. In case you need to turn it OFF temporarily (for example 

when you ride with a passenger), just press long “Backward” and 

“Forward” button together while in “Phone” or “Intercom” mode 

(a voice announcement will confirm the status). The unit will re-

member the last setting used, that mean you need to turn ON 

manually the stop light pressing again “Backward” and “Forward” 

button togheter. 

Attention: By default the stop light is OFF

Setup and special configurations

Resetting all paired devices

Sometimes you may find it necessary to delete all the pairing references stored in the 

Midland BTNEXT PRO unit (reset operation).

To perform this operation you must first enter the setup mode:


Turn off the unit


Press and hold down the “Middle” button about 7 sec., until the Red light is on per-

manently. 


Then simultaneously press and hold down the “” and “Volume –“ buttons for 

3 seconds. The Blue Light will be lit on for 1 sec and then back to steady RED.


Double click on the “Middle” button to exit the “Setup” mode and use the Midland 

BTNEXT PRO.

This procedure deletes all the paired Bluetooth devices stored in the memory and it is 

Stop Light

Содержание BTNEXT PRO

Страница 1: ...DUAL CORE INTERCOM SYSTEM BTNEXT PRO MANUALE D USO INSTRUCTION GUIDE BEDIENUNGSANLEITUNG MANUAL DE INSTRUCCIONES GUIDE D UTILISATION MANUAL DE INSTRU OES...

Страница 2: ...O units 25 Set up of the AGC system 26 Conference mode with one Bluetooth device on VOL 28 Talk 2 All Universal Intercom with different brand unit 29 Compatibility with Midland BT line units 29 Pairin...

Страница 3: ...d the package contains the following parts Midland BTNEXT PRO single 1 BTNEXT PRO communication unit 1 Slide in mounting kit with two stereo speakers 1 microphone with boom and 1 wired microphone 1 pl...

Страница 4: ...rge you should turn the device on with the plug already inserted Unit and fixing system description BTNEXT PRO description The BTNEXT PRO has five buttons on the front the main three big button are mu...

Страница 5: ...of the Slide in mounting kit The Midland BTNext PRO can be fixed onto the helmet installing the slide in mounting kit in two different ways By either using the plate with bi adhesive strip or the scre...

Страница 6: ...ing clip and push the unit upwards A Unlock Lock Switching ON and OFF your Midland BTNEXT PRO Switching the unit on Press and hold Middle button for approximately 3 seconds until the BLUE indicator li...

Страница 7: ...lied in the same Midland BTNEXT PRO box are already paired and ready to use this means you don t need to perform this procedure The units are already paired using the Middle button If the devices are...

Страница 8: ...essing Volume and Volume togheter for 3 sec How to pair the Midland BTNEXT PRO to more than two units One Midland BTNEXT PRO unit can be paired to maximum five other BT units that means six in total 3...

Страница 9: ...tion will be open see Table A Voice activation VOX The voice activation feature can open the intercom only to the unit paired to the Middle button Hint this feature is very useful when you have a spec...

Страница 10: ...d BWD buttons to allow the full communication of the four units together One Click Talk function When the conference mode is active is possible to open the conference communication to all the 4 users...

Страница 11: ...ow flashing Now you can release the button Talk2All Universal Intercom Not Midland Unit Talk2All Universal Intercom Midland Unit paired as a phone Passenger On the other intercom not Midland brand fol...

Страница 12: ...r if it must be private private To share the audio from Vol with the intercom long press the Vol button the voice will tell you public To keep the audio from Vol private long press the Vol button agai...

Страница 13: ...n for 3 seconds in order to redial the last number you will hear one audio confirmation tone To make a voice call Phone on Vol Briefly press Forward button If your mobile phone supports voice calls yo...

Страница 14: ...uttons available Only Play Pause is available with double click on the Middle button Music Share Music Share is possible only from the phone paired on the VOL button To start sharing your A2DP music w...

Страница 15: ...htothe FMRadio mode in order to use it Long press the middle button until you hear FM radio from the voice announcement Now all the three main buttons are dedicated to the FM Radio See Table C Press s...

Страница 16: ...or enabling confirmation and two audio beep tones for disabling This setting is rembered also after turning On Off the unit Wired audio in background The audio from the wired connection can be in back...

Страница 17: ...d light changes to a steady blue 5 Now press Volume or Volume to increase or reduce sensitivity Every time you press the Volume buttons the RED light will flash for confirmation When you reach the end...

Страница 18: ...d Using this device at a high volume may result in permanent hearing loss If you experience ringing in your ear or any other hearing related pain reduce the volu me or discontinue using this device Wi...

Страница 19: ...All articles displaying this symbol on the body packaging or instruction manual of same must not be thrown away into normal disposal bins but brought to specialised waste dispo sal centres Here the v...

Страница 20: ...INTERNATIONAL srl Via R Sevardi 7 42124 Reggio Emilia Italy Read the instructions carefully before installation and use Vertrieb durch ALAN ELECTRONICS GmbH Daimlerstra e 1K D 63303 Dreieich Deutschl...

Страница 21: ...www midlandeurope com...

Отзывы: