


9
42" PLASMA DISPLAY
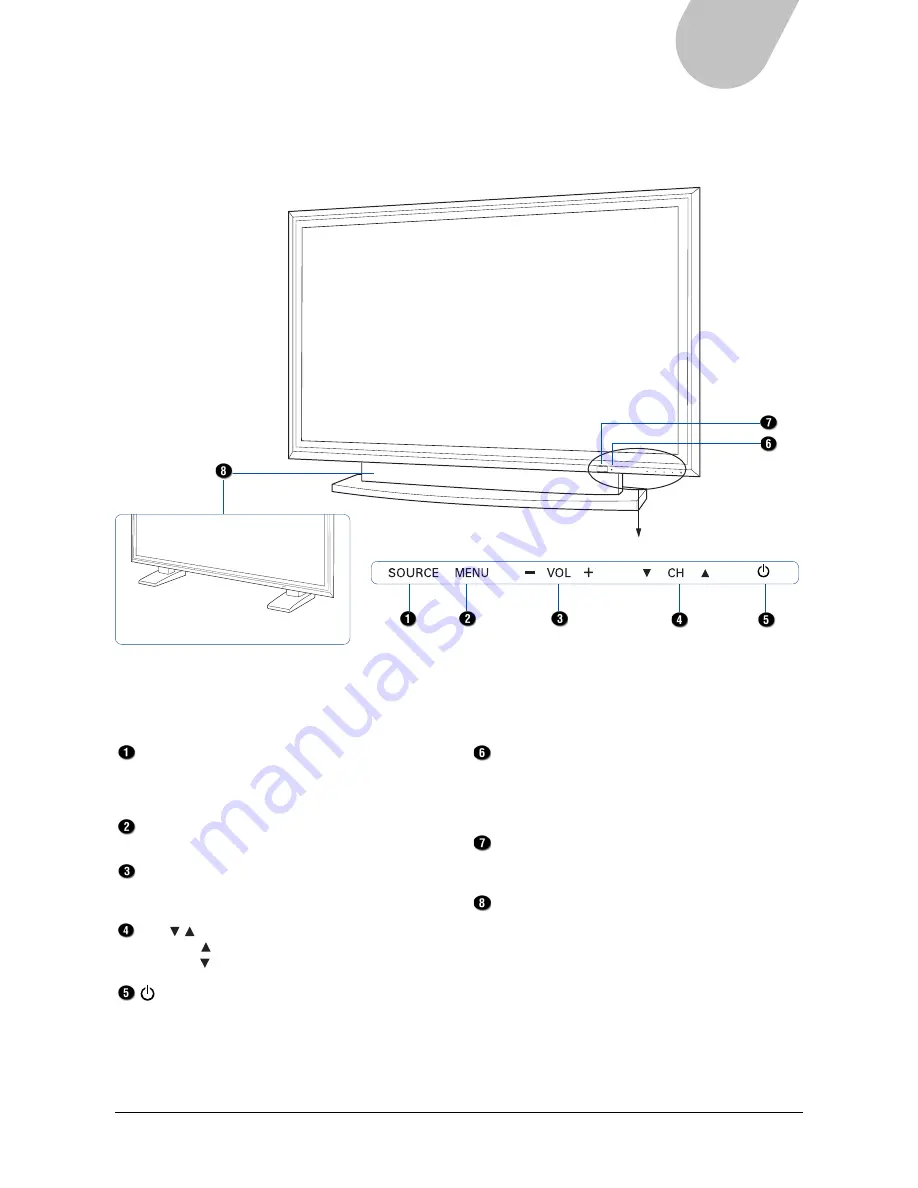
Front View
The following illustration shows the components on the front side of the PDP.
CH
VOL
MENU
SOURCE
Power indicator
Indicates when the power is on.
Standby state — Red
Operating state — Green
Warm up state – Orange
IR receiver
Point the remote control at the IR (Infrared Remote)
receiver to operate the PDP.
Base unit
*
SOURCE button
Press this button to switch between source signals:
HDTV (YPbPr), S-Video 1, Video 1, TV1
YCbCr, S-Video 2, Video 2, and TV2 (optional)
MENU button
Press this button to open the on-screen menu.
VOL (–/+) button
Press VOL+ to increase the volume.
Press VOL – to decrease the volume.
CH ( / ) button
Press CH to increase the channel number.
Press CH to decrease the channel number.
(Power/Standby) button
Press this button to turn on the PDP or switch the
PDP to standby mode.
* The base unit you receive will depend on the
configuration of the PDP purchased.
Содержание MHP1
Страница 1: ...PLASMA DISPLAY USER MANUAL www microtek com www microtek com MHP1 HD...
Страница 48: ...48...


