background image

Chapter

2

The 1600T in Action - Simple Examples

2-2

Getting Started With Visionscape® Smart Camera

v3.7.3, Mar 2009

Icons

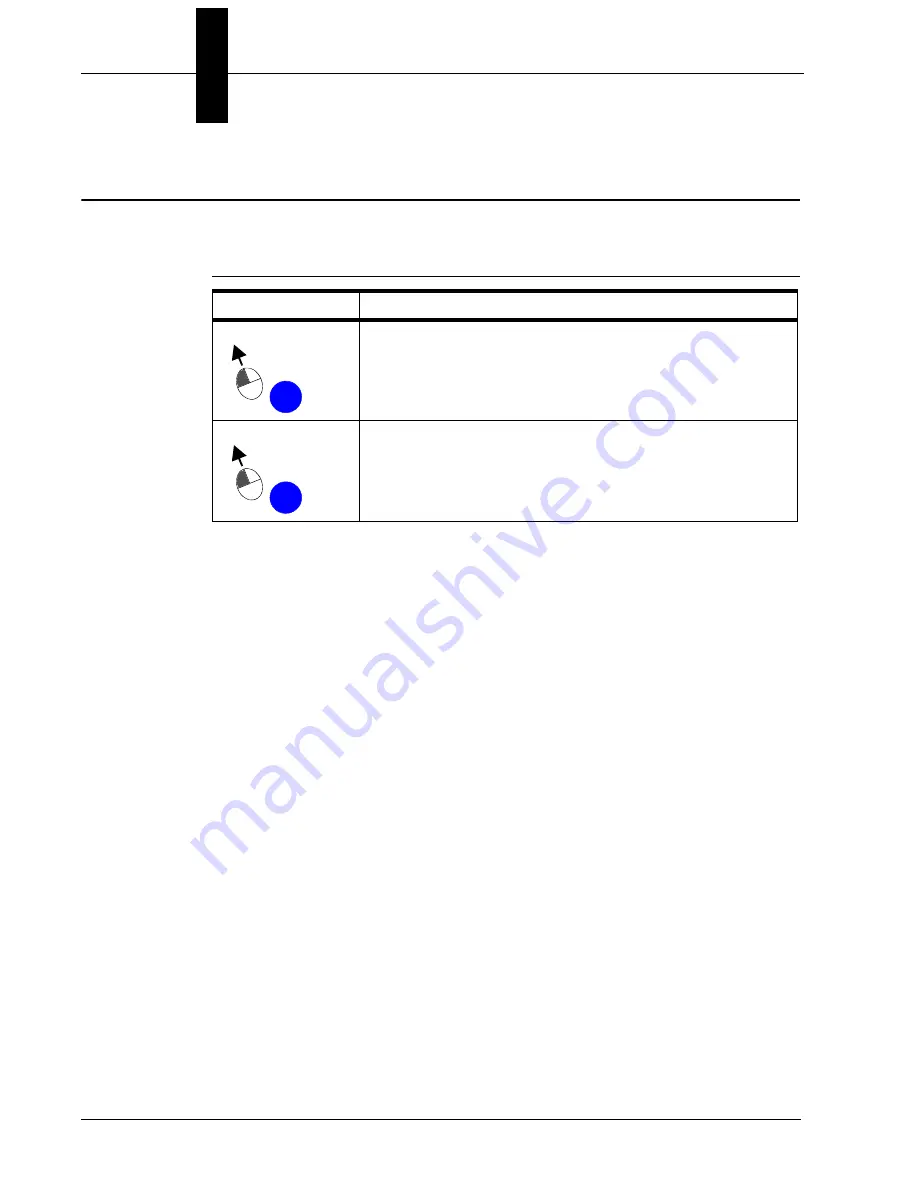
Table 2–1 describes the icon used in this chapter:

TABLE 2–1.

Icons and What They Mean

Icon

What It Means

This is step #1 of a procedure.

Click the left mouse button.

This is step #2 of a procedure.

Click the left mouse button.


1


2

Содержание Visionscape HE1600T

Страница 1: ...Getting Started With Visionscape Smart Camera HE1600T EM 40265 1V373 v3 7 3 Mar 2009 ...

Страница 2: ...1214 Fax 65 6846 4641 Microscan Limited Warranty Statement and Exclusions What Is Covered Microscan Systems Inc warrants to the original purchaser that products manufactured by it will be free from defects in material and workmanship under normal use and service for a period of one year from the date of shipment This warranty is specifically limited to at Microscan s sole option repair or replacem...

Страница 3: ...ird party for any special incidental or consequential damages including without limitation indirect special punitive or exemplary damages for loss of business loss of profits business interruption or loss of business information whether in contract tort or otherwise even if Microscan Systems Inc has been advised of the possibility of such damages Microscan Systems Inc s aggregate liability with re...

Страница 4: ......

Страница 5: ...scape Smart Camera for the First Time 1 1 Establishing a Network Connection Making a FrontRunner Device Button for Your Camera 1 1 Creating a New Job to Acquire Images 1 5 CHAPTER 2 The 1600T in Action Simple Examples 2 1 Icons 2 2 Simple Blob Tool 2 3 Simple Flaw Tool 2 12 Simple Fast Edge Tool 2 18 Simple Data Matrix Tool 2 34 Training Tools 2 39 Where To Now 2 40 ...

Страница 6: ...tting Started With Visionscape Smart Camera v3 7 3 Mar 2009 CHAPTER 3 The 1600T in Action Advanced Example 3 1 Advanced Example Using Multiple Tools 3 2 Input Datums 3 2 Procedure 3 2 Where To Now 3 20 Index Index 1 ...

Страница 7: ...onfidently Please don t be intimidated by the size of this Getting Started manual It contains a large number of images that will help you as you create new Jobs using the tutorials Manual Conventions The following typographical conventions are used throughout this manual Items emphasizing important information are bolded Menu selections menu items and entries in screen images are indicated as Run ...

Страница 8: ...Preface viii Getting Started With Visionscape Smart Camera v3 7 3 Mar 2009 ...

Страница 9: ...es familiarity with basic wired networking concepts such as IP addresses and DHCP servers If these terms are not familiar please talk to your IT department and see Setting Up Network Communications in the Visionscape Smart Camera HE1600T Guide A network connection is required to communicate with the Visionscape Smart Camera HE1600T In order that the Visionscape Smart Camera HE1600T be recognized i...

Страница 10: ...hese steps when connecting the Visionscape Smart Camera HE1600T for the first time 1 Connect the Visionscape Smart Camera HE1600T to the same network as the PC that will be running the FrontRunner software 2 Apply power to the Visionscape Smart Camera HE1600T be sure to do this AFTER making the physical connection to the network 3 Start the FrontRunner application by selecting Start Visionscape Vi...

Страница 11: ...e Network Settings button as shown in Figure 1 3 FIGURE 1 3 Network Overview Screen Camera Selected 6 If the info area displays a red background identifying a camera communication problem it means that the camera and the PC even though connected to the same network are not using the same logical IP addressing See Setting Up Network Communications in the Visionscape Smart Camera HE1600T Guide to co...

Страница 12: ...and click OK You will see the name of your camera change in the network overview You can close the Network Overview Window 9 From FrontRunner click to display the Select Device dialog box 10 Click on the camera name you just assigned and click OK You will see a new device button appear for your camera as shown in Figure 1 5 FIGURE 1 5 HawkEyeE1000E Device Button Added Note The green triangle symbo...

Страница 13: ...eps and the complete collection of steps is called a Job To do anything even to take a picture the Visionscape Smart Camera HE1600T requires a Job Use the following procedure to create a new Job 1 Click the device button for your camera 2 Take control of the camera by clicking This will display the Login to Device dialog box where you should enter the username hawkeye and password vision and then ...

Страница 14: ...2009 4 To acquire a new image click You should see an image appear in the display area 5 To display a live image click Click it again to exit live video 6 To bring up the step editing environment click You will see a hierarchy of steps on the left hand side of the editor as shown in Figure 1 7 FIGURE 1 7 Hierarchy of Steps ...

Страница 15: ...Time value to change it Reducing the exposure time will darken the image while increasing it will make the image brighter So far the Job you are manipulating exists only on the PC You are using the Job in Setup Mode which allows you to create edit and debug Jobs on the PC 8 To transfer the Job to the camera click If you want the Job to be non volatile still be loaded on the camera when it is reboo...

Страница 16: ...ing a Visionscape Smart Camera for the First Time 1 8 Getting Started With Visionscape Smart Camera v3 7 3 Mar 2009 FIGURE 1 8 Image Displayed by Your New Job Note Notice the statistics at the bottom of the display ...

Страница 17: ...amples This chapter contains simple tutorial examples to help you become familiar with various FrontRunner tools Simple Blob Tool on page 2 3 Simple Flaw Tool on page 2 12 Simple Fast Edge Tool on page 2 18 Simple Data Matrix Tool on page 2 34 Notice that each sections lists the complete Job xxxxx AVP that corresponds to the Job you will create ...

Страница 18: ... Visionscape Smart Camera v3 7 3 Mar 2009 Icons Table 2 1 describes the icon used in this chapter TABLE 2 1 Icons and What They Mean Icon What It Means This is step 1 of a procedure Click the left mouse button This is step 2 of a procedure Click the left mouse button 1 2 ...

Страница 19: ...kground A hole is a blob with the same color as the background This example counts the number of pips on a die 1 Start FrontRunner by selecting Start Visionscape Visionscape FrontRunner FrontRunner displays its main window 2 Do either of the following a For a camera already added to FrontRunner simply click the camera button b For a camera that has not been added to FrontRunner click FrontRunner d...

Страница 20: ...cture Mode Set to Load Images from File File List Click empty and then Add to display the Open dialog box Browse for the file Die 1 Pip tif from Windows It s located at C Vscape Tutorials Samples Tutorials HawkEye 1600T Simple Blob Tool Select Die 1 Pip tif and click Open Note These files were installed from the installation CD onto your hard drive when you installed Visionscape If you installed V...

Страница 21: ...Normally you wouldn t delete Blob Filter from your Job But since we re simply counting pips on a die you can delete it in this Job 11 Click Blob Tool in the Step Tree to display the Blob Tool properties page 12 Adjust the following Blob Tool properties Use Autothreshold Uncheck it High Threshold Set to 64 Maximum Blob size Set to 10000 Min Number of Blobs Set to 1 Max Number of Blobs Set to 6 13 T...

Страница 22: ...n Action Simple Examples 2 6 Getting Started With Visionscape Smart Camera v3 7 3 Mar 2009 FIGURE 2 2 Die 1 Pip tif Blob Tool ROI 14 Click on the box Move and size the box so that it surrounds the die as shown in Figure 2 3 ...

Страница 23: ...age 17 Adjust the following Acquire properties File List Click to the right of File List and then click Add Browse for the files Die 2 Pip tif Die 3 Pip tif Die 4 Pip tif Die 5 Pip tif and Die 6 Pip tif from Windows They are located at C Vscape Tutorials Samples Tutorials HawkEye 1600T Simple Blob Tool 18 Select Die 2 Pip tif through Die 6 Pip tif and click Open 19 Minimize the Editor 20 To run th...

Страница 24: ...r of Pips on the Die 22 Continue clicking to display the remaining images Notice that the value for NumBlobs changes as the image changes 23 Now let s display output information 24 Maximize the Editor 25 In the left pane of the Editor highlight Blob Tool 26 In the right pane of the Editor click the Show Output Datums button as shown in Figure 2 5 ...

Страница 25: ...output datums 5 of the 6 output datums have already been selected in Figure 2 5 28 Close or minimize the Editor 29 Click the Download Program from PC to Device Figure 2 6 to download your Job to the Smart Camera FIGURE 2 6 Download Program from PC to Device Button 30 Click the Start Program on Device Figure 2 7 to start your Job on the Smart Camera FIGURE 2 7 Start Program on Device Button ...

Страница 26: ... 10 Getting Started With Visionscape Smart Camera v3 7 3 Mar 2009 31 To display the output datums you specified earlier click the button shown in Figure 2 8 FIGURE 2 8 Show Output Datums Button You will see output similar to that shown in Figure 2 9 ...

Страница 27: ...on Simple Examples 2 v3 7 3 Mar 2009 Getting Started With Visionscape Smart Camera 2 11 FIGURE 2 9 Output From Your Job Congratulations You ve just created a Visionscape Job that counts the pips on a die and displays output information ...

Страница 28: ...lable This example determines the presence or absence of a paper clip 1 Start FrontRunner by selecting Start Visionscape Visionscape FrontRunner FrontRunner displays its main window 2 Do either of the following a For a camera already added to FrontRunner simply click the camera button b For a camera that has not been added to FrontRunner click FrontRunner displays the Select Device dialog box Sele...

Страница 29: ...Click empty and then Add to display the Open dialog box Browse for the files Paperclip01 tif Paperclip02 tif and Paperclip03 tif from Windows They are located at C Vscape Tutorials Samples Tutorials HawkEye 1600T Simple Flaw Tool Select Paperclip01 tif Paperclip02 tif and Paperclip03 tif Click Open Note These files were installed from the installation CD onto your hard drive when you installed Vis...

Страница 30: ...l Show Details 15 In the Setup window to view Paperclip01 tif click FrontRunner displays the image Paperclip01 tif and a box as shown in Figure 2 10 FIGURE 2 10 Paperclip01 tif and Flaw Tool Displayed 16 Click on the box re size it so that it is just slightly smaller than the entire display area see Figure 2 11 17 To run the Job once and then stop click FrontRunner displays Paperclip02 and the inf...

Страница 31: ...perclip 02 Passes Inspection Notice the following properties and their values Edge Count 1672 Min Allowed 100 Max Allowed 5000 The inspection passed because the Edge Count was between the minimum and maximum allowed 18 Click again FrontRunner displays the empty window and the information that the Flaw Tool failed as shown in Figure 2 12 ...

Страница 32: ...nscape Smart Camera v3 7 3 Mar 2009 FIGURE 2 12 Paperclip 03 Fails Inspection Notice the following properties and their values Edge Count 7 Min Allowed 100 Max Allowed 5000 The inspection failed because the Edge Count was not within the minimum and maximum allowed 19 Click again ...

Страница 33: ...tRunner displays Paperclip01 and the information that the Flaw Tool passed as shown in Figure 2 13 FIGURE 2 13 Paperclip 01 Passes Inspection Notice the following properties and their values Edge Count 2262 Min Allowed 100 Max Allowed 5000 The inspection passed because the Edge Count was between the minimum and maximum allowed ...

Страница 34: ...thms These transitions are found using a threshold or gradient analysis This example finds the four edges and two top corners of one image 1 Start FrontRunner by selecting Start Visionscape Visionscape FrontRunner FrontRunner displays its main window 2 Do either of the following a For a camera already added to FrontRunner simply click the camera button b For a camera that has not been added to Fro...

Страница 35: ...e Mode Set to Load Images from File File List Click empty and then Add to display the Open dialog box Browse for the file Chip01 tif from Windows It is located at C Vscape Tutorials Samples Tutorials HawkEye 1600T Simple Fast Edge Tool Select Chip01 tif Click Open Note This file was installed from the installation CD onto your hard drive when you installed Visionscape If you installed Visionscape ...

Страница 36: ...nscape Smart Camera v3 7 3 Mar 2009 14 In the Setup window to view Chip01 tif click FrontRunner displays Chip01 tif as shown in Figure 2 14 FIGURE 2 14 Chip01 tif with One Fast Edge Tool Inserted 15 Adjust the ROI for Top Fast Edge so that it looks like the image in Figure 2 15 ...

Страница 37: ...Set to Top to Bottom Transition color Set to Light to Dark Gradient Threshold Set to 50 18 Highlight Snapshot in the Step Tree left pane Right click Snapshot and click Insert Into FrontRunner displays the Insert Step window Double click on Fast Edge Tool to insert a second one into the Snapshot 19 Highlight the second Fast Edge in the Step Tree left pane right click and then click Rename Rename it...

Страница 38: ...et to Left to Right Transition color Set to Light to Dark Gradient Threshold Set to 50 23 Highlight Snapshot in the Step Tree left pane Right click Snapshot and click Insert Into FrontRunner displays the Insert Step window Double click on Fast Edge Tool to insert a third one into the Snapshot 24 Highlight Fast Edge in the Step Tree left pane right click and then click Rename Rename it to Right Fas...

Страница 39: ...ection Set to Right to Left Transition color Set to Light to Dark Gradient Threshold Set to 50 28 Highlight Snapshot in the Step Tree left pane Right click Snapshot and click Insert Into FrontRunner displays the Insert Step window Double click on Fast Edge Tool to insert a fourth one into the Snapshot 29 Highlight Fast Edge in the Step Tree left pane right click and then click Rename Rename it to ...

Страница 40: ...perties Scan Direction Set to Bottom to Top Transition color Set to Light to Dark Gradient Threshold Set to 50 33 Highlight Snapshot in the Step Tree left pane Right click Snapshot and click Insert Into FrontRunner displays the Insert Step window Click the Measurements tab Double click on IntersectLines Meas to insert it into the Snapshot 34 Repeat the previous step one more time to add another In...

Страница 41: ...ntersectLines Meas 36 Highlight Snapshot in the Step Tree left pane Right click Snapshot and click Insert Into FrontRunner displays the Insert Step window Click the Analysis Tools tab Double click on TwoPt Locator to insert it into the Snapshot When you are finished the Job should look like the Job in Figure 2 19 FIGURE 2 19 Step Tree 37 Highlight Left Top IntersectLines Meas in the Step Tree left...

Страница 42: ...ng Reference for First Line FIGURE 2 21 Select Reference Window 39 Select Edge Line EdgeLine from Left Fast Edge 40 Click OK 41 To select the reference for Second Line click in the area to the right of the blue arrow Figure 2 22 and click on the three dots which displays the Select Reference window as shown in Figure 2 23 Click Here ...

Страница 43: ... FIGURE 2 23 Select Reference Window 42 Select Edge Line EdgeLine from Top Fast Edge 43 Click OK 44 Highlight Right Top IntersectLines Meas in the Step Tree left pane 45 To select the reference for First Line click in the area to the right of the blue arrow Figure 2 24 and click on the three dots which displays the Select Reference window as shown in Figure 2 25 Click Here ...

Страница 44: ...g Reference for First Line FIGURE 2 25 Select Reference Window 46 Select Edge Line EdgeLine from Right Fast Edge 47 Click OK 48 To select the reference for Second Line click in the area to the right of the blue arrow Figure 2 26 and click on the three dots which displays the Select Reference window as shown in Figure 2 27 Click Here ...

Страница 45: ...ond Line FIGURE 2 27 Select Reference Window 49 Select Edge Line EdgeLine from Top Fast Edge 50 Click OK 51 Highlight TwoPt Locator in the Step Tree left pane 52 To select the reference for Pin 1 Point click in the area to the right of the blue arrow Figure 2 28 and click on the three dots which displays the Select Reference window as shown in Figure 2 29 Click Here ...

Страница 46: ...Reference for Pin 1 Point FIGURE 2 29 Select Reference Window 53 Select Point Pt from Left Top IntersectLines Meas 54 Click OK 55 To select the reference for Pin 2 Point click in the area to the right of the blue arrow Figure 2 30 and click on the three dots which displays the Select Reference window as shown in Figure 2 31 Click Here ...

Страница 47: ...tting Started With Visionscape Smart Camera 2 31 FIGURE 2 30 Selecting Reference for Pin 2 Point FIGURE 2 31 Select Reference Window 56 Select Point Pt from Right Top IntersectLines Meas 57 Click OK 58 Your setup for TwoPt Locator should appear as shown in Figure 2 32 Click Here ...

Страница 48: ... To train the tool click 60 Highlight Acquire in the Step Tree left pane Note You may have to click the Acquire tab in the properties window 61 Adjust the following Acquire properties Picture Mode Set to Load Images from File File List Click C Vscape Tutorials Samples Tutorials HawkEye 1600T Simple Fast Edge Tool chip01 tif and then Add to display the Open dialog box Browse for the files Chip02 ti...

Страница 49: ...he installation CD onto your hard drive when you installed Visionscape If you installed Visionscape to a location other than C vscape replace it with the appropriate drive and directory designation 62 To run the Job once and then stop click Notice that the Job runs successfully as shown in Figure 2 33 FIGURE 2 33 Job Runs Successfully Note Any tool inserted into the 2PtLocator adjusts as the symbo...

Страница 50: ...mple reads six Data Matrices using the DataMatrix Tool 1 Start FrontRunner by selecting Start Visionscape Visionscape FrontRunner FrontRunner displays its main window 2 Do either of the following a For a camera already added to FrontRunner simply click the camera button b For a camera that has not been added to FrontRunner click FrontRunner displays the Select Device dialog box Select a camera and...

Страница 51: ...u may have to click the Acquire tab in the properties window 11 Adjust the following Acquire properties Picture Mode Set to Load Images from File File List Click empty and then Add to display the Open dialog box Browse for the file DMs tif from Windows It is located at C Vscape Tutorials Samples Tutorials HawkEye 1600T Simple Data Matrix Tool Select DMs tif Click Open Note This file was installed ...

Страница 52: ... Highlight Snapshot in the Step Tree left pane Right click Snapshot and click Insert Into FrontRunner displays the Insert Step window Click on the Analysis Tools tab Double click on DataMatrix Tool to insert it into the Snapshot 14 Adjust the ROI so that there is a generous amount of space around the Data Matrix as shown in Figure 2 35 ...

Страница 53: ... Mar 2009 Getting Started With Visionscape Smart Camera 2 37 FIGURE 2 35 Data Matrix with ROI 15 Repeat steps 13 and 14 to add the remaining Data Matrix Tools After you have added all six Data Matrix Tools you should see a screen similar to the one shown in Figure 2 36 ...

Страница 54: ...Simple Examples 2 38 Getting Started With Visionscape Smart Camera v3 7 3 Mar 2009 FIGURE 2 36 All Six Data Matrices Trained 16 To run the Job once and then stop click You should see a screen similar to the one shown in Figure 2 37 ...

Страница 55: ...you train a Data Matrix tool to read a Data Matrix with 8 rows and 32 columns the Data Matrix tool will fail when it tries to read something other than a Data Matrix with 8 rows and 32 columns So a trained tool is more restricted in what it can read an untrained tool is less restricted in what it can read For this tutorial you saw a red Train button and red boxes in front of each Data Matrix tool ...

Страница 56: ...in Action Simple Examples 2 40 Getting Started With Visionscape Smart Camera v3 7 3 Mar 2009 Where To Now Chapter 3 of this Getting Started contains a tutorial example that is more advanced than the ones you just finished ...

Страница 57: ... Advanced Example 3 CHAPTER 3 The 1600T in Action Advanced Example This chapter contains an advanced tutorial example to help you become familiar with the use of various FrontRunner tools in one Job Notice that we list the complete Job xxxxx AVP that corresponds to the Job you will create ...

Страница 58: ...l use the Select Reference editor to select another step in your Job that will supply the datum value for this datum FIGURE 3 1 Input Datum Icon Procedure Use the following procedure to find the sides of an opto locate the switch on top of the opto and determine the switch s position 1 Start FrontRunner by selecting Start Visionscape Visionscape FrontRunner FrontRunner displays its main window 2 D...

Страница 59: ...eate it Note Maximize or minimize the Editor as needed to accomplish the steps in this procedure 10 Highlight Acquire in the Step Tree left pane FrontRunner displays the Acquire properties page Note You may have to click the Acquire tab in the properties window 11 Adjust the following Acquire properties Picture Mode Set to Load Images from File File List Click empty and then Add to display the Ope...

Страница 60: ...ick Insert Into FrontRunner displays the Insert Step window Click on the Analysis Tools tab Double click on Fast Edge to insert it into the Snapshot 13 In the Setup window to view opto01 tif click 14 FrontRunner displays Opto01 tif as shown in Figure 3 2 FIGURE 3 2 Opto01 tif 15 Highlight Snapshot in the Step Tree left pane Right click Snapshot and click Insert Into FrontRunner displays the Insert...

Страница 61: ...three Fast Edge tools a Highlight the first Fast Edge in the Step Tree left pane right click and then click Rename Rename the first Fast Edge to Left Fast Edge b Highlight the second Fast Edge in the Step Tree left pane right click and then click Rename Rename the second Fast Edge to Top Fast Edge c Highlight the third Fast Edge in the Step Tree left pane right click and then click Rename Rename t...

Страница 62: ...o Left Transition color Set to Dark to Light Sharpness Set to Sharp 23 Highlight Snapshot in the Step Tree left pane Right click Snapshot and click Insert Into FrontRunner displays the Insert Step window Click the Measurements tab Double click on IntersectLines Meas to insert it into the Snapshot 24 Highlight Snapshot in the Step Tree left pane Right click Snapshot and click Insert Into FrontRunne...

Страница 63: ... pane Right click TwoPt Locator and click Insert Into FrontRunner displays the Insert Step window Double click on Blob Tool to insert it into the TwoPt Locator 28 Right click on the Blob Filter and select Delete Click yes to confirm the deletion of the Blob Filter When you are finished the Job should look like the Job in Figure 3 4 FIGURE 3 4 Step Tree 29 Highlight Left Top IntersectLines Meas in ...

Страница 64: ...ing Reference for First Line FIGURE 3 6 Select Reference Window 31 Select Edge Line EdgeLine from Left Fast Edge 32 Click OK 33 To select the reference for Second Line click in the area to the right of the blue arrow Figure 3 7 and click on the three dots which displays the Select Reference window as shown in Figure 3 8 Click Here ...

Страница 65: ...cond Line FIGURE 3 8 Select Reference Window 34 Select Edge Line EdgeLine from Top Fast Edge 35 Click OK 36 Highlight Right Top IntersectLines Meas in the Step Tree left pane 37 To select the reference for First Line click in the area to the right of the blue arrow Figure 3 9 and click on the three dots which displays the Select Reference window as shown in Figure 3 10 Click Here ...

Страница 66: ...g Reference for First Line FIGURE 3 10 Select Reference Window 38 Select Edge Line EdgeLine from Right Fast Edge 39 Click OK 40 To select the reference for Second Line click in the area to the right of the blue arrow Figure 3 11 and click on the three dots which displays the Select Reference window as shown in Figure 3 12 Click Here ...

Страница 67: ... for Second Line FIGURE 3 12 Select Reference Window 41 Select Edge Line EdgeLine from Top Fast Edge 42 Click OK 43 Highlight TwoPt Locator in the Step Tree left pane 44 To select the reference for Pin 1 Point click in the area to the right of the blue arrow Figure 3 13 and click on the three dots which displays the Select Reference window as shown in Figure 3 14 Click Here ...

Страница 68: ... Reference for First Line FIGURE 3 14 Select Reference Window 45 Select Point PT from Left Top IntersectLines Meas 46 Click OK 47 To select the reference for Pin 2 Point click in the area to the right of the blue arrow Figure 3 15 and click on the three dots which displays the Select Reference window as shown in Figure 3 16 Click Here ...

Страница 69: ...elect Reference Window 48 Select Point Pt from Right Top IntersectLines Meas 49 Click OK In the FrontRunner Edit window TwoPt Locator and the Train button will display a red box until you train the tool Also the boxes around the untrained tool will remain dotted lines until trained 50 To train the Two Pt Locator tool highlight it and then click Your setup should appear as shown in Figure 3 17 Clic...

Страница 70: ...GURE 3 17 TwoPt Locator Adjusted 51 Highlight Blob Tool left pane 52 Adjust the following Blob Tool properties Use Autothreshold Deselect it Low Threshold Set to 128 High Threshold Set to 255 Blob Polarity Set to Light Parts 53 In the Editor window adjust the ROI so that it encloses the switch as shown in Figure 3 18 ...

Страница 71: ... right the Job passes 55 Highlight Acquire in the Step Tree left pane Note You may have to click the Acquire tab in the properties window 56 Adjust the following Acquire properties File List Click C Vscape Tutorials Samples Tutorials HawkEye 1600T Advanced Example Using Multiple Tools chip01 tif and then Add to display the Open dialog box Browse for the files opto02 tif opto03 tif opto04 tif opto0...

Страница 72: ...ced Example Using Multiple Tools Select opto02 tif opto03 tif opto04 tif opto05 tif and opto06 tif Click Open 57 Click again When the Opto switch is on the left as is the case with Opto02 tif the Job fails as shown in Figure 3 19 FIGURE 3 19 Job Fails 58 Click again Because we used a TwoPt Locator in this Job FrontRunner can find the switch even when the opto is rotated ...

Страница 73: ... Camera 3 17 In Figure 3 20 even though the opto is rotated to the left a couple of degrees the Job finds the switch The Job passes because the switch is in the correct position for a pass FIGURE 3 20 Opto Rotated Left Job Passes 59 Click again In Figure 3 21 the Job fails because the switch is in the incorrect position for a pass ...

Страница 74: ...ced Example 3 18 Getting Started With Visionscape Smart Camera v3 7 3 Mar 2009 FIGURE 3 21 Opto Rotated Left Job Fails Figure 3 22 and Figure 3 23 show the same pass and fail results with the opto rotated to the right a couple of degrees ...

Страница 75: ...Advanced Example Using Multiple Tools The 1600T in Action Advanced Example 3 v3 7 3 Mar 2009 Getting Started With Visionscape Smart Camera 3 19 FIGURE 3 22 Opto Rotated Right Job Passes ...

Страница 76: ...ut installing hardware and software it also contains tutorials to help you familiarize yourself with Visionscape Visionscape Smart Camera HE1600T Guide Contains reference information about the Visionscape Smart Camera HE1600T specifically system components optics and lighting connector pinouts cable specifications dimensions and how to update the firmware on the Smart Camera Perl Script Custom Too...

Страница 77: ...ramegrabber board for Camera Link camera applications Visionscape FrontRunner User Manual Contains information about using FrontRunner Visionscape Programmers Kit VSKit Manual Contains information about using VSKIT which is a collection of libraries that aid in the development of user interface applications for Visionscape products Visionscape Tools Reference Contains information about all the too...

Страница 78: ...Chapter 3 The 1600T in Action Advanced Example 3 22 Getting Started With Visionscape Smart Camera v3 7 3 Mar 2009 ...

Страница 79: ...13 2 19 2 32 2 35 3 3 3 15 Flaw Tool Example 2 12 G Gradient Threshold 2 21 2 22 2 23 2 24 H High Threshold 2 5 3 14 Hole 2 3 I Icons 2 2 L Low Threshold 3 14 M Max allowed 2 15 2 16 2 17 edge count 2 14 number of blobs 2 5 Min allowed 2 15 2 16 2 17 edge count 2 14 number of blobs 2 5 P Part 2 3 Picture Mode 2 4 2 13 2 19 2 32 2 35 3 3 S Scan Direction 2 21 2 22 2 23 2 24 3 6 Sharpness 3 6 Step t...

Отзывы: