- 35 -
7.
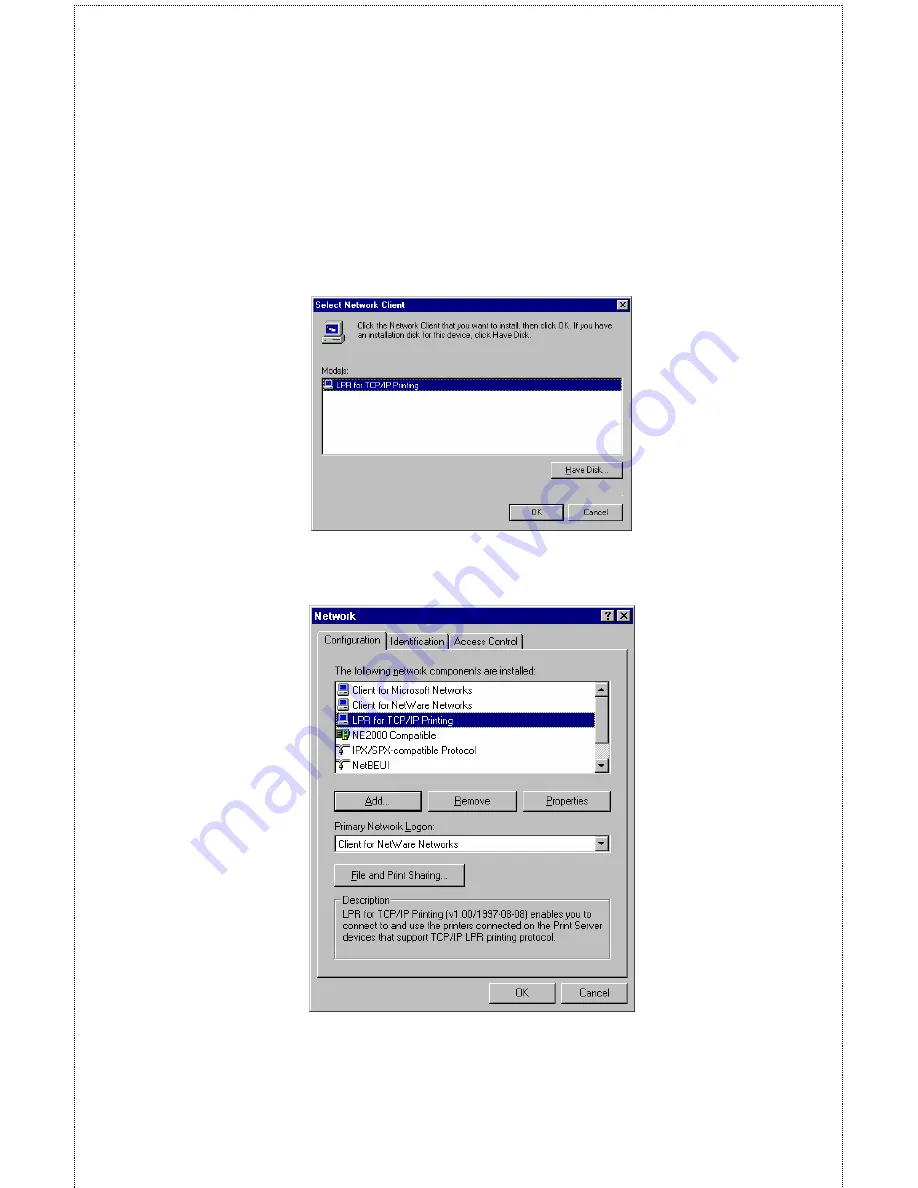
Insert the Print Server installation CD in your computer’s CD-
ROM, enter the proper pathname (for example , D:\ lpr), and
click
OK
.
8.
Select the LPR for TCP/IP Printing client and click
OK
.
9.
Windows will copy the necessary files, and return to the
Network dialog. Click
OK
to let Windows restart.
Содержание SP755C
Страница 27: ...27 Save to Print Server Please double check all the configurations and click Yes to save the settings...
Страница 30: ...30 Factory Reset Please click Yes to reload the factory settings of the print server...
Страница 32: ...32 About This screen displays the information of the print server...
Страница 44: ...44 Create a new Standard TCP IP Port Click Next...
Страница 46: ...46 Select LPR and put the Port name in the field labeled Queue Name Then Click OK Click Next...
Страница 48: ...48 Click Next Select a Printer Name...
Страница 49: ...49 Sharing can be enabled here Also a Test Page can be printed to confirm proper configuration...
Страница 50: ...50 When the Test Page has been printed click Finish to complete the installation...
Страница 52: ...52 Select Local Printer Create a new Standard TCP IP Port...
Страница 55: ...55 Click Next Click Finish...


