Rev. 112206.1
Page 60
Next, we will create a “.prn” file by
printing the document to a file instead of
routing it directly to a printer. You will be
prompted to specify the filename and
location. This puts the document in a
format that the ScribePC can use for
printing. Follow the instructions below to
create a .prn.
•
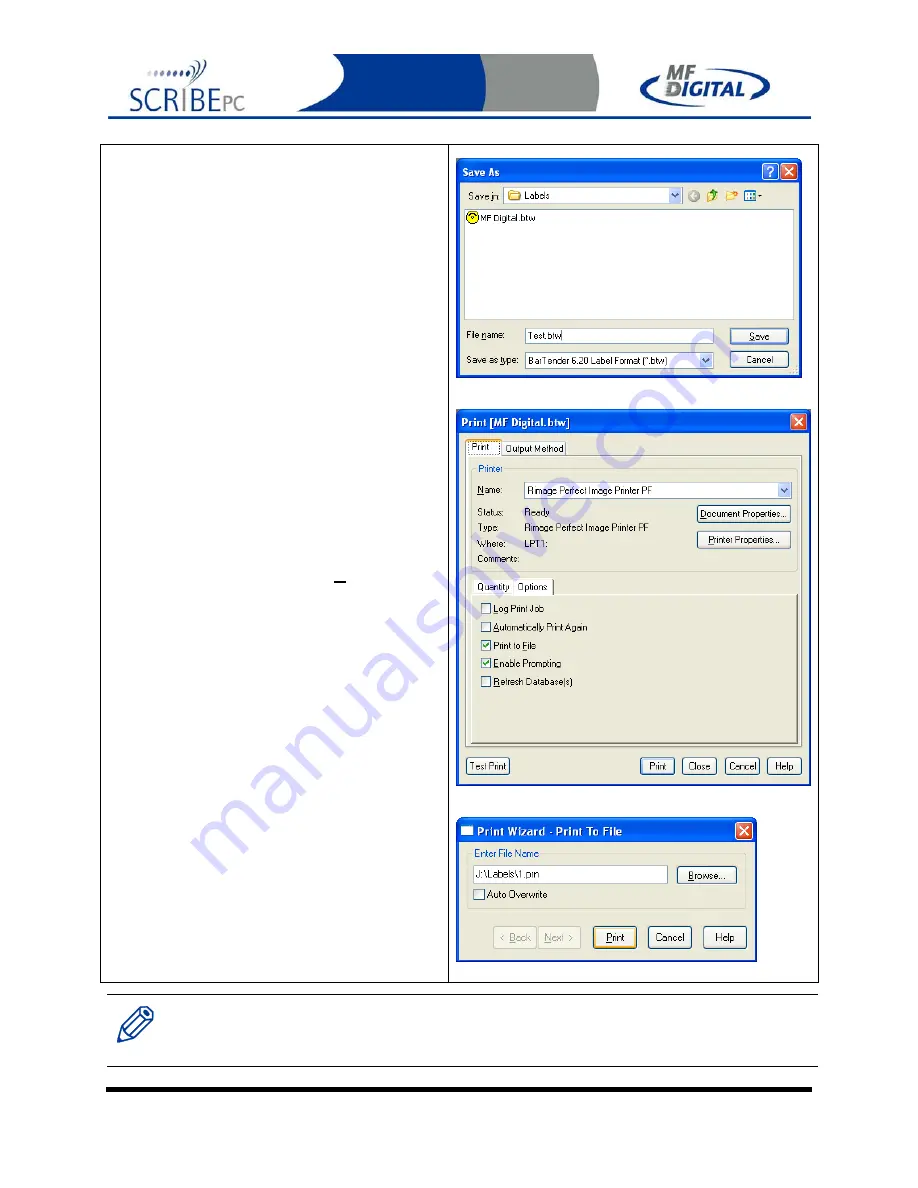
Use the CD Designer that was included
with your Prism Plus software to create
label. When a label file is saved in CD
Designer it is given a .BTW extension.
This format is not usable by the
ScribePC program. You will however
want to save your label as a .BTW for
future editing
(Fig. C)
.
•
To create a “.prn” you must use the
feature after you have created
your label.
Click
on
File-Print
. In the
NAME text box, be sure the RIMAGE
PERFECT and Select the
Print to file
option
(Fig D.)
.
•
Click
on
and give your file a name
(Fig. E.)
. It is a good idea to
Click
on
BROWSE and choose the labels folder
defined on the settings TAB of the
Scribe PC software.
•
Click
on PRINT when you are satisfied
and the PRN file will be created. This
file may now be used in the ScribePC
software.
(Fig C)
(Fig D)
(Fig E.)
Note:.
A .prn file cannot be edited. It contains information to create the image, and the settings of the
particular printer.
If any of the settings of the printer are changed, a new .prn file must be
generated.


