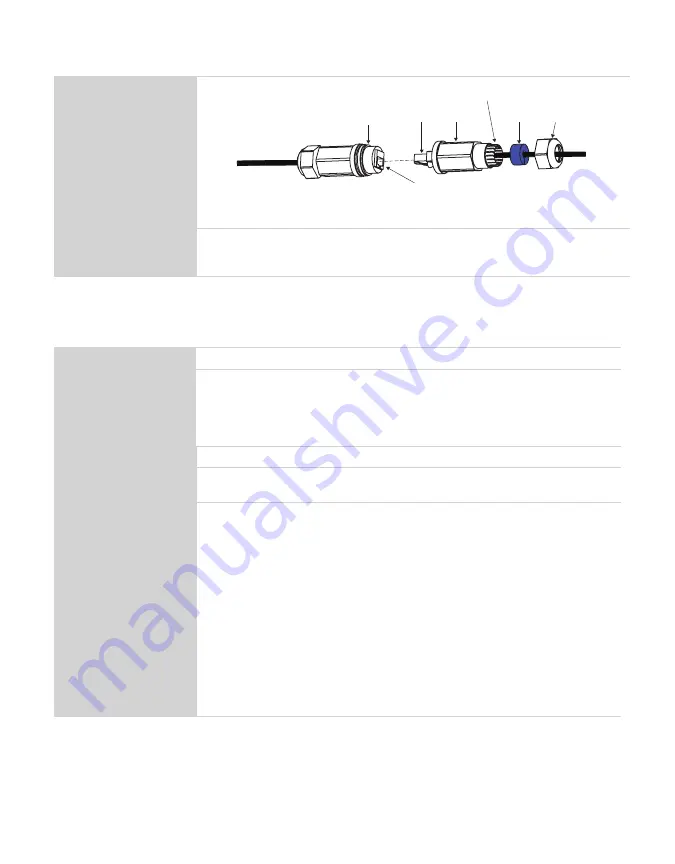
Table 3 Climate Station (H111) Installation (continued)
Connecting
(continued)
Cable to
Climate Station
Cable to
Power over
Ethernet (PoE)
injector adapter
Coupling
Outer
cover
Flexible
prongs
Cap
Blue
seal
grommet
PoE
connector
Climate Station
connector
Figure 2 Water-tight coupling
Verify the Climate Station is connected to the internet and functional by
looking through the devices page in AROYA or looking for a steady blue LED
light on the surface shown in
Follow the steps in
Table 4
to set up the AROYA Sensor Nose.
Table 4 Sensor Nose (H321) Installation
Tools Needed
AROYA Sensor Nose
Preparation
Consider the Surroundings
The TEROS 12 needles are inserted into the substrate.
Check Sensor Functionality
Press the function button (
) until the LED flashes green.
Mounting
Insert sensor into slabs or larger substrate types.
Configuration
All system configuration work is done at METER before installation occurs
at the customer site.
Connecting
Wake Sensor Nose and Verify
The Sensor Nose is shipped to the customer in SLEEP mode, indicated by a
solid red status LED light on the end where the cable is connected.
Press the button until a green LED light appears.
Press the button one more time then stop.
Status LED shows green when the unit has entered the ON mode.
If button is pressed too many times it will flash red and go back to sleep.
NOTE: The unit toggles between ON and SLEEP mode after the button is pressed
three times. It does not matter when the three button presses happen. For instance,
if the button is pressed once today, once tomorrow, and once the following day, the
base will either turn ON or go into SLEEP mode, depending on what state it was in
prior to the third button press.
5
AROYA
Содержание AROYA H110
Страница 1: ...AROYA...
Страница 18: ...Figure 11 AROYA sensor nose bottom view 16 System...
Страница 30: ......


