24
ENGLISH
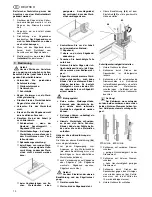
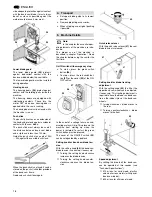
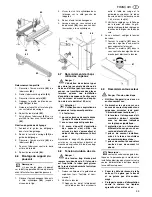
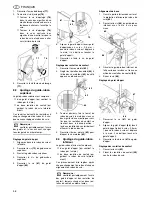
Adjusting the thrust bearing
1.
Loosen the thrust bearing's lock
screw
(87)
.
2.
Adjust thrust bearing position
(88)
(distance thrust bearing - band saw
blade = 0.5 mm – if the band saw
blade is turned by hand, it must not
touch the thrust bearing).
3.
Tighten the thrust bearing lock
screw
(87)
.
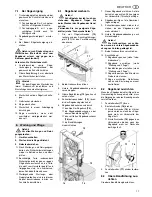
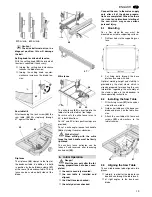
Adjusting the guide bearings
1.
Loosen screws
(89)
.
2.
Set guide bearings
(90)
against the
band saw blade.
3.
Turn the band saw wheel by hand in
a clockwise direction several times
to bring the guide bearings in correct
position – both guide bearings
should
just touch
the band saw
blade.
4.
Tighten screws
(89)
again.
5.
Close lower blade guard
(85)
6.
Close the lower housing door.
8.5
Replacing the Band Saw
Tyre
Periodically check band saw tyres for
wear. Replace only in pairs:
1.
Remove band saw blade (see "Care
and Maintenance");
2.
Lift band saw tyre with a small
screwdriver, then pull off the band
saw wheel.
3.
Mount new band saw tyres and rein-
stall the band saw blade.
8.6
Replacing the Table
Insert
The table insert needs replacement
when its slot has become enlarged or
damaged.
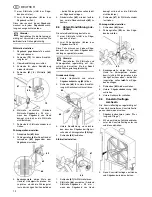
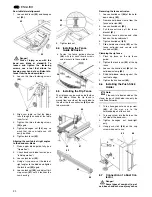
1.
Remove table insert
(91)
from saw
table (push up from underneath).
2.
Fit new table insert.
8.7
Adjusting the Blade
Guard's Movement Rate
Adjust the movement rate of the blade
guard if it can be lowered too easily.
1.
Pry the cover of the blade guard
adjusting knob off with a screw-
driver.
2.
Tighten the hexagon nut inside the
knob.
3.
Fit the cover back on the adjusting
knob.
8.8
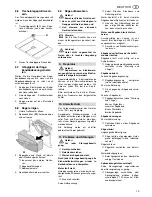
Cleaning the Saw
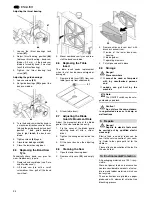
1.
Open the lower housing door.
2.
Remove chip case
(92)
and empty
it.
3.
Remove chips and saw dust with
brush or vacuum from:
inside of the lower band saw
housing;
blade guides;
operating elements
4.
Put chip case back in place.
8.9
Storage
A
Danger!
Store saw where
it cannot be used or tampered
with by unauthorized persons
and
nobody can get hurt by the
machine
.
3
Note:
The ON/OFF switch can be safe-
guarded by a padlock.
A
Caution!
Do not store the saw outdoors,
in unprotected areas or in damp or
wet locations.
A
Danger!
Repairs to electric tools must
be carried out by qualified electri-
cians only!
Electric tools in need of repair can be
sent to the service centre of your coun-
try. Refer to the spare parts list for the
address.
Please attach a description of the fault to
the electric tool.
All packaging materials are 100% recy-
clable.
Worn out power tools and accessories
contain considerable amounts of valua-
ble raw and rubber materials, which can
be recycled.
These instructions are printed on paper
produced with elemental chlorine-free
bleaching process.
87
88
89
90
91
9.
Repairs
10. Environmental Protection
92
Содержание BAS 317 Precision WNB
Страница 53: ...ZA0091_1 fm 3 1 2 4 6 5 ...
Страница 54: ......
Страница 55: ......
Страница 56: ...U4BA_M1 FM ZINDEL AG Technische Dokumentation und Multimedia www zindel de www metabo com ...

