


SQA-Vision
Service Manual Version 109.13.4
Edition rev.: Jan 2020
25
Appendix 2:
Replacing the
Processor
Instructions for RE-SEATING or REPLACING the SQA-Vision PROCESSOR
Applies to all SQA-Vision system versions
Stage 1:
Re-seating the processor
to the correct position
1.
Turn off the SQA-Vision and
disconnect the power supply
cable
2.
Loose the 4 screws on the rear
panel using a Philips
screwdriver #2 and open the
SQA-Vision
3.
Slightly press the center of the
processor with an index finger
to re-seat it into the correct
position
4.
Close the SQA-Vision and
tighten all screws of the rear
panel
5.
Connect the power cable of the
SQA-Vision
6.
Turn the SQA-Vision on and run
the SELF-TEST
7.
If the SQA-Vision passes, the
repair process is complete
8.
If the SQA-Vision does not
turn-on or fails the self- test,
go to
Stage 2
Stage 2:
Replace the damaged
processor
1.
Turn off the SQA-Vision and
disconnect the power supply
cable
2.
Release the 4 screws on the
rear panel using a Philips
screwdriver #2 and open the
SQA-Vision
3.
Remove the damaged
processor using extractor
tweezers as shown on the
figure to the right
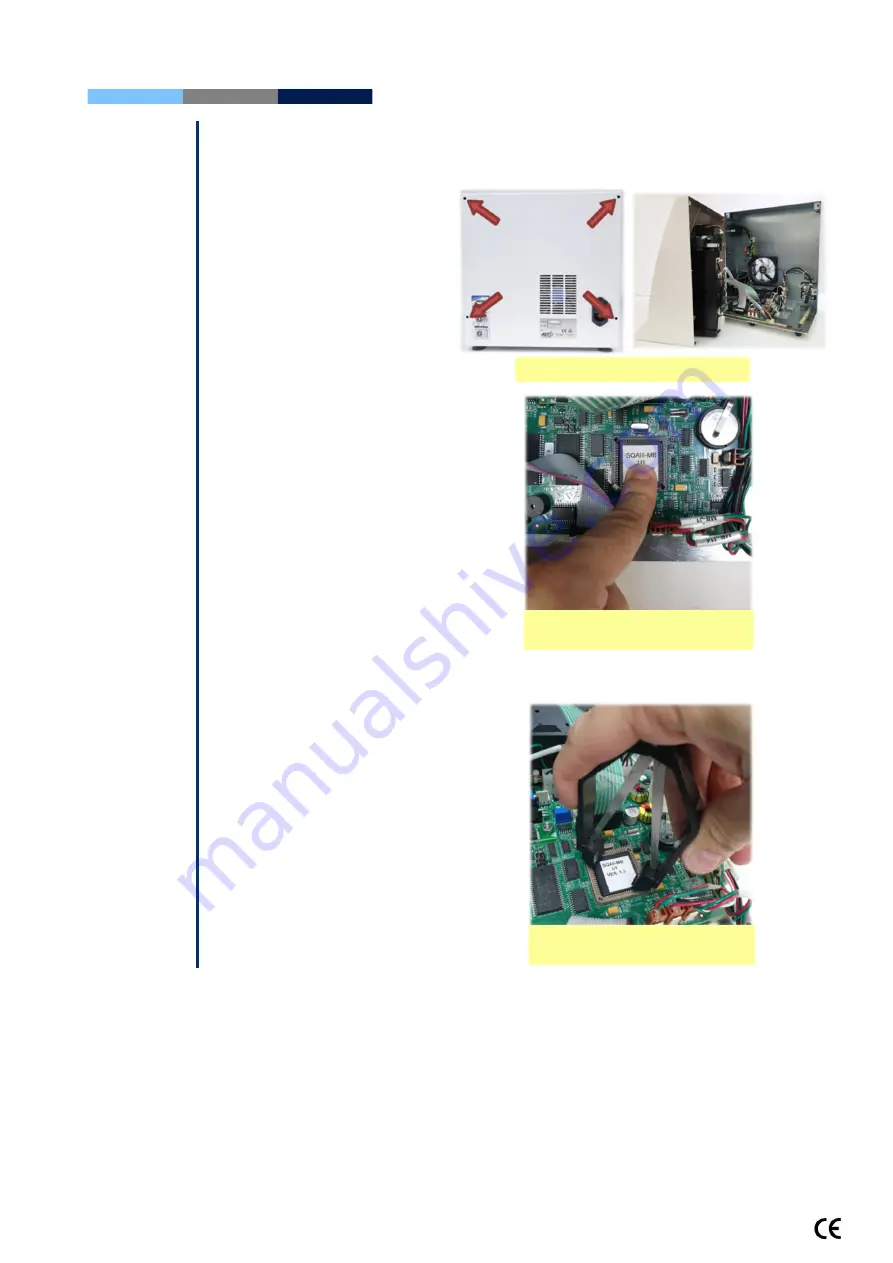
Open the SQA-Vision
Slightly press the center of
the processor
Remove the damaged
processor


