13
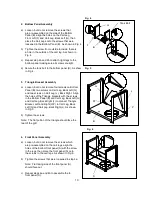
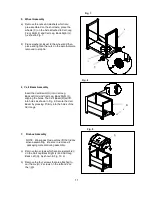
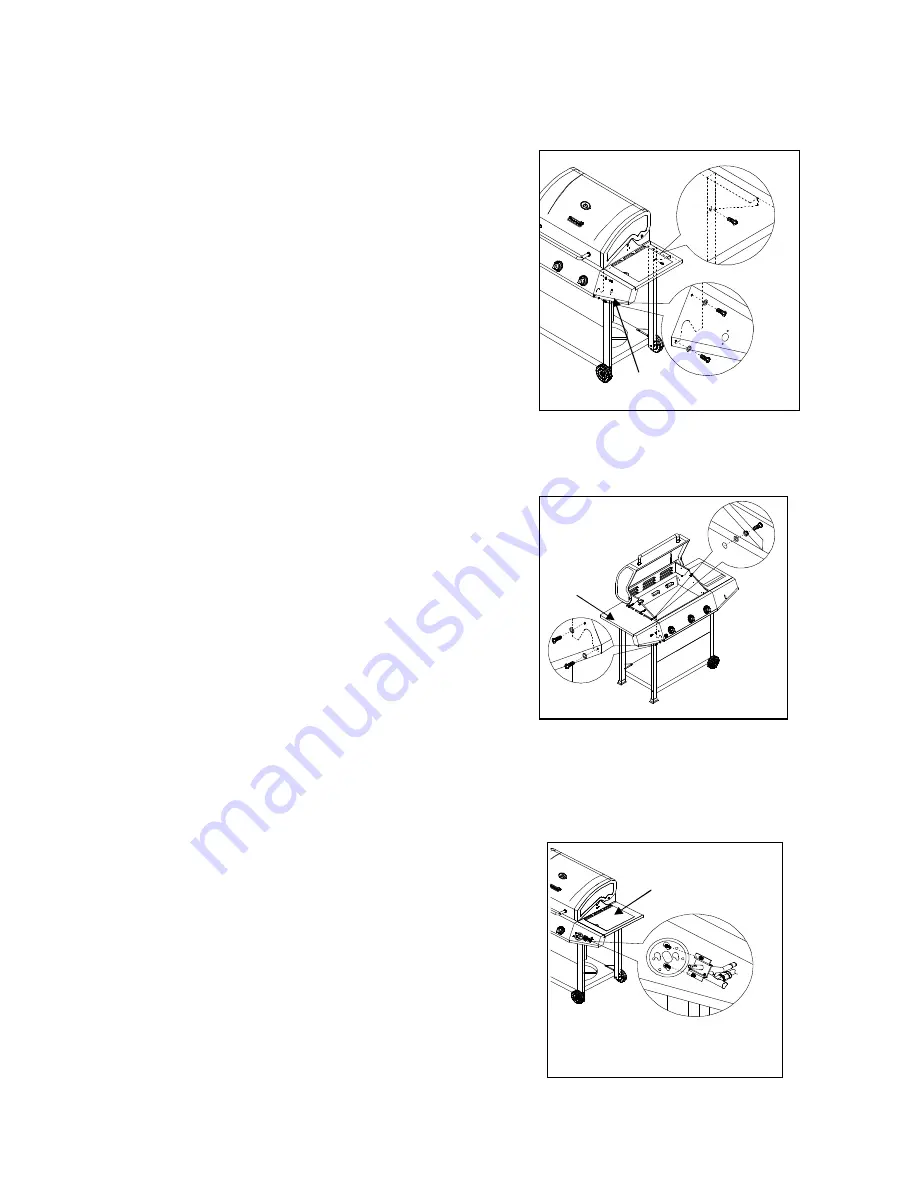
8. Side Burner Shelf Assembly
a) Loosen but do not remove the screw which
is pre-assembled on the cart leg. Remove
the two screws that are attached to the Side
Burner Shelf (D) frame and the two screws that
are attached to the main control panel.
b) Align the holes on Side Burner Shelf (D) with
the loosened screws located on the cart leg.
c) Secure Side Burner Shelf (D) from inside firebox
using two screws that were removed in step 8a
to attach the Side Burner Shelf (D) to the main firebox.
d) Secure the Side Burner Shelf Control Panel (D)
and main control panel by one screw which is
pre-assembled on the main control panel. As
shown in Fig.11. Tighten all screws.
e) Tighten screws loosened in 8b. Ensure all screws are tight.
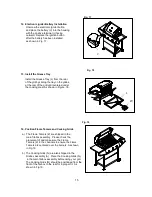
9. Left Side Shelf Assembly
Repeat Step 9 to assemble Left Side Shelf (E).
As shown in Fig.12.
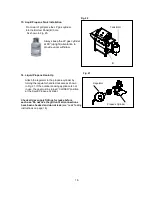
10. Side Burner Valve Installation
a) Loosen the screws which pre-assemble on the
side burner gas valve then attach to the bezel which
pre-assembled on the control panel, fix with vertical
gourd holes, then tighten the screws. As shown in Fig. 13
Fig. 12
Fig. 11
Fig. 13
E
D
1 0
0
2 0
0
3
0 0
4 0
0
5 0
0
6
0 0
7
0 0
8 0
0
D
1
0 0
2 0 0
3 0 0
4 0 0
5 0 0
6 0
0
7 0 0
8
0 0


