background image

Bedienen 

24  

Betriebs-Modus wechseln 

Nach dem Start befindet sich der Camcorder im  
Aufnahme-Modus. Sie können sofort Fotos 
erstellen oder Filme aufzeichnen. 

`


Um vom Aufnahme-Modus in den 
Wiedergabe-Modus zu wechseln, drücken Sie 

RECORD/PLAY. 

`


Um vom Wiedergabe-Modus wieder in den 
Aufnahme-Modus zu wechseln, drücken Sie 
erneut  

RECORD/PLAY

Bildschirm-Menüs bedienen 

In Bildschirm-Menüs nehmen Sie alle 
spezifischen Einstellungen vor, rufen Funktionen 
auf und bestimmen die Wiedergabe-Modi. Die 
Bildschirm-Menüs unterscheiden sich je nach 
Betriebsmodus. 

`


Um das Einstellungs-Menü anzuzeigen, 
drücken Sie 

OK

`


Um das Wiedergabe-Menü anzuzeigen, 
drücken Sie 

RECORD/PLAY.


`


Um sich in den Bildschirm-Menüs auf und ab 
zu bewegen, benutzen Sie die den Tele- und 
Weitwinkel-Kippschalter.  

`


Um sich in den Bildschirm-Menüs nach links 
und rechts zu bewegen, benutzen Sie die 
Links- und Rechtstaste. 

`


Um eine Auswahl zu betätigen, drücken Sie 

OK

`


Um Ihre Einstellungen zu verwerfen und zur 
vorherigen Bildschirmseite zu gelangen, 
wählen Sie 

SALIR

.  

`


Drücken Sie 

OK

.  

`


Alternativ drücken Sie  

RECORD/PLAY

Содержание MD 85733

Страница 1: ...anual de instrucciones cerca del camcorder Entregue el manual de instrucciones cuando venda el camcorder o si lo cede de otra manera Características de estructuración Los diferentes elementos del manual de instrucciones poseen unas características de estructuración fijas Así se puede averiguar fácilmente de qué tipo de texto se trata Texto normal De referencias Denominaciones para las TECLAS del c...

Страница 2: ...de funcionamiento 8 Características de estructuración de las advertencias de seguridad 9 Descripción del aparato 10 Voumen de suministro 11 Puesta en funcionamiento 13 Colocar la batería 13 Cargar la batería 15 Funcionamiento estacionario 15 Introducir y retirar la tarjeta SD MMC 16 Proteger los datos de una tarjeta SD MMC 17 Encender y apagar el camcorder 17 Manejo 19 Utilizar las teclas de funci...

Страница 3: ...producción en la pantalla LC 41 Reproducción en un televisor 43 Funciones del modo de reproducción 44 Eliminar película 44 Mostrar imágenes en miniatura 46 Bloquear películas 47 Repetir películas 48 Confeccionar fotografías 49 Realizar ajustes 49 Resolución 51 Exposición 51 Dos en Uno 52 Marco de imagen 54 Flash 55 Disparador automático 56 Nitidez 57 Balance de blancos 57 Grabación en serie 58 Con...

Страница 4: ...re suministrado 80 Instalar el controlador de la cámara 80 Instalar los programas de aplicación 80 Acrsoft PhotoImpression 80 Acrsoft Show Biz 80 Acrsoft Media Converter 80 Adobe Reader 80 MPEG4 Videocodec Xvid 81 Transferir películas y fotos a un ordenador 82 Convertir archivos de vídeo 83 Convertir con el Media Converter 2 83 Almacenar archivos de vídeo en DVD 87 Limpieza 89 Limpiar la carcasa 8...

Страница 5: ...tros Uso adecuado El camcorder sirve para los siguientes fines la grabación y reproducción de películas de vídeo digitales la grabación y reproducción de fotografías digitales la grabación y reproducción de audio digital la reproducción de archivos MP3 la representación de E Books en formato de texto El camcorder está concebido exclusivamente para estos fines y solamente debe ser usado para ellos ...

Страница 6: ...rriente debe estar libremente accesible No doble o aplaste el cable de red Evite que entren humedad o líquidos en el camcorder o el enchufe de la fuente de alimentación No toque el adaptador de red con las manos húmedas No utilice nunca el camcorder con un adaptador de red defectuoso Las reparaciones siempre deben ser efectuadas por personal especializado cualificado Desconecte el camcorder en cas...

Страница 7: ...os ojos de personas o animales Evitar daños del camcorder Utilice solamente baterías ión litio del tipo P60 Antes de colocar la batería compruebe que los contactos del camcorder y los de la batería estén limpios Eventualmente limpie los contactos con un paño seco y limpio o con una goma de borrar No toque el objetivo ni su montura con las manos Evitar daños de las baterías No coloque nunca la bate...

Страница 8: ...oque el camcorder en una bolsa de protección o una bolsa de plástico antes de exponerlo a un rápido cambio de temperatura Evitar fallos de funcionamiento Proteja el camcorder contra humedad Proteja el camcorder contra sal y polvo Proteja el camcorder contra fuertes campos magnéticos Mantenga el camcorder alejado de aparatos que producen fuertes campos magnéticos p ej motores eléctricos No utilice ...

Страница 9: ...pea Características de estructuración de las advertencias de seguridad AVISO Las indicaciones con la palabra AVISO advierten de peligros que pueden causar lesiones graves o mortales CUIDADO Las indicaciones con la palabra CUIDADO advierten de peligros que pueden causar lesiones ligeras hasta medianas ATENCIÓN Las indicaciones con la palabra ATENCIÓN advierten de peligros que pueden causar daños ma...

Страница 10: ... mostrar los menús de pantalla con los que se pueden realizar los ajustes El camcorder dispone de un zoom digital y funciones para el ajuste automático de la exposción y el balance de color La memoria interna dispone de una capacitad de 64 MByte Así también se pueden grabar fotos o películas cortas si no se encuentra ninguna tarjeta SD MMC en el camcorder Si se necesita más capacidad de memoria se...

Страница 11: ...Voumen de suministro 11 DE EN ES PT Voumen de suministro ...

Страница 12: ...le USB 2 Camcorder MD 85733 DV 3 Enchufe de la fuente de alimentación 4 Cable TV 5 Correa de transporte 6 Tapas protectoras para auriculares 7 Auriculares Batería ión litio del tipo NP60 CD ROM con programas para el usuario y software de controladores ...

Страница 13: ...ía al fuego AVISO Peligro de intoxicación Mantenga la batería alejada de los niños AVISO Peligro de causticación Retire inmediatamente del camcorder la batería que derrame líquido Mantenga el camcorder en la mano de tal forma para que la tapa del compartimento para la batería esté orientada hacia arriba Para abrir la tapa presione sobre el símbolo de flecha de la parte superior de la tapa Empuje l...

Страница 14: ...rtimento para baterías ATENCIÓN Se puede dañar la tapa No use demasiada fuerza Presione sólo ligeramente Para colocar la batería fijamente en el compartimento para baterías presione ligeramente sobre la batería 2 Coloque la tapa del compartimento para baterías sobre el compartimento de tal forma para que los pequeños pernos de su lado inferior se encuentren en las escotaduras correspondientes Empu...

Страница 15: ... alimentación Para cargar la batería conecte la clavija con el camcorder Conecte el enchufe de la fuente de alimentación en una toma de corriente de 230 V 50 Hz Ahora la batería se está cargando L La batería necesita para su primera carga completa aprox seis horas L Las indicaciones para un manejo adecuado de las baterías las encontrará en el apartado Evitar danos de las baterías a partir de la pá...

Страница 16: ...r una tarjeta SD MMC mantenga el camcorder con la pantalla LC hacia arriba Mantenga la tarjeta SD MMC con su inscripción hacia arriba Introduzca la tarjeta SD MMC cuidadosamente en la ranura para las tarjetas hasta que quede encajada La tarjeta SD MMC está lista para su funcionamiento Para retirar la tarjeta SD MMC introduzca ligeramente la tarjeta SD MMC en el camcorder y suéltela La tarjeta sale...

Страница 17: ...otección contra escritura desplace el cierre protector contra escritura a la posición 1 La protección contra escritura está desactivada Se pueden almacenar datos en la tarjeta SD MMC Encender y apagar el camcorder Para encender el camcorder abra la pantalla LC de la siguiente manera Mantenga el camcorder en la mano de tal forma para que la tapa de la pantalla indique hacia arriba Introduzca la man...

Страница 18: ...o 18 Para utilizar el camcorder gire la pantalla en 90 grados contra el sentido de las agujas del reloj 2 El camcorder está listo para su funcionamiento Para apagar el camcorder cierre la pantalla LC o pulse Encender Apagar 1 ...

Страница 19: ...on las teclas de función se inicia p ej una grabación o se cambia el modo de funcionamiento En los menús de pantalla se realizan los ajustes para el modo de funcionamiento correspondiente Este capítulo informa acerca de las teclas de función y sus funciones las indicaciones de la pantalla LC el manejo de los menús de pantalla ...

Страница 20: ...Manejo 20 Utilizar las teclas de función ...

Страница 21: ...uriculares 8 USB 2 0 High Speed y toma de corriente Cambio de modo Record Play 9 Volver a la última página de pantalla Nº Descripción Tecla izquierda Flash conectar desconectar Eliminar ojos rojos Luz 10 Auto Tecla derecha 11 Disparador automático conectar desconectar Tecla Ok 12 Interruptor basculante tele y gran angular 13 Disparador foto 14 Objetivo 15 Interruptor conectar desconectar 16 Dispar...

Страница 22: ...Manejo 22 Indicaciones en la pantalla LC ...

Страница 23: ...Factor del zoom digital Batería de carga completa Batería de carga mediana Batería de carga baja 8 Batería descargada Nº Símbolo Descripción 9 La tarjeta SD MMC se encuentra dentro del camcorder 10 Función Macro activada 11 Balance de blancos 12 Disparador automático 13 Fecha año mes día 14 Grabación en serie Flash automático Flash desactivado Flash siempre activado Reducción de ojos rojos 15 Luz ...

Страница 24: ... se accede a funciones y se determinan los modos de reproducción Los menús de pantalla son diferentes según el modo de funcionamiento Para que se muestre el menú de ajuste pulse OK Para que se muestre el menu de reproducción pulse RECORD PLAY Para moverse dentro del menu de pantalla hacia arriba y abajo utilice el interruptor basculante de tele y gran angular Para moverse dentro del menu de pantal...

Страница 25: ...Usted determina los ajustes para su película Usted determina sus ajustes de cámara Usted elije los efectos Usted inicia una grabación de audio Usted determina los ajustes básicos Para mostrar el menú Grabación pulse OK Aparece el menú ajustes El menú modo de película está seleccionado Nº Descripción 1 MODO PELÍCULA 2 MODO CÁMARA 3 MODO VOZ Función de dictáfono 4 EFECTO 5 CONFIGURACIÓN ...

Страница 26: ... menú MODO PELÍCULA se realizan los ajustes para el funcionamiento del camcorder Se pueden seleccionar los siguientes ajustes RESOLUCIÓN EXPOSICIÓN LUZ NITIDEZ BALANCE DE BLANCOS ESTABILIZACIÓN DETECTOR DE MOVIMENTO MODO NOCTURNO SALIR ...

Страница 27: ...an para el funcionamiento como cámara digital RESOLUCIÓN EXPOSICIÓN DOS EN UNO MARCO DE FOTO FLASH TEMPORIZADOR NITIDEZ BALANCE DE BLANCOS FOTO MÚLTIPLE LUZ DE FONDO IMPRESIÓN DE FECHA MODO NOCTURNO SALIR Los detalles para los ajustes se encuentran en el apartado Realizar ajuste a partir de la página 49 ...

Страница 28: ...Los detalles para los diferentes ajustes se encuentran en el apartado Grabar A partir de la página 70 Menú EFECTO En el menú EFECTO se determinan los efectos de la imagen para las grabaciones de película y de fotografías NORMAL BLANCO NEGRO CLÁSICO NEGATIVO SALIR Los detalles para los diferentes ajustes se encuentran en el capítulo Utilizar efectos fotográficos y de película A partir de la página ...

Страница 29: ...GURACIÓN se determinan los ajustes básicos para el camcorder SONIDO PANTALLA INICIAL AJUSTE DE LA HORA FORMATEAR MEMORIA SISTEMA TV IDIOMA CONFIGURACIÓN SALIR Los detalles para los ajustes se encuentran en el apartado Realizar ajuste a partir de la página 49 ...

Страница 30: ... Para poder moverse en una entrada del menú pulse Izquierda o Derecha o utilice el interruptor basculante de tele y de gran angular Para seleccionar una entrada del menú pulse OK Menú Descripción PELÍCULA Reproducir película IMAGEN Mostrar fotografías Y LIBRO ELECTRÓNICO Mostar E Books VOZ Reproducir grabaciones de sonido propias MÚSICA Reproducir archivos MP3 ...

Страница 31: ...a aceptar el ajuste pulse OK Imagen inicial Como imagen inicial se puede utilizar una foto memorizada o la imagen inicial estándar Seleccione el submenú Imagen inicial Aparecerá la imagen inicial cuando se enciende el camcorder Para elegir una imagen pulse la tecla Izquierda o Derecha Para determinar la foto indicada como imagen inicial pulse OK Ajustar la hora Para ajustar el año pulse varias vec...

Страница 32: ...matear la memoria ATENCIÓN Se pueden perder datos Si se formatea la memoria se borran todos los datos memorizados Asegúrese de que no se encuentren datos importantes en la memoria o en la tarjeta SD MMC Para formatear la memoria interna o la tarjeta SD MMC seleccione el menú Formatear memoria Pulse OK En la pantalla aparece una pregunta de seguridad Para no borrar los datos memorizados seleccione ...

Страница 33: ... Para aceptar el ajuste pulse OK Idioma Con este ajuste se puede determinar el idioma del menú de pantalla Seleccione la entrada para el idioma deseado Para aceptar el ajuste seleccionado pulse OK Ajuste de fábrica estándar Con esta función se pueden restablecer los ajustes de fábrica del camcorder Seleccione la entrada Estándar Pulse la tecla OK En la pantalla aparece la pregunta de seguridad Par...

Страница 34: ...miento de movimiento una vez desactivado Dos en uno una vez desactivado Marco de foto una vez desactivado Flash siempre desactivado Disparador automático una vez desactivado Ajuste válido Ajuste de fábrica Grabación en serie una vez desactivado Retroiluminación una vez desactivado Impresión de fecha siempre desactivado Efecto una vez normal Sonido siempre activado Sistema TV siempre según la regió...

Страница 35: ...la LC aparece la hora horas minutos segundos Para terminar la grabación de película vuelva a pulsar DISPARADOR PELÍCULA Realizar ajustes La cámara se suministra con los siguentes ajustes de fábrica en el modo de película Punto de menú válido Ajuste de fábrica Resolución siempre alta Luz una vez desactivado Exposición una vez 0 EV Nitidez una vez Nivel 5 Balance de blancos una vez desactivado Estab...

Страница 36: ...a 36 Para modificar los ajustes de fábrica despliegue la pantalla LC Pulse OK Aparecerá el menú Modo de película Seleccione con TELE GRAN ANGULAR la entrada de menú deseada Pulse OK Aparecerá el submenú seleccionado ...

Страница 37: ...s posibilidades de ajuste con más detalle Resolución Para la calidad de película están disponibles los siguientes ajustes Ajuste Explicación Alto 640 480 Pixel VGA 30 fps Normal 320 240 Pixel QVGA 30 fps La resolución seleccionada está disponible hasta que se selecciona otra Luz Para encender durante la grabación de película adicionalmente la luz de la cámara seleccione el ajuste ACTIVAR ...

Страница 38: ...lmente Para ello seleccione un ajuste del margen positivo 1 0 EV 0 6 EV o 0 3 EV Si desea subexponer artificialmente seleccione un ajuste del margen negativo 0 3 EV 0 6 EV o 1 0 EV El ajuste se mantendrá hasta que se seleccione otro o se apague la cámara El ajuste de fábrica es 0 EV Nitidez Con este ajuste se puede modificar la nitidez en nueve niveles El ajuste de fábrica es el nivel 5 Para aumen...

Страница 39: ...a con luz diurna Luz de fluorescente Para grabaciones de película con luz de fluorescente Bombilla Para grabaciones de película con luz de bombilla Estabilización Con este ajuste se puede evitar la falta de nitidez por mover la cámara L La imagen grabada se hace más pequeña si la función de estabilización está activada L El zoom digital esteá apagado si la función de estabilización está activada R...

Страница 40: ...Grabación nocturna Para obtener mejores resultados con grabaciones nocturnas seleccione dentro del menú Grabación nocturna Activar Terminar Para abandonar el modo de película sin modificaciones de ajuste seleccione SALIR ...

Страница 41: ...er las películas grabadas en la memoria interna o la tarjeta de memoria de diferentes maneras Reproducción en la pantalla LC Para ver películas en la pantalla LC de la cámara siga los siguientes pasos Pulse RECORD PLAY Aparece el menú principal del modo de reproducción ...

Страница 42: ... película seleccionada La segunda cifra indica la cantidad de las películas grabadas Para cambiar a la película anterior o siguiente seleccione DERECHA IZQUIERDA Para iniciar la reproducción pulse DISPARADOR DE PELÍCULA Para iniciar un avance o retroceso rápido durante la reproducción de la película seleccione DERECHA IZQUIERDA Para detener el avance o retroceso rápido suelte la tecla ...

Страница 43: ...s películas en un televisor siga los siguientes pasos Conecte la clavija negra del cable AV a la salida TV de la cámara Conecte las clavijas blanca y amarilla del cable AV a las tomas correspondientes del televisor Encienda el televisor En la pantalla LC aparece el menú Auricular TV Seleccione con TELE GRAN ANGULAR la opción TV Pulse OK La película aparece en el televisor L Mientras la cámara está...

Страница 44: ...Reproducción de película están disponibles las funciones que se describen a continuación Acceda al modo de reproducción Pulse OK si aparece la última película grabada Eliminar película Seleccione con DERECHA IZQUIERDA la opción ELIMINAR Pulse OK Aparecerá el menú ELIMINAR ...

Страница 45: ...cione NO Pulse OK L Si se encuentra introducida una tarjeta de memoria solamente se pueden eliminar las películas que se encuentran en la tarjeta de memoria L Si la tarjeta de memoria está bloqueada no se pueden eliminar las películas que se encuentran en la trajeta de memoria L Si las películas a eliminar están provistas con una protección contra borrado se deberá desactivar esta antes de elimina...

Страница 46: ...ente un resumen de las películas memorizadas Seleccione con DERECHA IZQUIERDA la opción MINIATURA Pulse OK Aparece un máximo de nueve películas como imágenes en miniatura Seleccione con DERECHA IZQUIERDA o TELE GRAN ANGULAR la película deseada Para iniciar la reproducción de la película pulse OK ...

Страница 47: ...ECHA IZQUIERDA la opción BLOQUEAR Pulse OK Aparecerá el menú BLOQUEAR Seleccione con DERECHA IZQUIERDA una película Para bloquear liberar todas las películas desplace TELE GRAN ANGULAR en dirección T Para bloquear liberar una película desplace TELE GRAN ANGULAR en dirección W Aparecera la ventanilla de consulta Para realizar el proceso seleccione SI Para interrumpir el proceso seleccione NO Pulse ...

Страница 48: ...máticamente diferentes o todas las películas Seleccione con DERECHA IZQUIERDA la opción REPETIR UNA Pulse OK Se inicia la reproducción de la película seleccionada Seleccione con DERECHA IZQUIERDA la opción REPETIR TODO Pulse OK Se inicia la repetición de todas las películas existentes ...

Страница 49: ...ar ajustes Se ha suministrado la cámara con los siguientes ajustes de fábrica en el modo de imagen Punto de menú válido Ajuste de fábrica Resolución siempre normal Exposición una vez 0 EV Dos en Uno una vez desactivado Marco de imagen una vez desactivado Flash siempre desactivado Disparador automático una vez desactivado Nitidez una vez nivel 5 Balance de blancos una vez Auto Grabación en serie un...

Страница 50: ...menú Modo de Película Pulse una vez DERECHA Aparece el menú Modo de Cámara Seleccione con TELE GRAN ANGULAR la entrada de menú deseada Pulse OK Aparece el submenú seleccionado Seleccione un ajuste Pulse OK Ahora el ajuste seleccionado está activado A continuación se explican con más detalle las diferentes posibilidades de ajsute ...

Страница 51: ...hasta que se selecciona otra Exposición La cámara ajusta automáticamente la exposición adecuada Bajo condiciones lumínicas difíciles en caso necesario se pueden obtener mejores resultados con un ajuste manual de la exposición Si se desea fotografiar p ej una persona delante de una puesta de sol se deberá sobreexponer la foto artificialmente Seleccione para ello un ajuste del margen positivo 1 0 EV...

Страница 52: ...Confeccionar fotografías 52 Dos en Uno Con este ajuste se pueden unir dos fotos en una imagen Seleccione del menú Modo Cámara el submenú DOS EN UNO Pulse OK Seleccione la entrada ACT Pulse OK ...

Страница 53: ...el DISPARADOR FOTO Ahora la parte izquierda de la pantalla LC aparece ensombrecida Aparece la imagen que se ha tomado hace un momento Seleccione la sección de imagen de la mitad no ensombrecida de la pantalla LC Pulse el DISPARADOR FOTO La nueva imagen está lista L El ajuste DOS EN UNO está disponible para una grabación A continuación la cámara vuelve al modo de grabación normal ...

Страница 54: ... Con este ajuste se puede proveer una foto con un marco de imagen Para ello están disponibles diez marcos de imagen diferentes Seleccione del menú MODO CÁMARA el submenú CUADRO DE FOTO Pulse OK Seleccione con TELE GRAN ANGULAR un marco de imagen ...

Страница 55: ...ta que se seleccione otro o hasta que se apague la cámara Para abandonar la función pulse RECORD PLAY Para desactivar el marco de imagen a través del menú seleccione el marco de color gris Flash Para el control del flash están disponibles cuatro ajustes diferentes CUIDADO Evitar lesiones oculares No utilice el flash directamente delante de los ojos de personas o animales ...

Страница 56: ...se seleccione otro Disparador automático Con el disparador automático se puede fotografiar con retraso de tiempo Si p ej Usted mismo desea aparecer en una foto se puede utilizar el disparador automático Se puede ajustar el disparador a través del menú disparador automático o con IZQUIERDA En la pantalla aparece el símbolo del disparador automático Después del disparo transcurren aprox diez segundo...

Страница 57: ... cámara ajusta el balance de blancos automáticamente Si después de una grabación se nota un tono de color en la pantalla LC modifique el ajuste del balance de blancos Vuelva a hacer la grabación Están disponibles los siguientes ajustes Ajuste Explicación Auto Ajuste de fábrica La cámara realiza el balance de blancos automáticamente Luz diurna Para grabaciones con luz diurna Luz fluorescente Para g...

Страница 58: ...e se apague la cámara Impresión de fecha Si se activa esta función se proveerá cada foto con la fecha actual La fecha aparecerá en las fotos impresas Para proveer una foto con la fecha actual seleccione en el menú Modo de Cámara la entrada Impresión de fecha Para activar la impresión de fecha seleccione Activar Pulse OK L El ajuste se mantiene hasta que se seleccione otro Grabación nocturna Para o...

Страница 59: ...rna o en una tarjeta SD MMC opcional Estas fotos se pueden visualizar de dos maneras Reproducción en la pantalla LC Reproducción en un televisor Reproducción en la pantalla LC Para visualizar las fotos en la pantalla LC de la cámara siga los siguientes pasos Pulse RECORD PLAY Aparece el menú Modo de Reproducción ...

Страница 60: ...OK En la pantalla LC aparecerá la última foto grabada Con DERECHA IZQUIERDA se cambia a la foto anterior o siguiente Para aumentar la foto en la pantalla LC desplace TELE GRAN ANGULAR en dirección T Para disminuir la foto en la pantalla LC desplace TELE GRAN ANGULAR en dirección W ...

Страница 61: ... GRAN ANGULAR en dirección T Se aumenta la parte seleccionada Para volver a disminuir la parte desplace TELE GRAN ANGULAR en dirección W Reproducción en un televisor Para visualizar las fotos en un televisor siga los siguientes pasos Conecte la clavija negra del cable AV a la salida TV de la cámara Conecte las clavijas blanca y amarilla del cable AV a la toma correspondiente del televisor Encienda...

Страница 62: ...roducción En el modo de reproducción están disponibles las siguientes funciones eliminar fotos mostrar imágenes en miniatura bloquear desbloquear imágenes mostrar diapositivas Acceda al modo de reproducción Seleccione con DERECHA o TELE GRAN ANGULAR FOTO ...

Страница 63: ...Visualizar fotografías 63 DE EN ES PT Pulse OK Vuelva a pulsar OK Aparece el menú Eliminar fotos Seleccione con DERECHA IZQUIERDA la opción ELIMINAR Pulse OK Aparece el menú ELIMINAR ...

Страница 64: ...ceso pulse OK L Si se encuentra introducida una tarjeta SD MMC solamente se pueden eliminar las fotos de la tarjeta SD MMC Si la tarjeta SD MMC está bloqueada no se pueden eliminar las fotos de la tarjeta SD MMC Si las fotos a eliminar están provistas con una protección contra eliminación se deberá desactivarla antes de la eliminación Los detalles se encuentran en el apartado Proteger los datos de...

Страница 65: ... PT Seleccione con DERECHA IZQUIERDA la opción MINIATURA Pulse OK L En la pantalla LC aparecerá un máximo de nueve imágenes en miniatura Seleccione con DERECHA IZQUIERDA o TELE GRAN ANGULAR la foto deseada Para mostrar la foto pulse OK ...

Страница 66: ...IERDA BLOQUEAR Pulse OK Aparece el menú BLOQUEAR Seleccione con DERECHA IZQUIERDA una foto Para bloquear liberar todas las fotos desplace TELE GRAN ANGULAR en dirección T Para bloquear liberar una foto desplace TELE GRAN ANGULAR en dirección W Aparecerá una consulta Para realizar el proceso seleccione SI Para interrumpir el proceso seleccione NO Parar terminar el proceso pulse OK ...

Страница 67: ...a función se pueden visualizar todas las fotos memorizadas una tras otra como presentación de diapositivas Seleccione con DERECHA IZQUIERDA DIAPOSITIVA Pulse OK Se inicia la representación de diapositivas Para detener la representación de diapositivas vuelva a pulsar OK ...

Страница 68: ...al Ningún efecto Ajuste estándar de la cámara B N Se grabarán las imágenes en blanco y negro Clásico Las imágenes tienen una tonalidad marrón efecto sepia Negativo Las imágenes se cambian a los colores negativos Seleccione el menú EFECTO Seleccione el efecto deseado Pulse OK L El ajuste se mantiene hasta que se seleccione otro o hasta que se apague la cámara ...

Страница 69: ...bién se puede utilizar la cámara para grabaciones de sonido p ej como dictáfono Voice Pen Grabar Para iniciar una grabación de sonido proceda como sigue Despliegue la pantalla LC Pulse OK Aparecerá el menú Modo película Pulse DERECHA hasta que aparezca el menú LÁPIZ DE VOZ Seleccione con TELE GRAN ANGULAR ENTRAR ...

Страница 70: ... al micrófono incorporado Para detener la grabación de sonido vuelva a pulsar DISPARADOR PELÍCULA L Se archivarán los archivos de sonido en formato WAV Reproducir Para reproducir una grabación de sonido proceda como sigue Pulse RECORD PLAY Aparecerá el menú Modo de reproducción Seleccione con DERECHA el menú VOZ ...

Страница 71: ...IERDA el archivo de sonido deseado Para iniciar la reproducción pulse DISPARADOR PELÍCULA El archivo de sonido grabado se reproduce a través del altavoz incorporado Para ajustar el volumen pulse TELE GRAN ANGULAR Para interrumpir la reproducción vuelva a pulsar el DISPARADOR PELÍCULA ...

Страница 72: ...enú de opciones de la reproducción de sonido pulse OK Para volver a oir la última grabación de sonido desplace TELE GRAN ANGULAR en dirección W Para volver a oir todas las grabaciones de sonido desplace TELE GRAN ANGULAR dos veces seguidas en dirección W ...

Страница 73: ...sea eliminar Pulse OK Para acceder a la opción Eliminar desplace TELE GRAN ANGULAR en dirección T Para eliminar un archivo de sonido desplace TELE GRAN ANGULAR en dirección W Para eliminar todos los archivos de sonido desplace TELE GRAN ANGULAR en dirección T Aparecerá una ventanilla de consulta Para realizar la eliminación seleccione SÍ Para no realizar la eliminación seleccione NO Para terminar ...

Страница 74: ...n USB del ordenador El LED del DISPARADOR PELÍCULA se ilumina de color rojo Cargue los archivos MP3 en la carpeta MP3 de la memoria interna o en una tarjeta SD MMC opcional L La carpeta se crea automáticamente en la tarjeta SD MMC Desconecte la cámara del ordenador Retire el cable USB Reproducir música MP3 Para reproducir un archivo MP3 proceda como sigue Pulse RECORD PLAY Aparece el menú Modo de ...

Страница 75: ...DERECHA IZQUIERDA Si el archivo dispone de una indicación de la letra de la canción aparece un símbolo de notas Para reproducir el archivo MP3 pulse el DISPARADOR PELÍCULA u OK Ajuste el volumen con TELE GRAN ANGULAR Para terminar la reproducción vuelva a pulsar el DISPARADOR PELÍCULA Para acceder al menú Repetir pulse OK ...

Страница 76: ...ces seguidas en dirección W Utilizar el auricular Conecte el auricular suministrado a la toma para auriculares Aparece el menú Auricular TV Seleccione con TELE GRAN ANGULAR Auricular Pulse OK AVISO Primero ajuste el volumen a un valor del margen inferior de la escala antes de utilizar el auricular A continuación elija un volumen que le resulte agradable Un volumen demasiado alto puede dañar su oíd...

Страница 77: ...memoria en su cámara Usted mismo puede diseñar el diseño de los libros Cargar E Books Conecte la cámara con el cable suministrado a la conexión USB del ordenador Cargue los E Books de formato TXT en la carpeta de E Book L La carpeta se crea automáticamente en la tarjeta SD MMC o en la memoria interna Leer E Books Pulse RECORD PLAY Aparece el menú Modo de Reproducción Seleccione el menú EBOOK Pulse...

Страница 78: ...un EBOOK Pulse OK Para pasar a la página siguiente desplace TELE GRAN ANGULAR en dirección W Para pasar a la página anterior desplace TELE GRAN ANGULAR en dirección T Seleccione los símbolos de la barra inferior de la pantalla LC con DERECHA IZQUIERDA Pulse OK ...

Страница 79: ...er E Books 79 DE EN ES PT Símbolo Explicación cambiar a la primera página cambiar a la última página modificar el color del texto y del fondo dejar que el texto vaya pasando automáticamente añadir punto de lectura ...

Страница 80: ...lla de bienvenida Seleccione Install USB Driver instalar controlador USB Siga las indicaciones que aparecen en la pantalla Instalar los programas de aplicación El CD suministrado contiene cinco programas de aplicación Acrsoft PhotoImpression Con este software se pueden mostrar editar y organizar imágenes Acrsoft Show Biz Con este software se pueden editar películas Acrsoft Media Converter Con este...

Страница 81: ...abadas se puedan reproducir correctamente en el PC Para instalar los programas de aplicación en su ordenador proceda como sigue Introduzca el CD ROM en el lector correspondiente de su ordenador Aparece la ventanilla de bienvenida Seleccione en la lista aquellos programas que desea instalar Siga las indicaciones que aparecen en la pantalla ...

Страница 82: ...ilumina de color rojo Las películas y fotos grabadas se encuentran memorizadas en la memoria interna o en la tarjeta SD MMC Las fotos están en formato JPG Se encuentran en la memoria interna o en su tarjeta SD MMC en la carpeta DCIM 100PHOTO Las películas están en formato AVI Se encuentran en la memoria interna o en su tarjeta SD MMC en la carpeta DCIM 200MOVIE L Las carpetas se crean automáticame...

Страница 83: ...compatible con Xvid Su cámara trabaja con este formato Así se podrán reproducir las películas convertidas en su cámara Convertir con el Media Converter 2 Inicie el Acrsoft Media Converter Aparece la ventana principal de Media Converter Seleccione de la columna Select Device la entrada deseada En la columna Select Conversion Parameter aparece la entrada correspondiente ...

Страница 84: ...Convertir archivos de vídeo 84 Haga clic en ADD MEDIA Seleccione el archivo de vídeo que desea convertir ...

Страница 85: ...Convertir archivos de vídeo 85 DE EN ES PT iniciar vista previa detener vista previa Para iniciar la conversión haga clic en Convertir ...

Страница 86: ... Clip0001 avi Si este nombre de archivo ya existe en la cámara cambie el nombre del archivo convertido a Clip000x avi L x significa el siguiente número libre Conecte la cámara con el cable USB al ordenador Transfiera el archivo convertido a la carpeta DCIM 200MOVIE de la tarjeta SD MMC Desconecte la cámara del ordenador Retire el cable USB Visualice el archivo de vídeo convertido en la pantalla LC...

Страница 87: ...crsoft Showbiz DVD se pueden almacenar sus archivos de vídeo en DVD Para archivar uno o varios archivos de vídeo en DVD proceda como sigue Inicie el programa Acrsoft Showbiz DVD Aparece la ventana principal del programa Seleccione el archivo de vídeo deseado Desplace el archivo de vídeo al área marcada ...

Страница 88: ...Almacenar archivos de vídeo en DVD 88 Haga clic en CREATE Para iniciar el proceso de grabación haga clic en START ...

Страница 89: ...medad en el adaptador de red ATENCIÓN Se puede dañar el camcorder Asegúrese de que no entre humead en el camcorder No utilice detergentes agresivos y ningún disolvente Limpiar la carcasa Limpie la suciedad con un paño suave y seco Limpiar el objetivo Limpie la suciedad con un paño para limpiar cristales Limpiar la pantalla LC Limpie la suciedad con un paño para limpiar cristales ...

Страница 90: ...as grabaciones de películas tienen un tono de color El balance de blancos es incorrecto Ajuste el balance de blancos correcto para las condiciones lumínicas véase el apartado Balance de blancos a partir de la página 39 Las fotografías grabaciones de película no están en color o de un color incorrecto Un efecto está activado Desactive el efecto véase el capítulo Utilizar efectos fotográficos y de p...

Страница 91: ... el apartado Contraluz a partir de la página 58 Las fotografías grabaciones de película están demasiado oscuras La corrección de la exposición está desajustada Vuelva a ajustar la corrección de la exposición véase el apartado Exposición a partir de la página 51 El Modo Contraluz está activado Active el Modo Contraluz véase el apartado Contraluz a partir de la página 58 Las fotografías grabaciones ...

Страница 92: ...a página 17 La tarjeta SD MMC está bloqueada Desbloquee la tarjeta SD MMC véase el apartado Proteger los datos de una tarjeta SD MMC a partir de la página 17 No se pueden eliminar las fotografías grabaciones de película El archivo está bloqueado Desbloquee el archivo véase el apartado Proteger los datos de una tarjeta SD MMC a partir de la página 17 No se puede encender la cámara La batería está v...

Страница 93: ...troduzca la tarjeta SD MMC correctamente véase el apartado Introducir y retirar la tarjeta SD MMC a partir de la página 16 El ordenador no reconoce la cámara No se ha instalado el controlador de la cámara en el ordenador Instale el controlador de la cámara véase el apartado Instalar el controlador de la cámara a partir de la página 80 ...

Страница 94: ...acenamiento 64 MByte interno una parte está resevada para el Firmware Ranura para tarjetas SD MMC Formato de archivo Foto JPEG Película AVI Xvid Sonido WAV MP3 Objetivo F3 2 f 7 00 mm Margen de ajuste Normal 150 cm hasta infinito Macro 20 cm centro de la imagen Zoom Zoom digital 8 x Resolución de imagen 3840 2880 Pixel 11 Megapixel interpolación 2592 1944 Pixel 5 Megapixel 1600 1200 Pixel 2 Megapi...

Страница 95: ...os Reproducción imagen Imagen individual Indicación de imágenes en miniatura Diapositivas Conexión PC Conexión Mini USB 2 0 HighSpeed Alimentación eléctrica Batería ión litio NP60 1050 mAh 3 7 V Dimensiones 90 56 6 25 mm Peso 110 g sin batería Requisitos del sistema para el PC Sistema operativo Windows XP Vista CPU Pentium III 800 MHz o superior Memoria RAM mín 256 MB Lector CD ROM Memoria libre e...

Страница 96: ... y la salud de las personas causadas por una eliminación incorrecta Así Usted contribuye a una reutilización el reciclaje y otras formas para el aprovechamiento de viejos aparatos eléctricos y electrónicos Recibirá información acerca de dónde podrá eliminar sus aparatos en su ayuntamiento o autoridad local Eliminar las baterías ATENCIÓN Las baterías pueden contener sustancias tóxicas que dañan el ...

Страница 97: ... of the product Keep this manual near the camcorder at all times If you sell or otherwise dispense with the camcorder please pass on these operating instructions with it Style Features Various parts of the operating instructions can be identified by their specific style features This is designed for easy identification of the type of text normal text cross references names for BUTTONS on the camco...

Страница 98: ...ation 8 Avoiding malfunctions 8 Style features used for safety instructions 9 Product description 10 Package contents 11 Start of operation 13 Inserting the battery 13 Charging the battery 15 Stationary operation 15 Inserting and removing the SD MMC card 16 Protecting data on an SD MMC card 17 Switching the camcorder on and off 17 Operation 19 Using the function buttons 20 LC displays 22 Changing ...

Страница 99: ...re 38 Definition 38 White balance 39 Stabilisation 39 Motion detection function 39 Night exposure 39 Finishing 39 Film playback 40 Playback on LC display 40 Playback on a TV set 42 Functions in playback mode 42 Deleting films 43 Displaying thumbnails 44 Locking films 45 Replaying films 46 Producing photos 48 Making settings 48 Resolution 50 Exposure 50 Two in one 51 Picture frames 53 Flash 54 Self...

Страница 100: ...s 76 Loading e books 76 Reading e books 76 Installing and using the software provided 79 Installing the camera driver 79 Installing application programs 79 Acrsoft PhotoImpression 79 Acrsoft ShowBiz 79 Acrsoft Media Converter 79 Adobe Reader 79 MPEG 4 video codec Xvid 80 Transferring films and photos to a computer 81 Converting video files 82 Converting using Media Converter 2 82 Backing up video ...

Страница 101: ...r injuries to yourself or others Correct use The camcorder is designed for the following purposes recording and playback of digital video films recording and playback of digital photos recording and playback of digital sound playback of MP3 files displaying e books in text format It is intended and may be used for these purposes only It may only be used as specified in these operating instructions...

Страница 102: ...ins cable Take measures to prevent moisture or liquid from penetrating the camcorder or mains adapter Do not touch the mains cable with wet hands Never use the camcorder if the mains adapter is damaged Always have repairs carried out by qualified professionals Switch the camcorder off immediately in the event of any malfunction Risk of explosion Do not short circuit the battery Do not throw the ba...

Страница 103: ...k that the contacts in the camcorder and on the batteries are clean Clean the battery connections if necessary with a clean dry cloth or an eraser Do not touch the lens or lens mounting Avoiding damage to the battery Never insert the battery the wrong way round Always ensure the correct polarity at the terminals Never allow the battery to come into contact with liquids Direct intense heat can dama...

Страница 104: ...ect the camcorder from damp salt and dust Protect the camcorder from strong magnetic fields Keep the camcorder away from sources of strong electromagnetic fields e g electric motors Do not use or store the camcorder in direct sunlight or at high temperatures L At low temperatures the capacity of the battery can drop significantly due to the reduced speed of the chemical reactions When recording in...

Страница 105: ...NG alerts the user to hazards which could lead to serious or fatal injuries BEWARE Information flagged up by the word BEWARE alerts the user to hazards which could lead to minor or moderate injuries CAUTION Information flagged up by the word CAUTION alerts the user to hazards which could damage property or harm the environment ...

Страница 106: ...lso serves to display the on screen menus in which you can make your settings The camcorder has a digital zoom and functions for automatic setting of exposure and colour balance The internal memory has a storage capacity of 64 MB You can therefore take photos or record short films even if there is no SD MMC card in the camcorder If you need more memory capacity you can use commercially available S...

Страница 107: ...Package contents 11 DE EN ES PT Package contents ...

Страница 108: ...ents 12 Number Description 1 USB cable 2 MD 85733 DV camcorder 3 Mains adapter plug 4 TV cable 5 Strap 6 Earphone caps 7 Earphones NP60 type lithium ion battery CD ROM with application programs and driver software ...

Страница 109: ...ot throw the battery into a fire WARNING Risk of poisoning Keep the battery out of reach of children WARNING Risk of chemical burns If the battery is leaking remove it from the camcorder immediately Hold the camcorder with the battery compartment cover facing upwards To open the cover press on the arrow symbol on the top of the cover Push the cover in the direction of the arrow 1 Lift off the cove...

Страница 110: ...acts in the compartment CAUTION Beware of damaging the cover Do not use excessive force Apply slight pressure only Press lightly on the battery 2 in order to insert it in the battery compartment Place the cover on the battery compartment in such a way that the small pins on its rear are located in the grooves provided Push the cover against the direction of the arrow until it clicks into place ...

Страница 111: ...r plug Connect the mains plug to the camcorder in order to charge the battery Plug the mains adapter into a 230 V 50 Hz socket The battery will begin charging L The battery requires approximately six hours to reach full charge for the first time L Advice on the correct handling of batteries can be found in the section entitled Avoiding damage to the battery from page 7 onwards Stationary operation...

Страница 112: ...corder with the LC display facing upwards in order to insert an SD MMC card Hold the SD MMC card with its inscription facing upwards Slide the SD MMC card carefully into the slot until it clicks into place The SD MMC card is now ready for use To remove the SD MMC card press the SD MMC card into the camcorder slightly and let it go again The card will be ejected by a few millimetres Remove the SD M...

Страница 113: ...t store any new data To remove the write protection push the write protect tab to position 1 The write protection is now cancelled You can now save data on the SD MMC card Switching the camcorder on and off To switch the camcorder on open the LC display as follows Hold the camcorder with the display flap pointing upwards Take hold of the flap Lift the display flap up until it is vertical 1 You wil...

Страница 114: ...Start of operation 18 To use the camcorder rotate the display 90 degrees anti clockwise 2 The camcorder is now ready for use To switch the camcorder off close the LC display or press the On Off switch 1 ...

Страница 115: ...can for example start recording using the function buttons or change the operating mode You can make your settings for the respective operating modes in the on screen menus This chapter provides information about the function buttons and their functions the LCD displays the operation of the on screen menus ...

Страница 116: ...Operation 20 Using the function buttons ...

Страница 117: ...point 7 Audio output earphone socket 8 USB 2 0 high speed and mains connection Record play mode change function 9 Return to previous screen No Description Leftward button Flash On Off Red eye suppression function Light 10 Auto Rightward button 11 Self timer On Off OK button 12 Tele wide angle rocker switch 13 Photo shutter release 14 Lens 15 On Off switch 16 Self timer LCD ...

Страница 118: ...Operation 22 LC displays ...

Страница 119: ...e and wide angle factor 7 Digital zoom factor Battery fully charged Battery on medium charge Battery on low charge 8 Battery flat 9 SD MMC card located in camcorder No Symbol Description 10 Macro function enabled 11 White balance 12 Self timer 13 Date year month day 14 Continuous shooting Automatic flash Flash off Flash on permanently Red eye reduction 15 Light on 16 Backlight High photo resolutio...

Страница 120: ... menus to specify all settings call up functions and to define the playback modes The on screen menus differ depending on the operating mode Press OK to display the settings menu Press RECORD PLAY to display the playback menu Use the tele angle and wide angle rocker switch to move up and down in the on screen menus Use the leftward and rightward buttons to move left and right in the on screen menu...

Страница 121: ...ing settings Specify the settings for your film Specify your camera settings Select effects Start an audio recording Specify the basic settings Press OK to display the Recording menu The settings menu is then displayed The Movie mode menu is selected No Description 1 MODO PELÍCULA 2 MODO CÁMARA 3 MODO VOZ dictaphone function 4 EFECTO 5 CONFIGURACIÓN ...

Страница 122: ...n in the MODO PELÍCULA menu You can select the following settings RESOLUCIÓN EXPOSICIÓN LUZ NITIDEZ BALANCE DE BLANCOS ESTABILIZACIÓN DETECTOR DE MOVIMENTO MODO NOCTURNO SALIR Details on the various settings can be found in the section entitled Making settings from page 35 onwards ...

Страница 123: ...red for digital camera mode RESOLUCIÓN EXPOSICIÓN DOS EN UNO MARCO DE FOTO FLASH TEMPORIZADOR NITEDEZ BALANCE DE BLANCOS FOTO MÚLTIPLE LUZ DE FONDO IMPRESIÓN DE FECHA MODO NOTCURNO SALIR Details on the various settings can be found in the section entitled Making settings from page 35 onwards ...

Страница 124: ...owing options ACT SALIR Details on the various settings can be found in the section entitled Recording from page 68 onwards EFECTO menu You can specify the effects for filming and taking photos in the EFECTO menu NORMAL BLANCO NEGRO CLÁSICO NEGATIVO SALIR Details on the various settings can be found in the section entitled Using film and photo effects from page 67 onwards ...

Страница 125: ...lowing basic settings for the camcorder in the CONFIGURACIÓN menu SONIDO PANTALLA INICIAL AJUSTE DE LA HORA FORMATEAR MEMORIA SISTEMA TV IDIOMA CONFIGURACIÓN SALIR Details on the various settings can be found in the section entitled Making settings from page 35 onwards ...

Страница 126: ... to display the Playback menu Press the left or right buttons or use the tele angle and wide angle rocker switch to move to a menu item Press OK to select a menu item Item Description PELÍCULA Play film IMAGEN Display photos Y LIBRO ELECTRÓNICO Display e books VOZ Play own sound recordings MÚSICA Play MP3 files ...

Страница 127: ...n use the standard start screen or select a photo from the memory for the start screen Select the Start screen sub menu The start screen will be displayed when you switch on the camcorder To select a picture press the leftward or rightward buttons Press OK to save the displayed photo as a start screen Setting the time To set the year press the tele wide angle button until the correct year is displ...

Страница 128: ...e internal memory or the SD MMC card Press OK A confirmation prompt will appear on the screen Select the option NO in order not to delete the stored data The menu will be closed and the data retained Select the option SI in order to delete the data Press OK The menu will be closed and the memory formatted TV system You can set the camera to various TV systems You can then adjust the display on the...

Страница 129: ...the setting Factory setting standard You can use this function to restore the camcorder s factory settings Choose the Standard option Press the OK button A confirmation prompt will appear on the screen Select the option NO in order to retain the current settings Select the option SI in order to accept the factory settings Press OK The menu will be closed ...

Страница 130: ...Image stabiliser Permanent Off Motion detection Once Off Two in one Once Off Photo frame Once Off Flash Permanent Off Self timer Once Off Continuous shooting Once Off Background lighting Once Off Setting Validity Factory Setting Date inscription Permanent Off Effect Once Normal Sound Permanent On TV system Permanent Depends where sold Language Permanent Depends where sold Volume Permanent Level 6 ...

Страница 131: ...ding The time hours minutes seconds is shown on the LC display during recording Press the SHOOT MOVIE button again to stop recording Making settings The camera is supplied with the following factory settings in movie mode Menu Item Validity Factory Setting Resolution Permanent High Light Once Off Exposure Once 0 EV Definition Once Level 5 White balance Once Off Stabilisation Permanent Off Motion d...

Страница 132: ...ms 36 Lift the LC display flap up to change the factory settings Press OK The Movie mode menu will be displayed Highlight the required menu item using TELE WIDE ANGLE Press OK The selected sub menu will be displayed ...

Страница 133: ...explained in more detail in the following sections Resolution The following settings are available for the film quality Setting Clarification High 640 480 pixels VGA 30 fps Normal 320 240 pixels QVGA 30 fps The selected resolution will be active until you select another one Light Select the ON setting in order to switch on the light on the camera as well during filming ...

Страница 134: ...re For overexposure select a setting in the positive range 1 0 EV 0 6 EV or 0 3 EV If you want artificial underexposure select a setting in the negative range 0 3 EV 0 6 EV or 1 0 EV The setting will be retained until you select another one or switch the camera off The factory setting is 0 EV Definition You can select nine levels of definition with this setting The factory setting is level 5 To sh...

Страница 135: ...n electric light Stabilisation This setting can be used to reduce blurring as a result of unsteady shooting L The recorded image becomes smaller if the stabilisation function is activated L The digital zoom is deactivated if the stabiliser function is enabled Motion detection function You can make video recordings automatically in this setting as soon as something moves for three seconds in the di...

Страница 136: ...the films recorded in the internal memory or on the optional memory card Playback on LC display Proceed as follows to view the films on the camera s LC display Press RECORD PLAY The main playback mode menu will be displayed Use the RIGHTWARD button to select the FILM menu ...

Страница 137: ...t indicates the number of films recorded Use the RIGHT LEFT buttons in order to change to the previous or next film Press SHOOT MOVIE to start playback Use the RIGHT LEFT buttons to fast forward or rewind during film playback Release the button again to stop the fast forward or rewind function You can use TELE WIDE ANGLE to adjust the volume Press TELE WIDE ANGLE towards T to increase the volume ...

Страница 138: ...to the corresponding sockets on the television set Switch the television set on The Earphones TV menu will appear on the LC display Select the TV option using TELE WIDE ANGLE Press OK The film will be displayed on the TV set The LC monitor is switched off while the camera is connected to a TV set Functions in playback mode The following functions are also available to you in Film playback mode Cal...

Страница 139: ...o select a film for deletion Push the TELE WIDE ANGLE button towards W in order to delete one single film Push the TELE WIDE ANGLE button towards T in order to delete all films A confirmation prompt will appear Select SI to proceed with deletion Select NO to cancel the deletion process Press OK L If a memory card is inserted you can only delete the films on the memory card ...

Страница 140: ...hem before deletion More explanation on write protection can be found in the section entitled Protecting data on an SD MMC card from page 17 onwards Displaying thumbnails This function provides you with a more rapid overview of the films stored in the memory Use the RIGHT LEFT buttons to select the option MINIATURA Press OK Up to nine films can be shown as thumbnails ...

Страница 141: ... to select the film required Press OK to playback the film Locking films This one step function enables you to protect individual films or all films from accidental deletion Use the RIGHT LEFT buttons to select the option BLOQUEAR Press OK The BLOQUEAR menu will be displayed ...

Страница 142: ...k unlock one film A confirmation window is then displayed Select SI to proceed with the action Select NO to cancel the process Press OK Replaying films This function enables automatic repeated playback of single films or all films Use the RIGHT LEFT buttons to select the option REPETIR UNA Press OK The selected film will be replayed Use the RIGHT LEFT buttons to select the option REPETIR TODO ...

Страница 143: ...Film playback 47 DE EN ES PT Press OK All the films available will be replayed ...

Страница 144: ...mode Making settings The camera is supplied with the following factory settings in picture mode Menu Item Validity Factory Setting Resolution Permanent Normal Exposure Once 0 EV Two in one Once Off Picture frame Once Off Flash Permanent Off Self timer Once Off Definition Once Level 5 White balance Once Auto Continuous shooting Once Off Backlight Once Off Date inscription Permanent Off Night exposu...

Страница 145: ...splayed Press the RIGHT button once The camera mode menu will be displayed Select the required menu item using TELE WIDE ANGLE Press OK The selected sub menu will be displayed Choose a setting Press OK The chosen setting is now enabled The various setting options are explained in more detail below ...

Страница 146: ... active until you choose another one Exposure The camera selects the right exposure automatically In difficult lighting conditions you may achieve better results by adjusting the exposure manually If you want to photograph someone with a sunset in the background for example you will need artificial overexposure For overexposure select a setting in the positive range 1 0 EV 0 6 EV or 0 3 EV If you ...

Страница 147: ...les you to combine two photos to make one picture Select the DOS EN UNO sub menu under the camera mode menu Press OK Choose the ACT option Press OK The right half of the LC display will be dimmed Select the display window on the non dimmed half of the LC display ...

Страница 148: ... dimmed The picture just taken will be displayed Select the display window on the non dimmed half of the LC display Press the PHOTO RELEASE SHUTTER The new picture is now completed L The DOS EN UNO setting remains active for one photograph at a time The camera then returns to normal shooting mode ...

Страница 149: ...RO DE FOTO sub menu Press OK Select the picture frame using TELE WIDE ANGLE Press OK to frame the photos with the frame selected The photos will then appear in the selected frame The setting will be retained until you select another one or switch the camera off Press RECORD PLAY to exit this function In order to switch off the picture frame via the menu choose the grey picture frame ...

Страница 150: ...ighting conditions Flash on permanently The flash is on for every shot Flash off The flash is switched off Red eye reduction If you take photographs of people with a flash their eyes may appear red The red eye effect can be minimised with this setting Make the settings via the FLASH menu or with the RIGHTWARD button The relevant symbol for the selected setting will appear in the display L The chos...

Страница 151: ...onds will elapse before the photograph is taken The self timer LED flashes slowly during this period It then flashes more rapidly shortly before taking the photograph Place the camera on a level surface or use a tripod in order to prevent the shots from being out of focus L The self timer setting is only active for one photograph at a time The camera then returns to normal shooting mode Definition...

Страница 152: ...n in daylight Fluorescent light For shots taken in fluorescent light Light bulb For shots taken in electric light Continuous shooting This setting enables five photographs to be taken in quick succession Place the camera on a level surface or use a tripod in order to prevent the shots from being out of focus L The setting is active for one shoot only The camera then returns to normal shooting mode...

Страница 153: ... option in the Camera mode menu Select On to activate the date inscription Press OK L The setting will be retained until you select another one Night exposure For better results with night shots select the option On in the Night exposure menu Place the camera on a level surface or use a tripod in order to prevent the shots from being out of focus L The setting will be retained until you select ano...

Страница 154: ...MMC card You can view these photos in two different ways Playback on the LC display Playback on a TV set Playback on LC display Proceed as follows to view the photos on the camera s LC display Press RECORD PLAY The playback mode menu will be displayed Select PHOTO using the RIGHT button or TELE WIDE ANGLE ...

Страница 155: ... previous or next photo Press the TELE WIDE ANGLE towards the T in order to enlarge the picture on the LC display Press the TELE WIDE ANGLE towards the W in order to reduce the picture on the LC display Proceed as follows in order to select a specific part of the picture for enlargement Press the TELE WIDE ANGLE button towards the T ...

Страница 156: ...ll be enlarged Push the TELE WIDE ANGLE button towards the W in order to reduce the area again Playback on a TV set Proceed as follows to view the photos on a television set Connect the black plug on the AV cable to the camera s TV output Connect the white and yellow plug on the AV cable to the corresponding sockets on the television set Switch the television set on The Earphones TV menu will appe...

Страница 157: ... playback mode The following functions are available in playback mode for photos Deleting photos Displaying thumbnails Locking unlocking photos Slide show Call up the playback mode Select PHOTO using the RIGHT button or TELE WIDE ANGLE Press OK ...

Страница 158: ... the option ELIMINAR Press OK The ELIMINAR menu will be displayed Use the RIGHT LEFT buttons to select a photo for deletion Push the TELE WIDE ANGLE button towards W in order to delete one single photo Push the TELE WIDE ANGLE button towards T in order to delete all photos A confirmation window is then displayed ...

Страница 159: ...MMC card inserted in the camcorder you can only delete the photos on the SD MMC card If the SD MMC card is locked you cannot delete the photos on the SD MMC card If the films you wish to delete are protected you will have to unlock them before deletion More details can be found in the section entitled Protecting data on an SD MMC card from page 17 onwards ...

Страница 160: ...e rapid overview of the photos stored in the memory Use the RIGHT LEFT buttons to select the option MINIATURA Press OK L Up to nine thumbnails can be shown on the LC display Use the RIGHT LEFT buttons or TELE WIDE ANGLE to select the photo required Press OK to display the photo ...

Страница 161: ...OQUEAR Press OK The BLOQUEAR menu will be displayed Use the RIGHT LEFT buttons to select a photo Push the TELE WIDE ANGLE button towards T in order to lock unlock all photos Push the TELE WIDE ANGLE button towards W in order to lock unlock one photo A confirmation prompt will appear Select SI to proceed with the action Select NO to cancel the process Press OK to exit the process ...

Страница 162: ...layback This function enables you to have all the photos in the memory displayed in succession as a slide show Use the RIGHT LEFT buttons to select DIAPOSITIVA Press OK The slide show will start To stop the slide show press OK again ...

Страница 163: ...ormal No effect Standard camera setting B W Pictures are taken in black and white Classic Pictures are given a brownish tone sepia effect Negative Pictures are reversed into negative images Select the EFECTO menu Select the desired effect Press OK The setting will be retained until you select another one or switch the camera off ...

Страница 164: ...lso be used for sound recordings e g as a dictaphone Voice Pen Recording Proceed as follows to begin sound recording Lift the LC display flap Press OK The movie mode menu will be displayed Press the RIGHTWARD button until the LÁPIZ DE VOZ menu is displayed Select ENTRAR using the TELE WIDE ANGLE button ...

Страница 165: ...ecording Speak into the inbuilt microphone To stop the sound recording press SHOOT MOVIE again The sound files will be saved in WAV format Playback Proceed as follows to play back sound recording Press RECORD PLAY The playback mode menu will be displayed Use the RIGHTWARD button to select the VOZ menu ...

Страница 166: ... RIGHT LEFT buttons to select the required sound file Press SHOOT MOVIE to start playback The sound file will be played back via the inbuilt loudspeaker Press TELE WIDE ANGLE to adjust the volume Press the SHOOT MOVIE button again to stop playback ...

Страница 167: ...to call up the sound playback menu Push the TELE WIDE ANGLE button towards the W in order to listen to the last sound recording again Push the TELE WIDE ANGLE button towards the W twice in succession in order to listen to all the sound recordings again ...

Страница 168: ...K Push the TELE WIDE ANGLE button towards T in order to call up the delete option Push the TELE WIDE ANGLE button towards W in order to delete one single sound file Push the TELE WIDE ANGLE button towards T in order to delete all the sound files A confirmation window will then be displayed Select SI to proceed with deletion Select NO to cancel the delete operation Press OK to exit the process ...

Страница 169: ... to the computer s USB connection The SHOOT MOVIE LED lights up red Load the MP3 files into the MP3 folder in the internal memory or onto the optional SD MMC card The folder will be created automatically on the SD MMC card Log the camera off the computer Remove the USB cable Playing MP3 music Proceed as follows to play an MP3 file Press RECORD PLAY The playback mode menu will be displayed Use the ...

Страница 170: ...ll through with the RIGHT LEFT buttons A musical note icon will be displayed next to any files with lyrics Press SHOOT MOVIE or OK to play the MP3 file Use TELE WIDE ANGLE to adjust the volume Press the SHOOT MOVIE button again to stop playback Press OK to call up the repeat menu ...

Страница 171: ...twice in succession in order to listen to all the MP3 files again Using earphones Plug the earphones supplied into the earphone socket The Earphones TV menu will be displayed Select Earphones using the TELE WIDE ANGLE button Press OK WARNING Set the volume at a low level initially before using headphones Then choose a comfortable volume Too high a volume setting can damage your hearing ...

Страница 172: ...mounts of memory You can choose the layout of the books Loading e books Using the cable provided connect the camera to the computer s USB connection Load the e books in txt format into the e book folder L The folder will be created automatically on the SD MMC card or the internal memory Reading e books Press RECORD PLAY The Playback mode menu will be displayed Select the EBOOK menu Press OK ...

Страница 173: ...DE ANGLE Press OK Push the TELE WIDE ANGLE button towards the W in order to turn to the next page Push the TELE WIDE ANGLE button towards the T in order to return to the previous page Use RIGHT LEFT to select icons from the task bar at the bottom of the LC display Press OK ...

Страница 174: ...Loading and reading e books 78 Symbol Clarification Go to first page Go to last page Change text colour and background colour Scroll through text automatically Insert bookmark ...

Страница 175: ...ded on your computer The welcome screen will appear Select Install USB Driver Follow the instructions on the monitor Installing application programs The CD supplied contains five application programs Acrsoft PhotoImpression You can display edit and organise pictures with this software Acrsoft ShowBiz You can edit films with this software Acrsoft Media Converter You can convert various video format...

Страница 176: ...lled for correct PC playback of the films recorded Proceed as follows to install the application programs on your computer Insert the CD ROM in the drive provided on your computer The welcome screen will appear Select the programs you wish to install from the list Follow the instructions on the monitor ...

Страница 177: ...VIE LED lights up red The films and photos will be saved in the internal memory or on the SD MMC card The photos are in JPG format They are located in the DCIM 100PHOTO folder in the internal memory or on your SD MMC card The films are in AVI format They are located in the DCIM 200MOVIE folder in the internal memory or on your SD MMC card L The folders are created automatically on the SD MMC card ...

Страница 178: ...r Your camera works with this format After conversion the films can be played back on your camera Converting using Media Converter 2 Start Acrsoft Media Converter The Media Converter main screen appears Choose the relevant item from the Select Device column The relevant item will be displayed in the Select Conversion Parameter column Click on ADD MEDIA ...

Страница 179: ...Converting video files 83 DE EN ES PT Select the video file for conversion ...

Страница 180: ...Converting video files 84 Start preview Exit preview To start conversion click on Convert The conversion process will start ...

Страница 181: ...his file name already exists on the camera then change the name of the converted file to Clip000x avi The x represents the next available number Connect the camera to your computer with the USB cable Transfer the converted file to the DCIM 200MOVIE folder on the SD MMC card Log the camera off the computer Remove the USB cable View the converted video file on the LC display ...

Страница 182: ... your video files on DVD using the Acrsoft Showbiz DVD software Proceed as follows to back up one or more video files on DVD Start Acrsoft Showbiz DVD The program s main screen will appear Select the relevant video file Drag the video file to the highlighted area Click on CREATE ...

Страница 183: ...Backing up video files on DVD 87 DE EN ES PT To start the burning process click on START ...

Страница 184: ...he mains adaptor CAUTION Beware of damaging the camcorder Ensure that no liquids penetrate the camcorder Do not use abrasive cleaning agents or solvents Cleaning the casing Wipe the casing down with a soft dry cloth Cleaning the lens Wipe the lens with a lens cloth Cleaning the LC display Wipe the display with a soft lens cloth ...

Страница 185: ...e lens The pictures films have a colour imbalance The white balance is incorrect Set the right white balance for the lighting conditions see section entitled White balance from page 39 onwards The pictures films are not in colour or they are the wrong colours A special effect is enabled Switch the special effect off see Using film and photo effects from page 67 onwards ...

Страница 186: ...n against the light Switch the backlight mode on see section entitled Backlight from page 56 onwards The pictures films are too dark The exposure is incorrectly adjusted Readjust the exposure see section entitled Exposure from page 38 onwards Backlight mode is enabled Switch the backlight mode off see section entitled Backlight from page 56 onwards The pictures films are too light The exposure is ...

Страница 187: ... from page 17 onwards The SD MMC card is locked Unlock the SD MMC card see section entitled Protecting data on an SD MMC card from page 17 onwards The pictures films cannot be deleted The file is locked Unlock the file see section entitled Protecting data on an SD MMC card from page 17 onwards The camera will not switch on The battery is flat Charge the battery see section entitled Charging the ba...

Страница 188: ...on Insert the SD MMC card properly see section entitled Inserting and removing the SD MMC card from page 16 onwards The camera is not being detected by the computer The camera driver is not installed on the computer Install the camera driver see section entitled Installing the camera driver from page 79 onwards ...

Страница 189: ...MB internal one part reserved for firmware Slot for SD MMC cards File formats Images JPEG Films AVI Xvid Sound WAV MP3 Lens F3 2 f 7 00 mm Range Normal 150 cm to infinite Macro centre of image 20 cm Zoom 8x digital zoom Image resolution 3840 2880 pixels 11 megapixels interpolated 2592 1944 pixels 5 megapixels 1600 1200 pixels 2 megapixels Film resolution 640 480 VGA 320 240 QVGA White balance Auto...

Страница 190: ...bnail view Slide show PC connection Mini USB 2 0 high speed connection Power supply NP60 lithium ion battery 1050 mAh 3 7 V Dimensions 90 56 6 25 mm Weight 110 g excl battery System requirements for the PC Operating system Windows XP Vista CPU Pentium III 800 MHz or above RAM min 256 MB Drive CD ROM Available hard disk memory Min 1 GB Connection USB 1 1 or 2 0 ...

Страница 191: ...ct on the environment and on human health caused by incorrect disposal You will therefore be contributing to the recovery recycling and other forms of reusing waste electric and electronic equipment Your local authority or town council will be able to advise you on the whereabouts of recycling points for equipment Battery disposal CAUTION Batteries may contain toxins which harm the environment Alw...

Страница 192: ...Disposal 96 ...

Страница 193: ... diese Gebrauchsanleitung immer in der Nähe des Camcorders auf Geben Sie die Gebrauchsanleitung weiter wenn Sie den Camcorder verkaufen oder auf andere Art weitergeben Gestaltungsmerkmale Verschiedene Elemente der Gebrauchsanleitung sind mit festgelegten Gestaltungsmerkmalen versehen So können Sie leicht feststellen um welche Art von Text es sich handelt normalen Text Querverweise Bezeichnungen fü...

Страница 194: ...8 Vor Kondenswasser schützen 8 Fehlfunktionen vermeiden 8 Gestaltungsmerkmale der Sicherheitshinweise 9 Gerätebeschreibung 10 Lieferumfang 11 In Betrieb nehmen 13 Akku einsetzen 13 Akku laden 15 Stationärer Betrieb 15 SD MMC Karte einsetzen und entfernen 16 Daten einer SD MMC Karte schützen 17 Camcorder ein und ausschalten 17 Bedienen 19 Funktions Tasten verwenden 20 Anzeigen auf dem LC Display 22...

Страница 195: ...en 39 Filme wiedergeben 40 Wiedergabe auf dem LC Display 40 Wiedergabe auf einem TV Gerät 42 Funktionen im Wiedergabe Modus 43 Filme löschen 43 Miniaturbilder anzeigen 45 Filme sperren 46 Filme wiederholen 47 Fotos erstellen 48 Einstellungen vornehmen 48 Auflösung 50 Belichtung 50 Zwei in Eins 51 Bildrahmen 53 Blitz 54 Selbstauslöser 55 Schärfe 56 Weißabgleich 56 Serienaufnahme 57 Gegenlicht 57 Da...

Страница 196: ... verwenden 79 Kamera Treiber installieren 79 Anwendungs Programme installieren 79 Acrsoft PhotoImpression 79 Acrsoft Show Biz 79 Acrsoft Media Converter 79 Adobe Reader 80 MPEG4 Videocodec Xvid 80 Filme und Fotos auf einen Computer übertragen 81 Videodateien konvertieren 82 Mit dem Media Converter 2 konvertieren 82 Video Dateien auf DVD sichern 86 Reinigen 88 Gehäuse reinigen 88 Objektiv reinigen ...

Страница 197: ...ebrauch Der Camcorder dient den folgenden Zwecken der Aufzeichnung und Wiedergabe von digitalen Video Filmen der Aufzeichnung und Wiedergabe von Digital Fotos der Aufzeichnung und Wiedergabe von Digital Audio der Wiedergabe von MP3 Dateien der Darstellung von E Books im Text Format Er ist ausschließlich für diese Zwecke bestimmt und darf nur dafür verwendet werden Er darf nur in der Art und Weise ...

Страница 198: ...n Sie das Netzkabel nicht Verhindern Sie das Eindringen von Feuchtigkeit oder Flüssigkeit in den Camcorder oder das Stecker Netzteil Berühren Sie das Netzteil nicht mit feuchten Händen Benutzen Sie den Camcorder nie mit einem schadhaften Netzteil Überlassen Sie Reparaturen stets qualifiziertem Fachpersonal Schalten Sie den Camcorder bei Funktionsstörungen sofort aus Explosionsgefahr Schließen Sie ...

Страница 199: ...amcorder vermeiden Verwenden Sie nur Lithium Ionen Akkus vom Typ NP60 Prüfen Sie vor dem Einlegen des Akkus ob die Kontakte im Camcorder und am Akku sauber sind Reinigen Sie die verschmutzten Kontakte mit einem trockenen sauberen Tuch oder einem Radiergummi Berühren Sie nicht das Objektiv und die Objektivfassung Beschädigung des Akkus vermeiden Setzen Sie den Akku nie falsch herum ein Achten Sie i...

Страница 200: ...l Legen Sie den Camcorder in eine Schutztasche oder eine Kunststofftüte bevor Sie ihn einem raschen Temperaturwechsel aussetzen Fehlfunktionen vermeiden Schützen Sie den Camcorder vor Nässe Schützen Sie den Camcorder vor Feuchtigkeit Salz und Staub Schützen Sie den Camcorder vor starken Magnetfeldern Halten Sie den Camcorder von Geräten fern die starke elektromagnetische Felder erzeugen z B Elektr...

Страница 201: ...staltungsmerkmale der Sicherheitshinweise WARNUNG Hinweise mit dem Wort WARNUNG warnen vor Gefährdungen bei denen möglicherweise schwere oder tödliche Verletzungen auftreten VORSICHT Hinweise mit dem Wort VORSICHT warnen vor Gefährdungen bei denen möglicherweise leichte bis mittlere Verletzungen auftreten ACHTUNG Hinweise mit dem Wort ACHTUNG warnen vor Gefährdungen bei denen möglicherweise Sach o...

Страница 202: ...llen der Bildschirm Menüs in denen Sie Ihre Einstellungen vornehmen können Der Camcorder besitzt einen digitalen Zoom und Funktionen zur automatischen Einstellung von Belichtung und Farbbalance Der interne Speicher verfügt über eine Kapazität von 64 MByte So können Sie auch dann Fotos oder kurze Filme aufzeichnen wenn sich keine SD MMC Karte im Camcorder befindet Benötigen Sie mehr Speicherkapazit...

Страница 203: ...Lieferumfang 11 DE EN ES PT Lieferumfang ...

Страница 204: ...2 Nummer Bezeichnung 1 USB Kabel 2 MD 85733 DV Camcorder 3 Stecker Netzteil 4 TV Kabel 5 Trageband 6 Ohrhörer Schutzkappen 7 Ohrhörer Lithium Ionen Akku vom Typ NP60 CD ROM mit Anwenderprogrammen und Treiber Software ...

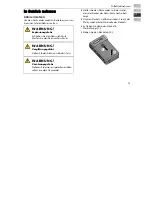
Страница 205: ...Akku nicht in Feuer WARNUNG Vergiftungsgefahr Halten Sie den Akku von Kindern fern WARNUNG Verätzungsgefahr Nehmen Sie einen ausgelaufenen Akku sofort aus dem Camcorder Halten Sie den Camcorder so in der Hand dass der Deckel des Akku Fachs nach oben zeigt Um den Deckel zu öffnen drücken Sie auf das Pfeilsymbol auf der Oberseite des Deckels Schieben Sie dabei den Deckel in Pfeilrichtung 1 Heben Sie...

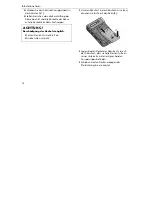
Страница 206: ...eigen ACHTUNG Beschädigung des Deckels möglich Setzen Sie nicht zu viel Kraft ein Drücken Sie nur leicht Um den Akku fest in das Akku Fach zu setzen drücken Sie leicht auf den Akku 2 Legen Sie den Deckel des Akku Fachs so auf das Akku Fach dass sich die kleinen Stifte an seiner Unterseite in den entsprechenden Aussparungen befinden Schieben Sie den Deckel entgegen der Pfeilrichtung bis er einraste...

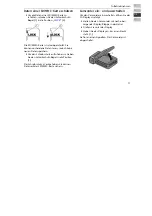
Страница 207: ...cken Sie das Stecker Netzteil nie ab Um den Akku zu laden verbinden Sie den Netzstecker mit dem Camcorder Stecken Sie das Stecker Netzteil in eine 230 V 50 Hz Steckdose Der Akku wird aufgeladen L Der Akku benötigt für die erste vollständige Ladung ca sechs Stunden L Hinweise zum sachgerechten Umgang mit Akkus finden Sie im Abschnitt Beschädigung des Akkus vermeiden ab Seite 7 Stationärer Betrieb U...

Страница 208: ...MMC Karte einzusetzen halten Sie den Camcorder mit dem LC Display nach oben Halten die SD MMC Karte mit der Beschriftung nach oben Schieben Sie die SD MMC Karte vorsichtig in den Kartenschlitz bis sie einrastet Die SD MMC Karte ist betriebsbereit Um die SD MMC Karte zu entfernen drücken Sie die SD MMC Karte leicht in den Camcorder hinein und lassen sie wieder los Die Karte wird einige Millimeter a...

Страница 209: ...rn Um den Schreibschutz aufzuheben schieben Sie den Schreibschutz Riegel in die Position 1 Der Schreibschutz ist aufgehoben Sie können Daten auf der SD MMC Karte sichern Camcorder ein und ausschalten Um den Camcorder einzuschalten öffnen Sie das LC Display wie folgt Halten Sie den Camcorder mit nach oben zeigender Display Klappe in der Hand Greifen Sie unter das Display Heben Sie das Display an bi...

Страница 210: ...men 18 Um den Camcorder zu verwenden drehen Sie das Display um 90 Grad gegen den Uhrzeigersinn 2 Der Camcorder ist betriebsbereit Um den Camcorder auszuschalten schließen Sie das LC Display oder drücken Sie Ein Aus 1 ...

Страница 211: ... den Funktions Tasten starten Sie z B eine Aufnahme oder wechseln den Betriebsmodus In den Bildschirm Menüs nehmen Sie Ihre Einstellungen für die jeweiligen Betriebs Modi vor Dieses Kapitel informiert Sie über die Funktions Tasten und ihre Funktionen die Anzeigen auf dem LC Display die Bedienung der Bildschirm Menüs ...

Страница 212: ...Bedienen 20 Funktions Tasten verwenden ...

Страница 213: ... Ausgang Ohrhörer Anschluss 8 USB 2 0 High Speed und Netz Anschluss Moduswechsel Record Play 9 Zurück zur letzten Bildschirmseite Nr Beschreibung Links Taste Blitz Ein Aus Rote Augen Unterdrücken Licht 10 Auto Rechts Taste 11 Selbstauslöser Ein Aus OK Taste 12 Tele und Weitwinkel Kippschalter 13 Foto Auslöser 14 Objektiv 15 Ein Aus Schalter 16 Selbstauslöser LCD ...

Страница 214: ...Bedienen 22 Anzeigen auf dem LC Display ...

Страница 215: ...ktor 7 Faktor des Digital Zooms Akku hat die volle Ladung Akku hat die mittlere Ladung Akku hat die geringe Ladung 8 Akku ist leer 9 SD MMC Karte befindet sich im Camcorder Nr Symbol Beschreibung 10 Makro Funktion eingeschaltet 11 Weißabgleich 12 Selbstauslöser 13 Datum Jahr Monat Tag 14 Serienaufnahme Automatischer Blitz Blitz aus Immer Blitz Rote Augen Reduzierung 15 Licht ein 16 Gegenlicht Hohe...

Страница 216: ...fen Funktionen auf und bestimmen die Wiedergabe Modi Die Bildschirm Menüs unterscheiden sich je nach Betriebsmodus Um das Einstellungs Menü anzuzeigen drücken Sie OK Um das Wiedergabe Menü anzuzeigen drücken Sie RECORD PLAY Um sich in den Bildschirm Menüs auf und ab zu bewegen benutzen Sie die den Tele und Weitwinkel Kippschalter Um sich in den Bildschirm Menüs nach links und rechts zu bewegen ben...

Страница 217: ...ellungen für Ihren Film fest Sie legen Ihre Kamera Einstellungen fest Sie wählen Effekte aus Sie starten eine Audio Aufnahme Sie legen die Grundeinstellungen fest Um das Menü Aufnahme anzuzeigen drücken Sie OK Das Menü Einstellungen wird angezeigt Das Menü MODO PELÍCULA ist ausgewählt Nr Beschreibung 1 MODO PELÍCULA 2 MODO CÁMARA 3 MODO VOZ Diktiergerät Funktion 4 EFECTO 5 CONFIGURACIÓN ...

Страница 218: ...LA Im Menü MODO PELÍCULA nehmen Sie Einstellungen für den Camcorder Betrieb vor Folgende Einstellungen können Sie wählen RESOLUCIÓN EXPOSICIÓN LUZ NITIDEZ BALANCE DE BLANCOS ESTABILIZACIÓN DETECTOR DE MOVIMENTO MODO NOCTURNO SALIR ...

Страница 219: ...ür den Betrieb als Digital Kamera benötigen RESOLUCIÓN EXPOSICIÓN DOS EN UNO MARCO DE FOTO FLASH TEMPORIZADOR NITEDEZ BALANCE DE BLANCOS FOTO MÚLTIPLE LUZ DE FONDO IMPRESIÓN DE FECHA MODO NOTCURNO SALIR Details zu den einzelnen Einstellungen finden Sie im Abschnitt Einstellungen vornehmen ab Seite 35 ...

Страница 220: ...E VOZ bietet folgende Optionen ACT SALIR Details zu den einzelnen Einstellungen finden Sie im Abschnitt Aufnehmen ab Seite 68 Menü EFECTO Im Menü EFECTO bestimmen Sie die Bild Effekte für die Film und Fotoaufnahme NORMAL BLANCO NEGRO CLÁSICO NEGATIVO SALIR Details zu den einzelnen Einstellungen finden Sie im Kapitel Film und Fotoeffekte verwenden ab Seite 67 ...

Страница 221: ...CIÓN legen Sie folgende Grundeinstellungen für den Camcorder fest SONIDO PANTALLA INICIAL AJUSTE DE LA HORA FORMATEAR MEMORIA SISTEMA TV IDIOMA CONFIGURACIÓN SALIR Details zu den einzelnen Einstellungen finden Sie im Abschnitt Einstellungen vornehmen ab Seite 35 ...

Страница 222: ...e RECORD PLAY Um sich zu einem Menü Eintrag zu bewegen drücken Sie Links bzw Rechts oder verwenden Sie den Tele und Weitwinkel Kippschalter Um einen Menü Eintrag auszuwählen drücken Sie OK Eintrag Beschreibung PELÍCULA Filme abspielen IMAGEN Fotos anzeigen Y LIBRO ELECTRÓNICO E Books anzeigen VOZ Eigene Tonaufnahmen abspielen MÚSICA MP3 Dateien abspielen ...

Страница 223: ...Einstellung mit Tele Weitwinkel Um die Einstellung zu übernehmen drücken Sie die OK Startbild Sie können ein gespeichertes Foto als Startbild verwenden oder das Standard Startbild verwenden Wählen Sie das Untermenü Startbild Das Startbild wird angezeigt wenn Sie den Camcorder einschalten Um ein Bild auszuwählen drücken Sie die Tasten Links oder Rechts Um das angezeigte Foto als Startbild festzuleg...

Страница 224: ...PLAY Um die geänderten Einstellungen zu übernehmen drücken Sie OK Speicher formatieren ACHTUNG Datenverlust möglich Wenn Sie den Speicher formatieren werden alle darin gespeicherten Daten gelöscht Stellen Sie sicher dass sich keine wichtigen Daten mehr im Speicher oder auf der SD MMC Karte befinden Um den internen Speicher oder die SD MMC Karte zu formatieren wählen Sie das Menü Speicher formatier...

Страница 225: ... gewünschte Einstellung Um die Einstellung zu übernehmen drücken Sie OK Sprache Mit dieser Einstellung können Sie die Sprache des Bildschirm Menüs festlegen Markieren Sie den Eintrag für die gewünschte Sprache Um die gewählte Einstellung zu übernehmen drücken Sie OK Werkseinstellung Standard Mit dieser Funktion können Sie die Werksein stellungen des Camcorders wiederherstellen Wählen Sie den Eintr...

Страница 226: ...lisierung dauerhaft aus Bewegungs erkennung einmal aus Zwei in Eins einmal aus Fotorahmen einmal aus Blitz dauerhaft aus Selbstauslöser einmal aus Serienaufnahme einmal aus Hintergrundlicht einmal aus Einstellung gültig Werks einstellung Datumsdruck dauerhaft aus Effekt einmal normal Ton dauerhaft ein TV System dauerhaft je nach Verkaufs region Sprache dauerhaft je nach Verkaufs region Lautstärke ...

Страница 227: ... der Filmaufnahme wird auf dem LC Display die Zeit Stunden Minuten Sekunden angezeigt Um die Filmaufnahme zu beenden drücken Sie FILM AUSLÖSER erneut Einstellungen vornehmen Die Kamera wird mit folgenden Werkseinstellungen im Film Modus ausgeliefert Einstellung gültig Werksein stellung Auslösung dauerhaft hoch Licht einmal aus Belichtung einmal 0EV Schärfe einmal Stufe 5 Weißabgleich einmal aus St...

Страница 228: ...ie Werkseinstellungen zu ändern klappen Sie das LC Display auf Drücken Sie OK Das Menü Film Modus wird angezeigt Markieren Sie mit TELE WEITWINKEL den gewünschten Menüeintrag Drücken Sie OK Das gewählte Untermenü wird angezeigt ...

Страница 229: ...n die Einstellmöglichkeiten genauer erläutert Auflösung Für die Filmqualität stehen Ihnen folgende Einstellungen zur Verfügung Einstellung Erläuterung Hoch 640 480 Pixel VGA 30 fps Normal 320 240 Pixel QVGA 30 fps Die gewählte Auflösung steht Ihnen zur Verfügung bis Sie eine andere wählen Licht Um während der Filmaufnahme zusätzlich das Licht an der Kamera einzuschalten wählen Sie die Einstellung ...

Страница 230: ...ung im Plusbereich 1 0 EV 0 6 EV oder 0 3 EV Wenn Sie künstlich unterbelichten wollen wählen Sie eine Einstellung aus dem Minusbereich 0 3 EV 0 6 EV oder 1 0 EV Die Einstellung bleibt so lange erhalten bis Sie eine andere wählen oder die Kamera ausschalten Die Werkseinstellung ist 0 EV Schärfe Mit dieser Einstellung können Sie den Schärfeeindruck in neun Stufen verändern Die Werkseinstellung ist S...

Страница 231: ...ür Filmaufnahmen bei Glüh lampenlicht Stabilisierung Mit dieser Einstellung können Sie die Unschärfe durch Verwackeln der Kamera vermindern L Das aufgenommene Bild wird kleiner wenn die Stabilisierungsfunktion aktiviert ist L Der Digitalzoom ist bei aktiver Stabilisierungsfunktion abgeschaltet Bewegungserkennung In dieser Einstellung können Sie automatisch Videoaufnahmen machen sobald sich drei Se...

Страница 232: ...her oder auf der optionalen Speicherkarte aufgenommenen Filme auf verschiedene Weise ansehen Wiedergabe auf dem LC Display Um sich die Filme auf dem LC Display der Kamera anzusehen gehen Sie wie folgt vor Drücken Sie RECORD PLAY Das Hauptmenü des Wiedergabe Modus wird angezeigt ...

Страница 233: ...zeigt Die zweite Ziffer zeigt die Anzahl der aufgenommenen Filme Um zum vorhergehenden oder nächsten Film zu wechseln wählen Sie RECHTS LINKS Um die Wiedergabe zu starten drücken Sie FILMAUSLÖSER Um während der Film Wiedergabe einen schnellen Vor bzw Rücklauf zu starten wählen Sie RECHTS LINKS Um den schnellen Vor bzw Rücklauf anzuhalten lassen Sie die Taste los Mit TELE WEITWINKEL können Sie die ...

Страница 234: ...or Schließen Sie den schwarzen Stecker des AV Kabels an den TV Ausgang der Kamera an Schließen Sie den weißen und gelben Stecker des AV Kabels an die entsprechenden Buchsen des Fernsehgeräts an Schalten Sie das Fernsehgerät ein Auf dem LC Display wird das Menü Ohrhörer TV angezeigt Wählen Sie mit TELE WEITWINKEL die Option TV Drücken Sie OK Der Film wird auf dem TV Gerät angezeigt Solange die Kame...

Страница 235: ...ergabe stehen Ihnen noch nachfolgend beschriebene Funktionen zur Verfügung Rufen Sie den Wiedergabe Modus auf Drücken Sie OK wenn der zuletzt aufgenommene Film angezeigt wird Filme löschen Wählen Sie mit RECHTS LINKS die Option ELIMINAR Drücken Sie OK Das Menü ELIMINAR wird angezeigt ...

Страница 236: ...ählen Sie SI Um den Vorgang abzubrechen wählen Sie NO Drücken Sie OK Wenn eine Speicherkarte eingesetzt ist können Sie nur die auf der Speicherkarte vorhandenen Filme löschen Wenn die Speicherkarte gesperrt ist können Sie die auf der Speicherkarte vorhandenen Filme nicht löschen Wenn die zu löschenden Filme mit einem Löschschutz versehen sind müssen Sie diese vor dem Löschen erst freigeben Erläute...

Страница 237: ...r einen Überblick der gespeicherten Filme verschaffen Wählen Sie mit RECHTS LINKS die Option MINIATURA Drücken Sie OK Es werden maximal neun Filme als Miniaturbilder angezeigt Wählen Sie mit RECHTS LINKS bzw TELE WEITWINKEL den gewünschten Film aus Um die Wiedergabe des Films zu starten drücken Sie OK ...

Страница 238: ...OQUEAR Drücken Sie OK Das Menü BLOQUEAR wird angezeigt Wählen Sie mit RECHTS LINKS einen Film aus Um alle Filme zu sperren freizugeben schieben Sie TELE WEITWINKEL in Richtung T Um einen Film zu sperren frei zu geben schieben Sie TELE WEITWINKEL in Richtung W Ein Abfragefenster wird angezeigt Um den Vorgang auszuführen wählen Sie SI Um den Vorgang abzubrechen wählen Sie NO Drücken Sie OK ...

Страница 239: ...atisch einzelne Filme oder alle Filme wiederholt abspielen Wählen Sie mit RECHTS LINKS die Option REPETIR UNA Drücken Sie OK Die Wiederholung des ausgewählten Films beginnt Wählen Sie mit RECHTS LINKS die Option REPETIR TODO Drücken Sie OK Die Wiederholung aller vorhandenen Filme beginnt ...

Страница 240: ...t dem MAKRO SCHALTER den Makro Modus ein Einstellungen vornehmen Die Kamera ist mit folgenden Werkseinstellungen im Bild Modus ausgeliefert worden Menüpunkt Gültig Werkseinstellung Auflösung immer Normal Belichtung einmal 0 EV Zwei in Eins einmal aus Bildrahmen einmal aus Blitz immer aus Selbstauslöser einmal aus Schärfe einmal Stufe 5 Weißabgleich einmal Auto Serienaufnahme einmal aus Gegenlicht ...

Страница 241: ...us wird angezeigt Drücken Sie einmal RECHTS Das Menü Kamera Modus wird angezeigt Wählen Sie mit TELE WEITWINKEL den gewünschten Menüeintrag Drücken Sie OK Das gewählte Untermenü wird angezeigt Wählen Sie eine Einstellung aus Drücken Sie OK Die gewählte Einstellung ist nun aktiv Nachfolgend werden die einzelnen Einstellmöglichkeiten genauer erläutert ...

Страница 242: ...zur Verfügung bis Sie eine andere wählen Belichtung Die Kamera stellt automatisch die passende Belichtung ein Unter schwierigen Lichtverhältnissen können Sie gegebenenfalls mit einer manuellen Anpassung der Belichtung bessere Ergebnisse erzielen Wenn Sie z B eine Person vor einem Sonnenuntergang fotografieren möchten müssen Sie das Foto künstlich überbelichten Wählen Sie hierfür eine Einstellung i...

Страница 243: ... 51 DE EN ES PT Zwei in Eins Mit dieser Einstellung können Sie zwei Fotos zu einem Bild verbinden Wählen Sie aus dem Menü Kamera Modus das Untermenü DOS EN UNO Drücken Sie OK Wählen Sie den Eintrag ACT Drücken Sie OK ...

Страница 244: ...ÖSER Nun wird die linke Seite des LC Displays abgedunkelt dargestellt Das gerade aufgenommene Bild wird dargestellt Wählen Sie den Bildausschnitt auf der nicht abgedunkelten Hälfte des LC Displays Drücken Sie den FOTO AUSLÖSER Das neue Bild ist fertig L Die Einstellung DOS EN UNO steht Ihnen jeweils für eine Aufnahme zur Verfügung Danach kehrt die Kamera in den normalen Aufnahmemodus zurück ...

Страница 245: ...stellung können Sie ein Foto mit einem Bildrahmen versehen Hierfür stehen Ihnen zehn unterschiedliche Bildrahmen zur Verfügung Wählen Sie aus dem Menü MODO CÁMARA das Untermenü CUADRO DE FOTO Drücken Sie OK Wählen Sie mit TELE WEITWINKEL einen Bildrahmen aus ...

Страница 246: ...s Sie eine andere wählen oder die Kamera ausschalten Um die Funktion zu verlassen drücken Sie RECORD PLAY Um den Bildrahmen über das Menü abzuschalten wählen Sie den grauen Bildrahmen Blitz Für die Blitzsteuerung stehen Ihnen vier verschiedene Einstellungen zur Verfügung VORSICHT Augenschäden vermeiden Benutzen Sie den Blitz nicht in unmittelbarer Nähe der Augen von Personen oder Tieren ...

Страница 247: ...leibt so lange erhalten bis Sie eine andere wählen Selbstauslöser Mit dem Selbstauslöser können Sie zeitverzögert fotografieren Wenn Sie z B selbst mit auf einem Foto erscheinen wollen können Sie den Selbstauslöser benutzen Sie können den Selbstauslöser über das Menü Selbstauslöser einstellen oder mit LINKS Im Display wird das Symbol für den Selbstauslöser angezeigt Nach dem Auslösen vergehen ca z...

Страница 248: ...leich Die Kamera stellt den Weißabgleich automatisch ein Wenn Sie nach einer Aufnahme einen Farbstich auf dem LC Display bemerken ändern Sie die Einstellung des Weißabgleichs Machen Sie die Aufnahme erneut Folgende Einstellungen stehen Ihnen zur Verfügung Einstellung Erläuterung Auto Werkseinstellung Die Kamera nimmt den Weißabgleich automatisch vor Tageslicht Für Aufnahmen bei Tageslicht Leuchtst...

Страница 249: ...der die Kamera ausschalten Datumsdruck Wenn Sie diese Funktion einschalten wird jedes Foto mit dem aktuellen Datum versehen Das Datum ist auch auf den ausgedruckten Fotos sichtbar Um ein Foto mit dem aktuellen Datum zu versehen wählen Sie im Menü Kamera Modus den Eintrag Datumsdruck Um den Datumsdruck zu aktivieren wählen Sie Ein Drücken Sie OK L Die Einstellung bleibt so lange erhalten bis Sie ei...

Страница 250: ...C Karte abgelegt Sie können diese Fotos auf zwei Arten anzeigen Wiedergabe auf dem LC Display Wiedergabe auf einem TV Gerät Wiedergabe auf dem LC Display Um sich die Fotos auf dem LC Display der Kamera anzusehen gehen Sie wie folgt vor Drücken Sie RECORD PLAY Das Menü Wiedergabe Modus wird angezeigt ...

Страница 251: ...uletzt aufgenommene Foto wird auf dem LC Display angezeigt Mit RECHTS LINKS wechseln Sie zum vorhergehenden oder nächsten Foto Um das Bild auf dem LC Display zu vergrößern schieben Sie TELE WEITWINKEL in Richtung T Um das Bild auf dem LC Display zu verkleinern schieben Sie TELE WEITWINKEL in Richtung W ...

Страница 252: ...lte Bereich wird vergrößert Um den Bereich wieder zu verkleinern schieben Sie TELE WEITWINKEL in Richtung W Wiedergabe auf einem TV Gerät Um sich die Fotos auf einem Fernsehgerät anzusehen gehen Sie wie folgt vor Schließen Sie den schwarzen Stecker des AV Kabels an den TV Ausgang der Kamera an Schließen Sie den weißen und gelben Stecker des AV Kabels an die entsprechenden Buchsen des Fernsehgeräts...

Страница 253: ...Modus Im Wiedergabe Modus für Fotos stehen Ihnen noch folgende Funktionen zur Verfügung Fotos löschen Miniaturbilder anzeigen Bilder sperren entsperren Diashow anzeigen Rufen sie den Wiedergabe Modus auf Wählen Sie mit RECHTS oder TELE WEITWINKEL FOTO aus ...

Страница 254: ...Fotos ansehen 62 Drücken Sie OK Drücken Sie erneut OK Das Menü wird angezeigt Fotos löschen Wählen Sie mit RECHTS LINKS die Option ELIMINAR Drücken Sie OK Das Menü ELIMINAR wird angezeigt ...

Страница 255: ... auszuführen wählen Sie SI Um das Löschern nicht auszuführen wählen Sie NO Um den Vorgang zu beenden drücken Sie OK L Ist eine SD MMC Karte eingesetzt können Sie nur die Fotos auf der SD MMC Karte löschen Ist die SD MMC Karte gesperrt können Sie die Fotos auf der SD MMC Karte nicht löschen Sind die zu löschenden Fotos mit einem Löschschutz versehen müssen Sie diese vor dem Löschen erst frei geben ...

Страница 256: ...en Überblick der gespeicherten Fotos verschaffen Wählen Sie mit RECHTS LINKS die Option MINIATURA Drücken Sie OK Es werden maximal neun Miniatiurbilder auf dem LC Display angezeigt Wählen Sie mit RECHTS LINKS oder TELE WEITWINKEL das gewünschte Foto aus Um das Foto anzuzeigen drücken Sie OK ...

Страница 257: ...absichtigtes Löschen schützen Wählen Sie mit RECHTS LINKS BLOQUEAR Drücken Sie OK Das Menü BLOQUEAR wird angezeigt Wählen Sie mit RECHTS LINKS ein Foto aus Um alle Fotos zu sperren frei zu geben schieben Sie TELE WEITWINKEL in Richtung T Um ein Foto zu sperren frei zu geben schieben Sie TELE WEITWINKEL in Richtung W ...

Страница 258: ...brechen wählen Sie NO Um den Vorgang zu beenden drücken Sie OK Diashow wiedergeben Mit dieser Funktion können Sie sich alle gespeicherten Fotos nacheinander als Diashow anzeigen lassen Wählen Sie mit RECHTS LINKS DIAPOSITIVA Drücken Sie OK Die Diashow startet Um die Diashow anzuhalten drücken Sie erneut OK ...

Страница 259: ...t Standardeinstellung der Kamera S W Die Bilder werden in Schwarzweiß aufgenommen Klassisch Die Bilder werden bräunlich eingefärbt Sepia Effekt Negativ Die Bilder werden in die Negativ Farben umgewandelt Wählen Sie das Menü EFECTO Wählen Sie den gewünschten Effekt Drücken Sie OK L Die Einstellung bleibt so lange erhalten bis Sie eine andere wählen oder die Kamera ausschalten ...

Страница 260: ...uch für Tonaufnahmen nutzen z B als Diktiergerät Voice Pen Aufnehmen Um eine Tonaufnahme zu starten gehen Sie wie folgt vor Klappen Sie das LC Display auf Drücken Sie OK Das Menü Film Modus wird angezeigt Drücken Sie RECHTS bis das Menü LÁPIZ DE VOZ angezeigt wird Wählen Sie mit TELE WEITWINKEL ENTRAR ...

Страница 261: ...Sie in das eingebaute Mikrofon Um die Tonaufnahme anzuhalten drücken Sie erneut FILM AUSLÖSER Die Tondateien werden im WAV Format gespeichert Wiedergeben Um eine Tonaufnahme wiederzugeben gehen Sie wie folgt vor Drücken Sie RECORD PLAY Das Menü des Wiedergabe Modus wird angezeigt Wählen Sie mit RECHTS das Menü VOZ aus ...

Страница 262: ...te Tondatei aus Um die Wiedergabe zu starten drücken Sie den FILM AUSLÖSER Die aufgenommene Tondatei wird über den eingebauten Lautsprecher wiedergegeben Um die Lautstärke einzustellen drücken Sie TELE WEITWINKEL Um die Wiedergabe zu unterbrechen drücken Sie den FILM AUSLÖSER erneut ...

Страница 263: ...ionsmenü der Tonwiedergabe aufzurufen drücken Sie OK Um die letzte Tonaufnahme noch einmal zu hören schieben Sie TELE WEITWINKEL in Richtung W Um alle Tonaufnahmen noch einmal zu hören schieben Sie TELE WEITWINKEL zweimal hintereinander in Richtung W ...

Страница 264: ...Sie OK Um die Option Löschen aufzurufen schieben Sie TELE WEITWINKEL in Richtung T Um eine einzelne Tondatei zu löschen schieben Sie TELE WEITWINKEL in Richtung W Um alle Tondateien zu löschen schieben Sie TELE WEITWINKEL in Richtung T Ein Abfragefenster wird angezeigt Um das Löschen auszuführen wählen Sie SÍ Um das Löschen nicht auszuführen wählen Sie NO Um den Vorgang zu beenden drücken Sie OK ...

Страница 265: ...luss des Computers an Die LED am FILM AUSLÖSER leuchtet rot Laden Sie die MP3 Dateien in den MP3 Ordner im internen Speicher oder auf der optionalen SD MMC Karte Der Ordner wird automatisch auf der SD MMC Karte angelegt Melden Sie die Kamera vom Computer ab Entfernen Sie das USB Kabel MP3 Musik abspielen Um eine MP3 Datei abzuspielen gehen Sie wie folgt vor Drücken Sie RECORD PLAY Das Menü Wiederg...

Страница 266: ... LINKS Wenn die Datei über eine Songtextanzeige verfügt wird ein Notensymbol angezeigt Um die MP3 Datei abzuspielen drücken Sie den FILM AUSLÖSER oder OK Stellen Sie die Lautstärke mit TELE WEITWINKEL ein Um die Wiedergabe zu beenden drücken Sie den FILM AUSLÖSER erneut Um das Menü Wiederholen aufzurufen drücken Sie OK ...

Страница 267: ...einander in Richtung W Ohrhörer benutzen Schließen Sie den mitgelieferten Ohrhörer an die Ohrhörer Buchse an Das Menü Ohrhörer TV wird angezeigt Wählen Sie mit TELE WEITWINKEL Ohrhörer Drücken Sie OK WARNUNG Stellen Sie die Lautstärke zunächst auf einen Wert im unteren Bereich der Skala bevor Sie Kopfhörer benutzen Wählen Sie dann erst eine für Sie angenehme Lautstärke Eine zu hohe Lautstärke kann...

Страница 268: ...en Das Aussehen der Bücher können Sie selbst gestalten E Books laden Schließen Sie die Kamera mit dem mitgelieferten Kabel an den USB Anschluss des Computers an Laden Sie die E Books im TXT Format in den E Book Ordner Der Ordner wird automatisch auf der SD MMC Karte bzw dem internen Speicher angelegt E Books lesen Drücken Sie RECORD PLAY Das Menü Wiedergabe Modus wird angezeigt Wählen Sie das Menü...

Страница 269: ...ein EBOOK aus Drücken Sie OK Um zur nächsten Seite zu blättern schieben Sie TELE WEITWINKEL in Richtung W Um zur vorigen Seite zu blättern schieben Sie TELE WEITWINKEL in Richtung T Wählen Sie Symbole in der unteren Leiste im LC Display mit RECHTS LINKS aus Drücken Sie OK ...

Страница 270: ...E Books laden und lesen 78 Symbol Erläuterung zur ersten Seite wechseln zur letzten Seite wechseln Text und Hintergrundfarbe ändern Text automatisch weiterblättern lassen Lesezeichen hinzufügen ...

Страница 271: ...s entsprechende Laufwerk Ihres Computers ein Das Willkommen Fenster wird angezeigt Wählen Sie Install USB Driver USB Treiber installieren Befolgen die Anweisungen auf dem Monitor Anwendungs Programme installieren Die mitgelieferte CD enthält fünf Anwendungsprogramme Acrsoft PhotoImpression Mit dieser Software können Sie Bilder anzeigen bearbeiten und organisieren Acrsoft Show Biz Mit dieser Softwa...

Страница 272: ...t werden damit die aufgenommenen Filme auf dem PC richtig wiedergegeben werden können Um die Anwendungsprogramme auf Ihrem Computer zu installieren gehen Sie wie folgt vor Legen Sie die CD ROM in das entsprechende Laufwerk Ihres Computers ein Das Willkommen Fenster wird angezeigt Wählen Sie aus der Liste die Programme aus die Sie installieren möchten Befolgen Sie die Anweisungen auf dem Monitor ...

Страница 273: ...ÖSER leuchtet rot Die aufgenommenen Filme und Fotos sind im internen Speicher bzw auf der SD MMC Karte gespeichert Die Fotos liegen im JPG Format vor Sie befinden sich im internen Speicher oder auf Ihrer SD MMC Karte im Ordner DCIM 100PHOTO Die Filme liegen im AVI Format vor Sie befinden sich im internen Speicher oder auf Ihrer SD MMC Karte im Ordner DCIM 200MOVIE Die Ordner werden automatisch auf...

Страница 274: ...iesem Format arbeitet Ihre Kamera Die konvertierten Filme können Sie dann auf Ihrer Kamera wiedergeben Mit dem Media Converter 2 konvertieren Starten Sie den Acrsoft Media Converter Das Media Converter Hauptfenster wird angezeigt Wählen Sie aus der Spalte Select Device den gewünschten Eintrag aus In der Spalte Select Conversion Parameter wird der entsprechende Eintrag angezeigt ...

Страница 275: ...Videodateien konvertieren 83 DE EN ES PT Klicken Sie auf ADD MEDIA Wählen Sie die umzuwandelnde Videodatei aus ...

Страница 276: ...Videodateien konvertieren 84 Vorschau starten Vorschau stoppen Um die Konvertierung zu starten klicken Sie auf Umwandeln Die Konvertierung startet ...

Страница 277: ...me bereits auf der Kamera vorhanden ist ändern Sie den Dateinamen der konvertierten Datei in Clip000x avi x stellt die nächste freie Nummer dar Schließen Sie die Kamera mit dem USB Kabel an den Computer an Übertragen Sie die konvertierte Datei in den Ordner DCIM 200MOVIE auf der SD MMC Karte Melden Sie die Kamera vom Computer ab Entfernen Sie das USB Kabel Schauen Sie sich die konvertierte Videoda...

Страница 278: ...önnen Sie Ihre Video Dateien auf DVD sichern Um eine oder mehrere Video Dateien auf DVD zu sichern gehen Sie wie folgt vor Starten Sie das Programm Acrsoft Showbiz DVD Das Hauptfenster des Programms wird angezeigt Wählen Sie die gewünschte Videodatei Ziehen Sie die Videodatei in den markierten Bereich ...

Страница 279: ...Video Dateien auf DVD sichern 87 DE EN ES PT Klicken Sie auf CREATE Um den Brennvorgang zu starten klicken Sie auf START ...

Страница 280: ...digung des Camcorders möglich Stellen Sie sicher dass keine Feuchtigkeit in den Camcorder eindringt Verwenden Sie keine scheuernden Reinigungsmittel und keine Lösungsmittel Gehäuse reinigen Wischen Sie Verschmutzungen mit einem weichen trockenen Tuch ab Objektiv reinigen Entfernen Sie Verschmutzungen mit einem Glasreinigungstuch LC Display reinigen Entfernen Sie Verschmutzungen mit einem Glasreini...

Страница 281: ... Sie den Makro Modus aus Die Bilder Filmaufnahmen sind unscharf Das Objektiv ist verschmutzt Reinigen Sie das Objektiv Die Bilder Filmaufnahmen haben einen Farbstich Der Weißabgleich stimmt nicht Stellen Sie den für die Beleuchtungsverhältnisse richtigen Weißabgleich ein siehe Abschnitt Weißabgleich ab Seite 39 ...

Страница 282: ...itz ein siehe Abschnitt Blitz ab Seite 54 Der Blitz wird durch z B einen Finger abgedeckt Halten Sie die Kamera anders Die Entfernung zum Motiv ist zu groß Verringern Sie die Entfernung zum Motiv Die Aufnahmen wurden im Gegenlicht gemacht Schalten Sie den Gegenlicht Modus ein siehe Abschnitt Gegenlicht ab Seite 57 Die Bilder Filmaufnahmen sind zu dunkel Die Belichtungskorrektur ist verstellt Stell...

Страница 283: ...r Filmaufnahmen sind zu hell Die Belichtungskorrektur ist verstellt Stellen Sie die Belichtungskorrektur neu ein siehe Abschnitt Belichtung ab Seite 38 Der Speicher ist voll Leeren Sie den Speicher Die Bilder Filmaufnahmen können nicht gespeichert werden Die SD MMC Karte ist gesperrt Entsperren Sie die SD MMC Karte siehe Abschnitt Daten einer SD MMC Karte schützen ab Seite 17 ...

Страница 284: ...en ab Seite 17 Die Kamera lässt sich nicht einschalten Der Akku ist leer Laden Sie den Akku siehe Abschnitt Akku laden ab Seite 15 Die SD MMC Karte lässt sich nicht einsetzen Sie ist nicht in der richtigen Stellung Setzen Sie die SD MMC Karte richtig ein siehe Abschnitt SD MMC Karte einsetzen und entfernen ab Seite 16 Die Kamera wird vom Computer nicht erkannt Der Kamera Treiber ist nicht auf dem ...

Страница 285: ...altbar Speichermedium 64 MByte intern ein Teil ist reserviert für die Firmware Kartenschacht für SD MMC Karten Dateiformate Bild JPEG Film AVI Xvid Ton WAV MP3 Objektiv F3 2 f 7 00 mm Einstellbereich Normal 150 cm bis unendlich Macro 20 cm Bildmitte Zoom 8facher Digital Zoom Bildauflösung 3840 2880 Pixel 11 Megapixel interpoliert 2592 1944 Pixel 5 Megapixel 1600 1200 Pixel 2 Megapixel Film auflösu...

Страница 286: ...erung Bild wiedergabe Einzelbild Miniaturbildanzeige Diashow PC Anschluss Mini USB 2 0 HightSpeedAnschluss Stromversorgung NP60 Lithium Ionen Akku 1050 mAh 3 7 V Abmessungen 90 56 6 25 mm Gewicht 110 g ohne Akku Systemvoraussetzungen für den PC Betriebssystem Windows XP Vista CPU Pentium III 800 MHz oder höher RAM Speicher min 256 MB Laufwerk CD ROM Freier Festplattenspeicher min 1 GB Anschluss US...

Страница 287: ...e Entsorgung auf die Umwelt und die menschliche Gesundheit zu vermeiden Sie leisten damit Ihren Beitrag zur Wiederverwertung zum Recycling und zu anderen Formen der Verwertung von Elektro und Elektronik Altgeräten Informationen wo die Geräte zu entsorgen sind erhalten Sie über Ihre Kommunen oder die Gemeindeverwaltungen Akkus entsorgen ACHTUNG Akkus können Giftstoffe enthalten die die Umwelt schäd...

Страница 288: ...Entsorgen 96 ...

Страница 289: ...idade da câmara de filmar Se vender ou entregar a câmara de filmar a terceiros junte também este manual de instruções Características de apresentação Vários elementos do manual de instruções estão marcados com características determinadas Desta forma pode determinar facilmente de que tipo de letra se trata texto normal Referências Designação para BOTÕES na câmara de filmar e no menu do ecrã Contag...

Страница 290: ...ncionamento 8 Características de apresentação das indicações de segurança 9 Descrição do aparelho 10 Volume de fornecimento 11 Colocar em funcionamento 13 Colocar a bateria 13 Carregar bateria 15 Funcionamento estacionário 15 Colocar e retirar cartão SD MMC 16 Proteger os dados do cartão SD MMC 17 Ligar e desligar a câmara de filmar 17 Operar 19 Utilizar as teclas de funções 20 Apresentar no visor...

Страница 291: ...ução 43 Eliminar filmes 43 Indicar fotografias miniaturas 45 Bloquear filmes 46 Repetir filmes 47 Criar fotografias 48 Efectuar configurações 48 Resolução 50 Exposição à luz 50 Dois em Um 51 Enquadramento da imagem 53 Flash 54 Disparador automático 55 Nitidez 56 Controlo de luminosidade 56 Captação em série 57 Contraluz 57 Impressão da data 57 Captação nocturna 57 Visualizar fotografias 58 Reprodu...

Страница 292: ...olador da câmara 79 Instalar programas de utilização 79 Acrsoft PhotoImpression 79 Acrsoft Show Biz 79 Acrsoft Media Converter 79 Adobe Reader 80 MPEG4 Videocodec Xvid 80 Transferir filmes e fotos para o computador 81 Converter ficheiros de vídeo 82 Converter com o Media Converter 2 82 Guardar ficheiros de vídeo em DVD 86 Limpeza 88 Limpar exterior 88 Limpar a objectiva 88 Limpar o visor LCD 88 El...

Страница 293: ...riais que lhe possam ser causados ou a terceiros Uso em conformidade com a determinação de finalidade A câmara de filmar serve para os seguintes fins gravação e reprodução de filmes de vídeo digitais gravação e reprodução de fotos digitais gravação e reprodução de áudio digital reprodução de ficheiros MP3 apresentação de E Books em formato de texto É exclusivamente destinada para estes efeitos Só ...

Страница 294: ... acessível Não dobre ou esmague o cabo de rede Evite a entrada de humidade ou de líquidos para o interior da câmara de filmar ou da fonte de alimentação da ficha Não toque na fonte de alimentação com as mãos húmidas Nunca utilize a câmara de filmar se esta tiver uma fonte de alimentação danificada Faça com que as reparações sejam efectuadas apenas por pessoal técnico qualificado Desligue imediatam...

Страница 295: ...s de pessoas ou animais Evitar danos na câmara de filmar Utilize apenas pilhas de iões de lítio do tipo NP60 Verifique antes de colocar a pilha se os contactos na câmara de filmar e na pilha estão limpos Limpe os contactos sujos com um pano seco e limpo ou com uma borracha Não toque na objectiva e no suporte da objectiva Evitar danificação da pilha Nunca coloque a pilha de forma incorrecta Tenha s...

Страница 296: ...ura rápidas Coloque a câmara de filmar numa bolsa de protecção ou numa saca de plástico antes de a expor a mudanças de temperaturas bruscas Evitar falhas no funcionamento Proteja a câmara de filmar de humidade Proteja a câmara de filmar de humidade sal e pó Proteja a câmara de filmar de campos magnéticos fortes Mantenha a câmara de filmar afastada de aparelhos que radiam fortes campos electromagné...

Страница 297: ...ísticas de apresentação das indicações de segurança AVISO Indicações com a palavra AVISO alertam para perigos através dos quais podem surgir possíveis ferimentos graves ou fatais CUIDADO Indicações com a palavra CUIDADO alertam para perigos através dos quais podem surgir possíveis ferimentos ligeiros até médios ATENÇÃO Indicações com a palavra ATENÇÃO alertam para perigos através dos quais podem s...

Страница 298: ...sor LC de alta resolução com o qual pode controlar as suas gravações Além disso o visor LC serve para apresentar os menus de ecrã nos quais pode proceder aos seus ajustes A câmara de filmar possui um zoom digital e funções relativamente aos ajustes digitais de captação luminosa e balanço de cores A memória interna possui de uma capacidade de 64 MByte Dessa forma pode gravar fotos ou filmes curtos ...

Страница 299: ...Volume de fornecimento 11 DE EN ES PT Volume de fornecimento ...

Страница 300: ...SB 2 MD 85733 DV câmara de filmar 3 Fonte de alimentação com ficha 4 Cabo da TV 5 Fita de suporte 6 Capas de protecção para auscultadores 7 Auscultadores Baterias de iões de lítio do tipo NP60 CD ROM com programas de utilização e software do controlador ...

Страница 301: ...ão queime a pilha no fogo AVISO Perigo de envenenamento Mantenha a bateria fora do alcance das crianças AVISO Perigo de queimaduras Retire uma pilha que verte imediatamente da câmara de filmar Segure na máquina de filmar de forma a que a tampa do compartimento da bateria indique para cima Para abrir a tampa prima no símbolo da seta na parte superior da tampa Desloque para isso a tampa no sentido d...

Страница 302: ...s no compartimento da bateria ATENÇÃO Possíveis danos na tampa Não utilize muita força Prima só levemente Para colocar a bateria de forma fixa no compartimento da bateria faça um pequena força na bateria 2 Coloque a tampa do compartimento da bateria para que os pequenos pinos na sua parte inferior se encontrem nas ranhuras correspondentes Desloque a tampa em sentido contrário da seta até encaixar ...

Страница 303: ...de alimentação da ficha Para carregar a bateria ligue a ficha de rede com a câmara de filmar Insira a fonte de alimentação com ficha numa tomada de 230 V 50 Hz A bateria é carregada L A bateria necessita para o primeiro carregamento completo aprox 6 horas L Notas para um manuseamento correcto com baterias encontra no capítulo Evitar danos da bateria a partir da página 7 Funcionamento estacionário ...

Страница 304: ...rtão SD MMC segure na câmara de filmar com o visor LCD para cima Segure o cartão SD MMC com a inscrição para cima Insira o cartão SD MMC cuidadosamente no compartimento do cartão até que encaixe O cartão SD MMC está operacional Para retirar o cartão SD MMC pressione o cartão SD MMC levemente para dentro da câmara de filmar e depois largue o O cartão é empurrado alguns milímetros para fora da câmar...

Страница 305: ...dados Para desactivar a protecção contra escrita desloque o fecho de protecção contra escrita para a posição 1 A protecção contra escrita está desactiva Pode guardar dados no cartão SD MMC Ligar e desligar a câmara de filmar Para ligar a câmara de filmar abra o visor LCD do seguinte modo Segure na câmara de filmar com a tampa do visor a indicar para cima Agarre por baixo do visor Levante o visor a...

Страница 306: ...funcionamento 18 Para utilizar a câmara de filmar rode o visor a 90 graus em sentido anti horário 2 A câmara de filmar está operacional Para desligar a câmara de filmar feche o visor LCD ou prima Ligar desligar 1 ...

Страница 307: ...enus do ecrã Com as teclas de função inicia p ex uma gravação ou altera o modo de funcionamento Efectua nos menus do ecrã as suas configurações para o respectivo modi de funcionamento Este capítulo informa o sobre As teclas de função e as suas funções As indicações visor LCD A utilização dos menus do ecrã ...

Страница 308: ...Operar 20 Utilizar as teclas de funções ...

Страница 309: ... USB 2 0 ligação de rede e High Speed Alternância do modo Record Play 9 Retroceder para a última página do ecrã N º Descrição Tecla esquerda Flash Ligar Desligar Evitar olhos vermelhos Luz 10 Auto Tecla direita 11 Disparador automático Ligar Desligar Tecla OK 12 Interruptor basculante do ângulo da televisão e grande angular 13 Disparador de foto 14 Objectiva 15 Interruptor de ligar desligar 16 Dis...

Страница 310: ...Operar 22 Apresentar no visor LCD ...

Страница 311: ...ctor do zoom digital A bateria está completamente carregada A bateria está com meia carga A bateria está com a carga mínima 8 Bateria descarregada 9 O cartão SD MMC encontra se na câmara de filmar N º Símbolo Descrição 10 Função macro ligada 11 Controlo de luminosidade 12 Disparador automático 13 Data Ano Mês Dia 14 Captação em série Flash automático Flash desligado Flash sempre Redução de olhos v...

Страница 312: ...as acede a funções e define os modos de reprodução Os menus do ecrã distinguem se de acordo com o modo de funcionamento Para apresentar o menu de configuração prima OK Para apresentar o menu da Reprodução prima em RECORD PLAY Para altera no menu do ecrã utilize o interruptor basculante do ângulo da televisão e grande angular Para se mover para a esquerda e para a direita no menu do ecrã utilize a ...

Страница 313: ...termina os ajustes para o seu filme determina os ajustes da sua câmara selecciona efeitos dá início a uma gravação áudio determina as configurações padrão Para apresentar o menu Gravação prima OK É apresentado o menu Configurações É seleccionado o menu MODO PELÍCULA N º Descrição 1 MODO PELÍCULA 2 MODO CÁMARA 3 MODO VOZ função da máquina de ditar 4 EFECTO 5 CONFIGURACIÓN ...

Страница 314: ...MODO PELÍCULA pode efectuar as configurações para o funcionamento da câmara de filmar Pode seleccionar as seguintes configurações RESOLUCIÓN EXPOSICIÓN LUZ NITIDEZ BALANCE DE BLANCOS ESTABILIZACIÓN DETECTOR DE MOVIMENTO MODO NOCTURNO SALIR ...

Страница 315: ...ara o funcionamento como câmara digital RESOLUCIÓN EXPOSICIÓN DOS EN UNO MARCO DE FOTO FLASH TEMPORIZADOR NITEDEZ BALANCE DE BLANCOS FOTO MÚLTIPLE LUZ DE FONDO IMPRESIÓN DE FECHA MODO NOCTURNO SALIR Encontrará os pormenores relativos às configurações no parágrafo Efectuar configurações a partir da página 35 ...

Страница 316: ... seguintes opções ACT SALIR Encontrará os pormenores relativos às configurações no parágrafo Captar a partir da página 68 Menu EFECTO No menu EFECTO define os efeitos de ecrã para a gravação de filme e fotografia NORMAL BLANCO NEGRO CLÁSICO NEGATIVO SALIR Encontrará os pormenores relativos às configurações no capítulo Utilizar os efeitos de filme e fotografia a partir da página 66 ...

Страница 317: ...ina as seguintes configurações de base para a câmara de filmar SONIDO PANTALLA INICIAL AJUSTE DE LA HORA FORMATEAR MEMORIA SISTEMA TV IDIOMA CONFIGURACIÓN SALIR Encontrará os pormenores relativos às configurações no parágrafo Efectuar configurações a partir da página 35 ...

Страница 318: ...a se mover para uma entrada de menu prima Esquerda e ou Direita ou utilize o interruptor basculante do ângulo da televisão e grande angular Para seleccionar uma entrada de menu prima OK Entrada Descrição PELÍCULA Reproduzir filmes IMAGEN Mostrar fotografias Y LIBRO ELECTRÓNICO Mostrar e books VOZ Reproduzir as próprias gravações de som MÚSICA Reproduzir ficheiros MP3 ...

Страница 319: ...gulo da televisão Grande angular Para aceitar a configuração prima o botão OK Imagem inicial Pode utilizar uma fotografia memorizada como imagem inicial ou utilizar a imagem inicial padrão Seleccione o submenu Imagem inicial A imagem inicial é apresentada quando ligar a câmara de filmar Para seleccionar uma imagem prima as teclas Esquerda e Direita Para determinar a fotografia apresentada como ima...

Страница 320: ...ra memorizada prima RECORD PLAY Para aceitar as configurações alteradas prima OK Formatar a memória ATENÇÃO É possível a perda de dados Ao formatar a memória são eliminados todos os dados memorizados Certifique se de que já não se encontram dados importantes na memória ou no cartão de memória SD MMC Para formatar a memória interna ou o cartão de memória SD MMC seleccione o menu Formatar memória Pr...

Страница 321: ...ão marque a configuração pretendida Para aceitar a configuração prima OK Idioma Com esta configuração pode determinar o idioma do menu do ecrã Marque a entrada para o idioma pretendido Para aceitar a configuração pretendida prima OK Ajuste de fábrica padrão Com esta função pode repor as configurações de fábrica da câmara de filmar Seleccione a entrada Padrão Prima a tecla OK No ecrã é apresentada ...

Страница 322: ...ecção de movimento uma vez desligado Dois em Um uma vez desligado Enquadramento da foto uma vez desligado Flash permane nte desligado Definição válida Ajuste de fábrica Disparador automático uma vez desligado Captação em série uma vez desligado Luz de fundo uma vez desligado Impressão da data permanente desligado Efeito uma vez normal Som permanente ligado Sistema TV permanente consoante a região ...

Страница 323: ...r LCD o tempo Horas Minutos Segundos Para terminar a gravação de filme prima novamente DISPARADOR DE FILME Efectuar configurações A câmara é fornecida com os seguintes ajustes de fábrica no modo de Filme Definição válida Definição de fábrica Resolução permanente elevada Luz uma vez desligado Exposição à luz uma vez 0EV Nitidez uma vez Nível 5 Controlo de luminosidade uma vez desligado Estabilizaçã...

Страница 324: ...ar filmes 36 Para alterar os ajustes de fábrica abra o visor LCD Prima OK É indicado o menu Modo de filme Marque com TELE GRANDE ANGULAR a entrada pretendida do menu Prima OK É indicado o submenu pretendido ...

Страница 325: ...cadas de forma mais exacta as possibilidades de ajuste Resolução Para a qualidade do filme estão à sua disposição os seguintes ajustes Definição Explicação Elevado 640 480 pixéis VGA 30 fps Normal 320 240 pixéis QVGA 30 fps A resolução pretendida está à disposição até seleccionar uma outra Luz Para ligar ainda a luz na câmara durante a gravação de filme seleccione o ajuste LIGADO ...

Страница 326: ...configuração de exposição 1 0 EV 0 6 EV ou 0 3 EV Caso pretenda subexpôr artificialmente seleccione a configuração de diminuição da exposição 0 3 EV 0 6 EV ou 1 0 EV A configuração encontra se activa até que seleccionar outra ou desligar a câmara A configuração de fábrica é de 0 EV Nitidez Com esta configuração pode alterar a impressão de nitidez em nove níveis A configuração de fábrica encontra s...

Страница 327: ...m a luz de lâmpadas Estabilização Com esta configuração pode evitar a falta de nitidez devido à desfocagem da câmara L A imagem captada fica mais pequena se a função de estabilização estiver activada L O zoom digital encontra se desligado quando a função de estabilização está activada Detecção de movimento Nesta configuração pode efectuar automatica mente gravações de vídeo desde que algo se estej...

Страница 328: ...s filmes gravados na memória interna ou no cartão de memória opcional de diferentes formas Reprodução no visor LCD Para visualizar os filmes no visor LCD da câmara proceda da seguinte forma prima RECORD PLAY É indicado o menu principal do Modo de Reprodução ...

Страница 329: ... O segundo algarismo indica a quantidade de filmes gravados Para passar para o filme anterior ou para o próximo filme seleccione DIREITA ESQUERDA Para iniciar a reprodução prima DISPARADOR DE FILME Para iniciar um avanço ou um retrocesso rápidos durante a reprodução do filme seleccione DIREITA ESQUERDA Para parar o avanço ou o retrocesso rápidos solte a tecla Com TELE GRANDE ANGULAR pode adequar o...

Страница 330: ...m televisor proceda da seguinte forma Ligue a ficha preta do cabo AV à saída TV da câmara Ligue a ficha branca e amarela do cabo AV as respectivas tomadas do televisor Ligue o televisor É indicado no visor LC o menu auscultadores TV Seleccione com TELE GRANDE ANGULAR a opção TV Prima OK O filme é apresentado no televisor Enquanto a câmara estiver ligada a um aparelho TV o monitor LCD está desligad...

Страница 331: ...Reprodução de filme estão ainda à sua disposição as funções descritas de seguida Consulte o modo reprodução Prima OK caso seja apresentado o último filme que foi gravado Eliminar filmes Seleccione com DIREITA ESQUERDA a opção ELIMINAR Prima OK É indicado o menu ELIMINAR ...

Страница 332: ...per o processo seleccione NO Prima OK Caso esteja inserido um cartão de memória pode apenas eliminar os filmes existentes no cartão de memória Caso o cartão de memória esteja bloqueado não pode eliminar os filmes existentes no cartão de memória Caso os filmes a serem eliminadas estiverem previstos com uma protecção de eliminação terá de a desbloquear primeiro antes de eliminar Encontra explicações...

Страница 333: ... vista geral mais rápida dos filmes memorizados Seleccione com DIREITA ESQUERDA a opção ELIMINAR Prima OK São indicadas no máximo nove filmes como fotografias miniaturas Seleccione com DIREITA ESQUERDA e ou TELE GRANDE ANGULAR o filme pretendido Para iniciar a reprodução do filme prima OK ...

Страница 334: ...DA a opção BLOQUEAR Prima OK É indicado o menu BLOQUEAR Seleccione com DIREITA ESQUERDA um filme Para bloquear desbloquear todos os filmes desloque TELE GRANDE ANGULAR na direcção T Para bloquear desbloquear um filme desloque TELE GRANDE ANGULAR na direcção W Aparece uma janela de consulta Para executar o processo seleccione SI Para interromper o processo seleccione NO Prima OK ...

Страница 335: ... reproduzir automaticamente filmes individuais ou todos os filmes Seleccione com DIREITA ESQUERDA a opção REPETIR UNA Prima OK Começa a repetição do filme seleccionado Seleccione com DIREITA ESQUERDA a opção REPETIR TODO Prima OK Começa a repetição de todos os filmes existentes ...

Страница 336: ... A câmara vem fornecida com os seguintes ajustes de fábrica no modo de Imagem Ponto do menu Válido Definição de fábrica Resolução sempre Normal Exposição à luz uma vez 0 EV Dois em Um uma vez desligado Enquadramento da imagem uma vez desligado Flash sempre desligado Disparador automático uma vez desligado Nitidez uma vez Nível 5 Controlo de luminosidade uma vez Auto Captação em série uma vez desli...

Страница 337: ...lme Prima uma vez em DIREITA É indicado o menu modo de Câmara Seleccione com TELE GRANDE ANGULAR a entrada do menu pretendida Prima OK É indicado o submenu pretendido Seleccione uma configuração Prima OK A configuração seleccionada encontra se agora activa De seguida serão explicadas de forma mais exacta cada uma das possibilidades de ajuste ...

Страница 338: ... disposição até que seleccione uma outra Exposição à luz A câmara ajusta automaticamente a exposição à luz adequada Em condições de iluminação difíceis pode eventualmente contar com melhores resultados através de uma adaptação manual da exposição à luz Caso por exemplo pretender fotografar uma pessoa em frente ao pôr do sol tem de sobreexpôr artificialmente a fotografia Para tal seleccione uma con...

Страница 339: ...otografias 51 DE EN ES PT Dois em Um Com esta configuração pode juntar duas fotografias numa só imagem A partir do menu Modo de Câmara seleccione o submenu DOS EN UNO Prima OK Seleccione a entrada ACT Prima OK ...

Страница 340: ...R DE FOTO Agora é a vez da metade esquerda do visor LCD ficar escura É representada a imagem agora captada Escolhe a secção de imagem para a metade não escurecida do visor LCD Prima o DISPARADOR DE FOTO A nova imagem está pronta L Pode também utilizar a configuração DOS EN UNO para uma gravação De seguida a câmara volta ao modo normal de gravação ...

Страница 341: ...om esta configuração pode colocar uma fotografia num quadro Aqui encontra se à sua disposição dez enquadramentos diferentes A partir do menu MODO CÁMARA seleccione o submenu CUADRO DE FOTO Prima OK Seleccione com TELE GRANDE ANGULAR um enquadramento da imagem ...

Страница 342: ... encontra se activa até que seleccionar outra ou desligar a câmara Para abandonar a função prima RECORD PLAY Para desligar o Enquadramento da imagem através do menu seleccione o enquadramento de imagem cinzento Flash Para o controlo do flash estão à sua disposição quatro diferentes ajustes CUIDADO Evitar danos visuais Não utilize o flash próximo dos olhos de pessoas ou animais ...

Страница 343: ...seleccionar outro Disparador automático Através do disparador automático pode fotografar de forma retardada temporalmente Se por exemplo pretender aparecer numa fotografia pode utilizar o disparador automático Pode configurar o disparador automático através do menu Disparador Automático ou através de ESQUERDA É apresentado no visor o símbolo para o disparador automático Após premir o disparador au...

Страница 344: ...e luminosidade A máquina define automaticamente o controlo da luminosidade Se após uma captação notar uma ligeira coloração no visor LCD altere a configuração do controlo da luminosidade Faça novamente a captação Estão disponíveis as seguintes configurações Definição Explicação Auto Definição de fábrica A máquina efectua automaticamente o controlo da luminosidade Luz do dia Para captações à luz do...

Страница 345: ...ccionar outra ou desligar a câmara Impressão da data Se activar esta função todas as fotos ficam com a data A data fica visível nas fotografias impressas Para colocar a data actual numa foto seleccione no menu Modo da Câmara a entrada Impressão da data Para activar a impressão da data seleccione Ligar Prima OK L O ajuste encontra se activado até seleccionar outro Captação nocturna Para obter melho...

Страница 346: ... ou num cartão de memória opcional SD MMC Pode apresentar estas fotografias de duas formas Reprodução no visor LCD Reprodução num aparelho TV Reprodução no visor LCD Para visualizar as fotografias no visor LCD da câmara proceda da seguinte forma prima RECORD PLAY É indicado o menu modo de reprodução ...

Страница 347: ...tada no visor LCD Através da DIREITA ESQUERDA alterna para a foto anterior ou seguinte Para aumentar a imagem no visor LCD desloque a TELE GRANDE ANGULAR na direcção T Para diminuir a imagem no visor LCD desloque a TELE GRANDE ANGULAR na direcção W Para seleccionar uma parte definida da imagem e a aumentar proceda da seguinte forma ...

Страница 348: ...ELE GRANDE ANGULAR na direcção T A área seleccionada aumenta Para voltar a diminuir esta área desloque o TELE GRANDE ANGULAR na direcção W Reprodução num aparelho TV Para visualizar as fotos num televisor proceda da seguinte forma Ligue a ficha preta do cabo AV à saída TV da câmara Ligue a ficha branca e amarela do cabo AV as respectivas tomadas do televisor Ligue o televisor É indicado no visor L...

Страница 349: ... modo reprodução para fotografias ainda tem disponível as seguintes funções Eliminar fotografias Indicar fotografias miniaturas Bloquear desbloquear fotos Indicar apresentação de diapositivos Consulte o modo reprodução Seleccione FOTO com DIREITA ou TELE GRANDE ANGULAR ...

Страница 350: ...Visualizar fotografias 62 Prima OK Prima novamente OK É indicado o menu Eliminar fotografias Seleccione com DIREITA ESQUERDA a opção ELIMINAR Prima OK É indicado o menu ELIMINAR ...

Страница 351: ...a executar a eliminação seleccione SI Para não executar a eliminação seleccione NO Para terminar o processo prima em OK L Se estiver inserido um cartão SD MMC só poderá eliminar as fotos no cartão SD MMC Se o cartão SD MMC estiver bloqueado não poderá eliminar as fotos no cartão SD MMC Se as fotos a serem eliminadas estiverem protegidas com uma protecção de eliminação terá de a desbloquear antes d...

Страница 352: ...ma vista geral mais rápida das fotos memorizadas Seleccione com DIREITA ESQUERDA a opção ELIMINAR Prima OK São indicadas no máximo nove fotografias miniaturas no visor LCD Seleccione a fotografia desejada com DIREITA ESQUERDA ou TELE GRANDE ANGULAR Para apresentar a foto prima OK ...

Страница 353: ...os de eliminação indesejada Seleccione com DIREITA ESQUERDA BLOQUEAR Prima OK É indicado o menu BLOQUEAR Seleccione com DIREITA ESQUERDA uma fotografia Para bloquear desbloquear todas as fotografias desloque TELE GRANDE ANGULAR na direcção T Para bloquear desbloquear uma foto desloque TELE GRANDE ANGULAR na direcção W ...

Страница 354: ...O Para terminar o processo prima em OK Reproduzir apresentação de diapositivos Com esta função todas as fotos memorizadas são indicadas em sequência como apresentação de diapositivos Seleccione com DIREITA ESQUERDA DIAPOSITIVA Prima OK Inicia a apresentação de diapositivos Para parar a apresentação diapositivos prima novamente OK ...

Страница 355: ...o Normal Sem efeito Definição padrão da câmara P W As fotos são tiradas a preto e branco Clássico As fotos são tiradas com tom castanho efeito sépia Negativo As fotos são transformadas em cores negativas Seleccione o menu EFECTO Seleccione o efeito desejado Prima OK L A configuração encontra se activa até que seleccionar outra ou desligar a câmara ...

Страница 356: ...e utilizar a câmara para gravações de som p ex como máquina de ditar Voice Pen Gravar Para iniciar uma gravação de som proceda do seguinte modo abra o visor LCD Prima OK É indicado o menu modo de filme Prima DIREITA até ser indicado o menu LÁPIZ DE VOZ Seleccione com TELE GRANDE ANGULAR ENTRAR ...

Страница 357: ... Fala para o microfone instalado Para parar a gravação de som prima novamente DISPARADOR DE FILME Os ficheiros de som são memorizados no formato WAV Reproduzir Para reproduzir uma gravação de som proceda do seguinte modo prima RECORD PLAY É indicado o menu modo de reprodução Seleccione com DIREITA o menu VOZ ...

Страница 358: ...A ESQUERDA o ficheiro de som desejado Para iniciar a reprodução prima DISPARADOR DE FILME O ficheiro de som gravado é reproduzido pelas colunas instaladas Para configurar o volume prima TELE GRANDE ANGULAR Para interromper a reprodução prima DISPARADOR DE FILME ...

Страница 359: ...T Para consultar o menu de opção da reprodução do som prima OK Para ouvir a última gravação de som desloque TELE GRANDE ANGULAR na direcção W Para ouvir todas as gravações de som desloque duas vezes seguidas TELE GRANDE ANGULAR na direcção W ...

Страница 360: ...ima OK Para consultar a opção Eliminar desloque TELE GRANDE ANGULAR na direcção T Para eliminar um ficheiro de som individual desloque TELE GRANDE ANGULAR na direcção W Para eliminar todos os ficheiros de som desloque TELE GRANDE ANGULAR na direcção T Aparece uma janela de consulta Para executar a eliminação seleccione SI Para não executar a eliminação seleccione NO Para terminar o processo prima ...

Страница 361: ...ido na ligação USB do computador O LED no DISPARADOR DE FILME está vermelho Carregue os ficheiros MP3 para a pasta MP3 na memória interna ou para o cartão SD MMC opcional A pasta é colocada automaticamente no cartão SD MMC Desactive câmara do computador Retire o cabo USB MP3 reproduzir músicas Para reproduzir um ficheiro MP3 proceda do seguinte modo Prima RECORD PLAY É indicado o menu modo de repr...

Страница 362: ... DIREITA ESQUERDA Se o ficheiro possuir uma indicação da letra de canção é indicado um símbolo de notas musicais Para reproduzir o ficheiro MP3 prima DISPARADOR DE FILME ou OK Configure o volume com TELE GRANDE ANGULAR Para terminar reprodução prima novamente DISPARADOR DE FILME Para consultar o menu Reproduzir prima OK ...

Страница 363: ...direcção W Utilizar auscultadores Ligue os auscultadores fornecidos à tomada para auscultadores É indicado o menu Auscultadores TV Seleccione com TELE GRANDE ANGULAR auscultadores Prima OK AVISO Coloque o volume primeiramente num valor inferior na área da escala antes de utilizar os auscultadores Seleccione primeiramente um volume de som agradável para si Um volume demasiado alto pode danificar a ...

Страница 364: ...memória na sua câmara Pode decorar a seu gosto o aspecto dos livros Carregar e books Ligue a câmara com o cabo fornecido na ligação USB do computador Carregue os E Books em formato de texto na pasta E Book A pasta é colocada automaticamente no cartão SD MMC ou na memória interna Ler e books prima RECORD PLAY É indicado o menu modo de reprodução Seleccione o menu EBOOK Prima OK ...

Страница 365: ...RANDE ANGULAR um EBOOK Prima OK Para passar à página seguinte desloque TELE GRANDE ANGULAR na direcção W Para passar à página anterior desloque TELE GRANDE ANGULAR na direcção T Seleccione os símbolos na barra inferior no visor LCD com DIREITA ESQUERDA Prima OK ...

Страница 366: ...Carregar e ler E Books 78 Símbolo Explicação Mudar para a primeira página Mudar para a última página Alterar texto e cor de fundo Esfolhear o texto automaticamente Adicionar marcador ...

Страница 367: ...respectiva drive o seu computador É apresentada a janela das boas vindas Seleccione Install USB Driver instalar controlador USB Siga as indicações do monitor Instalar programas de utilização O CD fornecido contém cinco programas de utilização Acrsoft PhotoImpression Com este software pode apresentar processar e organizar fotos Acrsoft Show Biz Com este software pode processar filmes Acrsoft Media ...

Страница 368: ...software tem de ser instalado para que os filmes gravados possam ser reproduzidos correctamente no PC Para instalar os programas de utilização no seu computador proceda do seguinte modo Insira o CD ROM na respectiva drive o seu computador É apresentada a janela das boas vindas Seleccione da lista os programas que deseja instalar Siga as indicações do monitor ...

Страница 369: ...PARADOR DE FILME está vermelho Os filmes gravados e as fotos encontram se na memória interna ou no cartão SD MMC As fotos encontram se no formato JPG Encontra se na memória interna ou no seu cartão SD MMC na pasta DCIM 100PHOTO Os filmes encontram se no formato AVI Encontra se na memória interna ou no seu cartão SD MMC na pasta DCIM 200MOVIE As pastas são colocadas automaticamente no cartão SD MMC...

Страница 370: ...d compatível MPEG4 A sua câmara funciona com este formato Pode reproduzir os filmes convertidos na sua câmara Converter com o Media Converter 2 Inicie o Acrsoft Media Converter É apresentada a janela principal Media Converter Seleccione da coluna Select Device o registo desejado Na coluna Select Conversion Parameter é indicado o registo correspondente ...

Страница 371: ...Converter ficheiros de vídeo 83 DE EN ES PT Clique em ADD MEDIA Seleccione o ficheiro de vídeo a ser convertido ...

Страница 372: ...Converter ficheiros de vídeo 84 Iniciar pré visualização Parar pré visualização Para iniciar a conversão clique em transformar Inicia a conversão ...

Страница 373: ...ip0001 avi Se já existir o nome do ficheiro na câmara altere o nome do ficheiro do ficheiro convertido para Clip000x avi x representa o número livre seguinte Ligue a câmara com o cabo USB ao computador Transfira o ficheiro convertido para a pasta DCIM 200MOVIE no cartão SD MMC Desactive câmara do computador Retire o cabo USB Veja o ficheiro de vídeo convertido no visor LCD ...

Страница 374: ...iz DVD pode guardar os seus ficheiros de vídeo em DVD Para gravar um ou mais ficheiros de vídeo para DVD proceda do seguinte modo Inicie o programa Acrsoft Showbiz DVD A janela principal do programa é apresentada Seleccione o ficheiro de vídeo desejado Desloque o ficheiro de vídeo para a área marcada ...

Страница 375: ...Guardar ficheiros de vídeo em DVD 87 DE EN ES PT Clique em CREATE Para iniciar a conversão clique em transformar ...

Страница 376: ...e de alimentação ATENÇÃO Possiveis danos na câmara de filmar Certifique se que não entra nenhuma humidade para a câmara de filmar Não utilize produtos de limpeza abrasivos e solventes Limpar exterior Retire a sujidade com um pano macio e seco Limpar a objectiva Retire as sujidades com um pano para limpar vidros Limpar o visor LCD Retire as sujidades com um pano para limpar vidros ...

Страница 377: ...os gravações de filmes têm um risco de cor O controlo de luminosidade não corresponde Configure o controlo de luminosidade correcto de acordo com a situação da luminosidade ver capítulo controlo de luminosidade a partir da página 39 As fotos gravações de filmes estão sem cor ou com as cores erradas Está ligado um efeito Desligue o efeito ver capítulo utilizar efeito filme e foto a partir da página...

Страница 378: ...ulo contraluz a partir da página 57 As fotos gravações de filmes estão muito escuras A correcção da exposição de luz está desconfigurada Configure novamente a correcção da exposição de luz ver capítulo Iluminação a partir da página 38 O modo contraluz está ligado Desligue o modo contraluz ver capítulo contraluz a partir da página 57 As fotos gravações de filmes estão muito claras A correcção da ex...

Страница 379: ...tir da página 17 O cartão SD MMC está bloqueado Desbloqueie o cartão SD MMC ver capítulo Proteger dados de um cartão SD MMC a partir da página 17 As fotos gravações de filmes não são possíveis eliminar O ficheiro está bloqueado Desbloqueie o ficheiro ver capítulo Proteger dados de um cartão SD MMC a partir da página 17 Não é possível ligar a máquina fotográfica A bateria está vazia Carregue a bate...

Страница 380: ...sira correctamente o cartão SD MMC ver capítulo Colocar e retirar os dados de um cartão SD MMC a partir da página 16 A câmara não é reconhecida pelo computador O controlador da câmara não está instalado no computador Instalar o controlador da câmara ver capítulo Instalar controlador da câmara a partir da página 79 ...

Страница 381: ...MByte interno uma parte está reservada para a parte da empresa Compartimento para cartões para cartões SD MMC Formatos dos ficheiros Imagem JPEG Filme AVI Xvid Som WAV MP3 Objectiva F3 2 f 7 00 mm Área de configuração Normal 150 cm a infinito Macro 20 cm centro da imagem Zoom Zoom digital de 8 níveis Resolução de imagem 3840 2880 Pixel 11 Megapixel interpolado 2592 1944 Pixel 5 Megapixel 1600 1200...

Страница 382: ...dução de imagem Imagem individual Indicação de fotos miniaturas Apresentação de diapositivos Ligação PC Mini USB 2 0 Ligação HightSpeed Alimentação de corrente NP60 Baterias de iões de lítio 1050 mAh 3 7 V Dimensões 90 56 6 25 mm Peso 110 g sem bateria Sistemas requeridos para o PC Sistema operativo Windows XP Vista CPU Pentium III 800 MHz ou superior Memória RAM min 256 MB drive CD ROM Memória do...

Страница 383: ...s devido a eliminação incorrecta sobre o meio ambiente e a saúde pública Contribui assim para a reutilização reciclagem e outras formas de reutilizações de electrodomésticos e aparelhos electrónicos antigos Poderá obter informações sobre a eliminação de aparelhos junto à administração sua junta de freguesia Eliminar baterias ATENÇÃO Baterias podem possuir substâncias nocivas que prejudicam o meio ...

Страница 384: ...Eliminar 96 ...

Отзывы: