background image

3

Installing the Software

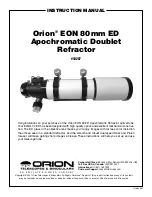
1. Insert the CD-ROM into the computer and wait for the below screen to appear. If it doesn’t appear, go to 
“My Computer” and double-click on the CD-ROM drive where the Meade SkyCapture was placed. Then, 
double click on autorun.exe.

If your computer does not have a CD-ROM drive, visit http://www.Meade.com to download the software 
and drivers from the Meade DSI IV’s product page. 

2. From the autorun install screen, proceed to install all of the listed items on the screen: ASCOM Platform, 
ASCOM Camera Driver, Camera DirectShow Driver, and the Camera Application Software  (SkyCapture).

Quick Start Summary

ASCOM Drivers 

Many third party software uses the ASCOM platform to interface with cameras and telescope equipment. 
If auto-guiding, imaging in RAW format, or wanting plug and play compatibility with third party software, 
it’s necessary to install the ASCOM drivers. Third party software such as Maxim DL, Nebulosity, FireCap-
ture, SharpCap, and PHD Guiding will also require the ASCOM and/or DirectShow drivers for the DSI IV.

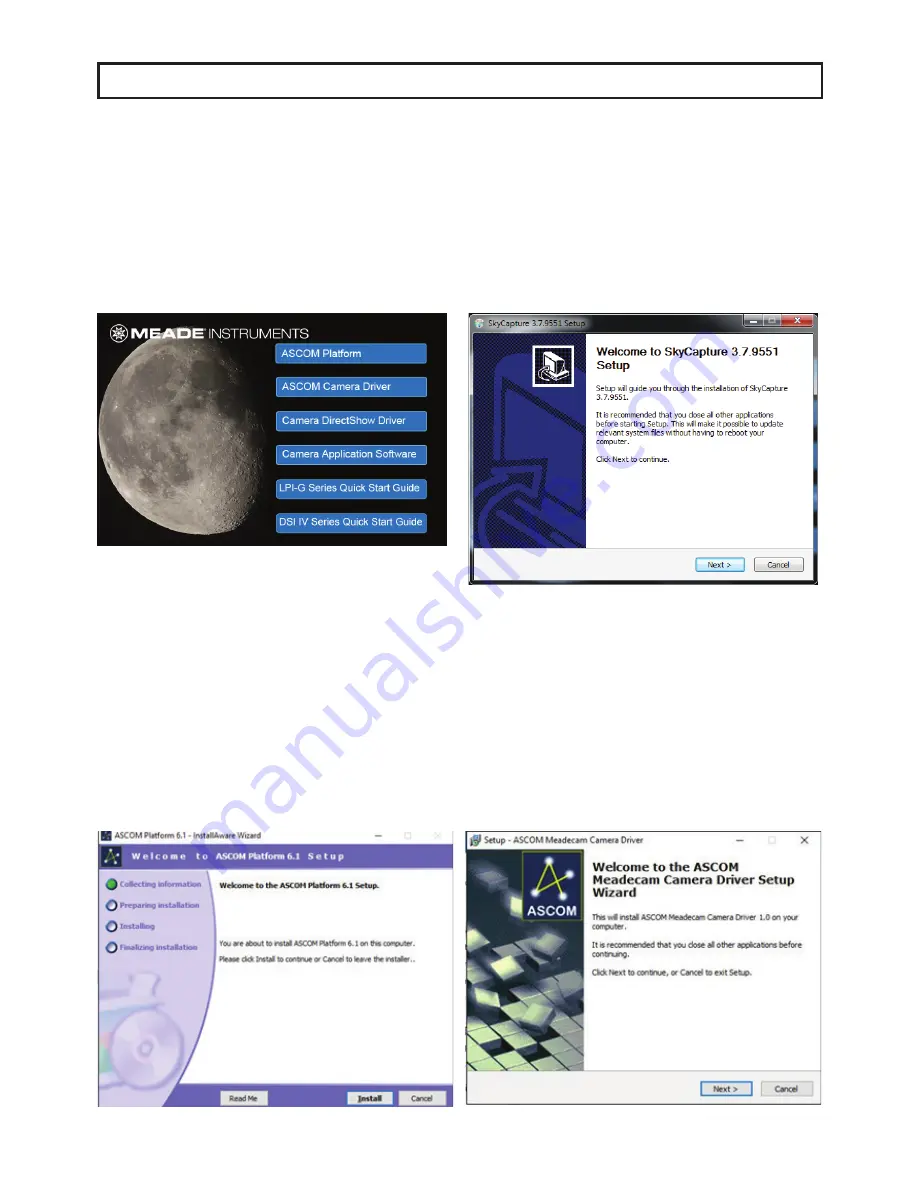
To install the ASCOM drivers, first install the “ASCOM Platform” by clicking on the “ASCOM Platform” 
button found on the CD-ROM startup screen and follow the on-screen instructions.

After the ASCOM platform is installed, install the ASCOM Camera Drivers by clicking on the “ASCOM 
Camera Driver” button found on the CD-ROM startup screen. Follow the on-screen instructions to com-
plete the installation.

Содержание Deep Sky Imager Color IV Series

Страница 1: ...Deep Sky Imager IV Series Quick Start Guide 633001 DSI IV Color 633002 DSI IV Monochrome...

Страница 2: ...is recommended for fastest download speed and video frame rate CD ROM drive or connection to the internet is required to install the software and drivers Compatible Operating Systems Windows XP 32 bi...

Страница 3: ...ry ASCOM Drivers Many third party software uses the ASCOM platform to interface with cameras and telescope equipment If auto guiding imaging in RAW format or wanting plug and play compatibility with t...

Страница 4: ...4...

Страница 5: ...on found on the CD ROM startup screen Follow the on screen instructions to complete the installation Connecting the Camera 1 Connect the Meade DSI IV to the computer using the included USB cable Wait...

Страница 6: ...suggest first selecting a bright target such as the Moon or star cluster to more easily acquire your first target You can adjust the Gain and Exposure Time slider bars to get the brightness to the des...

Страница 7: ...ing to Options Preferences under the Record tab The default recording file format is SER You can switch to AVI in the Preferences screen which is found under the Options tab at the top of the screen V...

Страница 8: ...one so This is used to power the TEC 2 Locate the Bit Depth menu on the left menu bar of SkyCapture and Select 12 Bits This setting captures all of the available information from the camera which is r...

Страница 9: ...and focused 2 Enter the desired exposure time for the deep sky object you wish to capture If the TEC is on you can extend the exposure to several minutes to capture faint details Enter the exposure t...

Страница 10: ...Party Software Example using PHD2 software Select Windows WDM style webcam camera in the camera selection drop list box and click Connect button Choose MeadeCam in the pop up Camera choice box Choose...

Страница 11: ...11 Go back to the main interface and click the loop button to start the exposure as the following...

Страница 12: ...m DL and click the Camera Control Window Icon Click the Setup Camera button in the pop up Camera Control Window Select ASCOM and click the Advanced button NOTE Do not select the Meade DSI camera model...

Страница 13: ...SCOM Meadecam Driver in the drop list box and click the Properties button Adjust the camera settings as appropriate or use the default settings then click OK Click the Connect button to accomplish the...

Страница 14: ...d click the Camera Control Window Icon Select the Video DS in the pop up dialog and click OK Click the Setup Camera button in the pop up Camera Control Window NOTE Do not select the Meade DSI camera m...

Страница 15: ...15 Click Connect to start the video...

Страница 16: ...16 Using the ASCOM Driver in SharpCap Select ASCOM Meadecam item in the ASCOM cameras section of the Cameras menu Change settings or not and click OK to start the video...

Страница 17: ...17 Using the DirectShow Driver in SharpCap Select MeadeCam item in the DirectShow cameras section of the Cameras menu to start the video...

Страница 18: ...body so that it s finger tight Ensure that the rubber O ring on the desiccant plug is in place to form a seal The desiccant plug may occasionally need to be removed and dried out to keep the inside o...

Отзывы: