background image

6

Basic Camera Operation

1.  Plug the camera into your computer’s USB port if you have not already done so.  If this is the first time 
plugging the camera into your computer, wait for the camera drivers to install.  
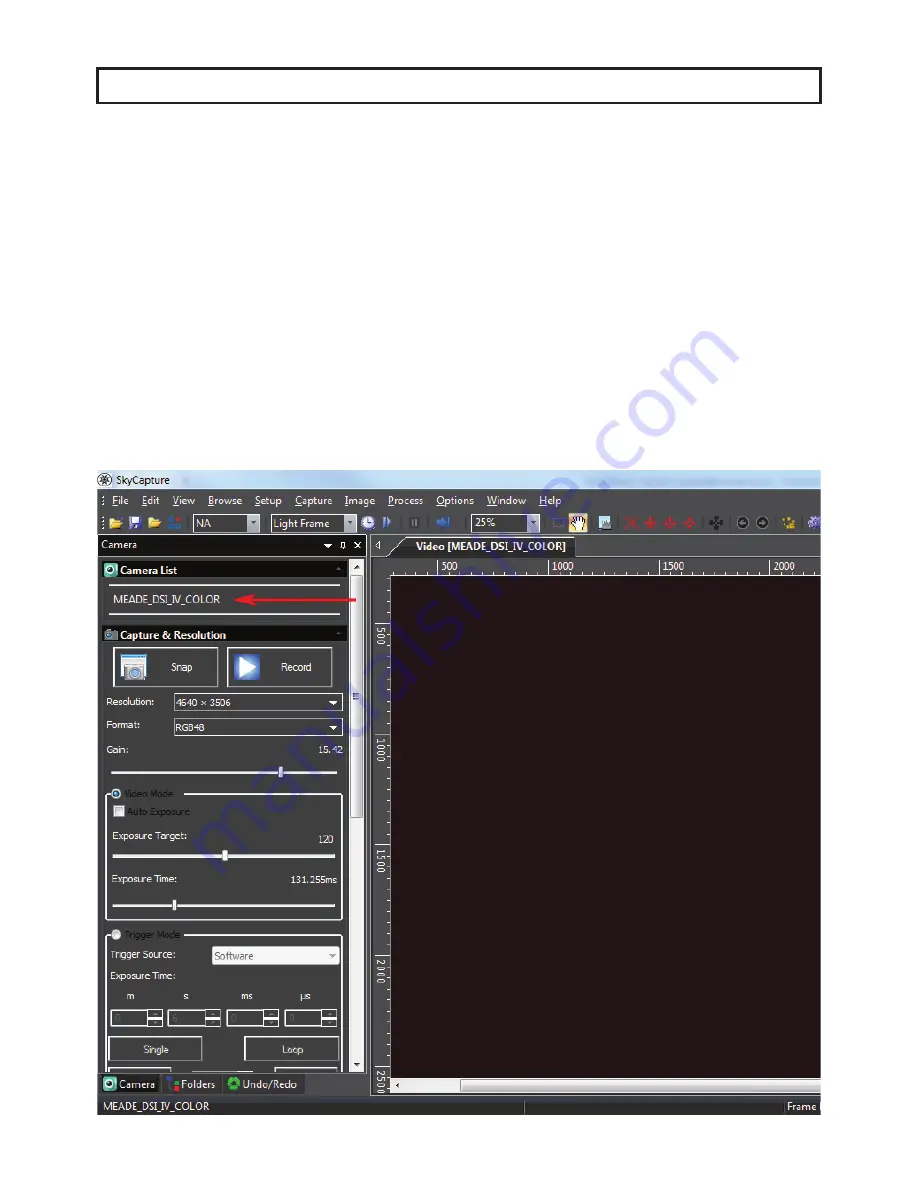
2.  Open SkyCapture.  On the left side of the screen, the 

Camera

 window displays the camera controls. By 

default, the 

Camera List 

and 

Capture & Resolution

 tabs will appear.

3.  Confirm your Meade DSI IV series camera model is shown on the 

Camera List

. For example “MEADE_

DSI_IV_COLOR”.
4.  Click the camera model shown in the 

Camera List

 to begin a live video stream.  

5.  Using your telescope, find and focus your target. We suggest first selecting a bright target, such as the 
Moon or star cluster to more easily acquire your first target. You can adjust the Gain and Exposure Time 
slider bars to get the brightness to the desired level.  Alternatively, you can check the Auto Exposure box, 
however lunar and planetary often have best results when manually setting the exposure and gain. 

Note: You can monitor the framerate and number of frames streamed at the bottom of the screen.

6.  Click Snap to take an individual exposure.  You can save individual exposures by going to File: Save

The following procedure will guide you through capturing your first image with the DSI IV Series camera 
using the included Meade SkyCapture control software. For detailed instructions on using the numerous 
SkyCapture features, go to the Help menu for more details.

Содержание Deep Sky Imager Color IV Series

Страница 1: ...Deep Sky Imager IV Series Quick Start Guide 633001 DSI IV Color 633002 DSI IV Monochrome...

Страница 2: ...is recommended for fastest download speed and video frame rate CD ROM drive or connection to the internet is required to install the software and drivers Compatible Operating Systems Windows XP 32 bi...

Страница 3: ...ry ASCOM Drivers Many third party software uses the ASCOM platform to interface with cameras and telescope equipment If auto guiding imaging in RAW format or wanting plug and play compatibility with t...

Страница 4: ...4...

Страница 5: ...on found on the CD ROM startup screen Follow the on screen instructions to complete the installation Connecting the Camera 1 Connect the Meade DSI IV to the computer using the included USB cable Wait...

Страница 6: ...suggest first selecting a bright target such as the Moon or star cluster to more easily acquire your first target You can adjust the Gain and Exposure Time slider bars to get the brightness to the des...

Страница 7: ...ing to Options Preferences under the Record tab The default recording file format is SER You can switch to AVI in the Preferences screen which is found under the Options tab at the top of the screen V...

Страница 8: ...one so This is used to power the TEC 2 Locate the Bit Depth menu on the left menu bar of SkyCapture and Select 12 Bits This setting captures all of the available information from the camera which is r...

Страница 9: ...and focused 2 Enter the desired exposure time for the deep sky object you wish to capture If the TEC is on you can extend the exposure to several minutes to capture faint details Enter the exposure t...

Страница 10: ...Party Software Example using PHD2 software Select Windows WDM style webcam camera in the camera selection drop list box and click Connect button Choose MeadeCam in the pop up Camera choice box Choose...

Страница 11: ...11 Go back to the main interface and click the loop button to start the exposure as the following...

Страница 12: ...m DL and click the Camera Control Window Icon Click the Setup Camera button in the pop up Camera Control Window Select ASCOM and click the Advanced button NOTE Do not select the Meade DSI camera model...

Страница 13: ...SCOM Meadecam Driver in the drop list box and click the Properties button Adjust the camera settings as appropriate or use the default settings then click OK Click the Connect button to accomplish the...

Страница 14: ...d click the Camera Control Window Icon Select the Video DS in the pop up dialog and click OK Click the Setup Camera button in the pop up Camera Control Window NOTE Do not select the Meade DSI camera m...

Страница 15: ...15 Click Connect to start the video...

Страница 16: ...16 Using the ASCOM Driver in SharpCap Select ASCOM Meadecam item in the ASCOM cameras section of the Cameras menu Change settings or not and click OK to start the video...

Страница 17: ...17 Using the DirectShow Driver in SharpCap Select MeadeCam item in the DirectShow cameras section of the Cameras menu to start the video...

Страница 18: ...body so that it s finger tight Ensure that the rubber O ring on the desiccant plug is in place to form a seal The desiccant plug may occasionally need to be removed and dried out to keep the inside o...

Отзывы: