background image

Vengeance 

3

 User

’s Manual

2

0

Hardware and Installation


Note:    Vertical removal is NOT recommended, as it requires higher force and can lead 

to socket contact damage.


Caution:  Never  touch  fragile  socket  contacts  to  avoid  damage  and  do  not  touch 

processor sensitive contacts at any time during installation. 

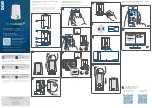
Step 3 

Processor installation: 

Lift processor package from shipping media by grasping the substrate edges.

Scan  the  processor  package  gold  pads  for  any  presence  of  foreign  material.  If
necessary, the gold pads can be wiped clean with a soft lint-free cloth and isopropyl
alcohol.

Locate  connection  1  indicator  on  the  processor  which  aligns  with  connection  1
indicator chamfer on the socket, and notice processor keying features that line up
with posts along socket walls.

Содержание Vengeance 3

Страница 1: ...Vengeance 3 SMB Network Appliance User Manual...

Страница 2: ...wave does not warrant or assume any legal liability or responsibility for the accuracy completeness or usefulness of any information in this document Maxxwave does not make any commitment to update th...

Страница 3: ...Shielded interface cables must be used in order to comply with emission limits Safety Precautions Before getting started read the following important cautions 1 Be sure to ground yourself to prevent s...

Страница 4: ...Model Jumper JP3 11 2 4 Connectors 11 2 4 1 Mini Card Connector for mSATA CN1 12 2 4 2 M 2 2280 Connector for PCIeX4 CN2 13 2 4 3 ATX Power Connector CN3 14 2 4 4 LCM Connector CN5 14 2 4 5 Internal U...

Страница 5: ...the Hard Disks 22 Appendix A LAN Bypass Configuration 23 About LAN Bypass 23 LAN Bypass Register Configuration 24 Appendix B WDT Timer for System Reset 26 Appendix C LAN Module Expansion 27 LAN Bypass...

Страница 6: ...LAN modules via the PCIe 3 0 interface support max up to 32 LAN ports To avoid the influences of shutdown by the environment the NA591 s supports data protection of LAN bypass for fail over option by...

Страница 7: ...e ECC ECC memory by CPU SKU BIOS AMI 256Mbit PnP Flash BIOS with function of BIOS redirected to COM port Storage Two 2 5 SATA HDDs One mSATA One M 2 2280 PCIe x4 signal M key LAN 2 x 10 100 1000Mbps L...

Страница 8: ...B Two USB 2 0 ports one front side two USB 2 0 3 0 are internal pin headers Hardware Monitoring Controller Winbond NCT6102D CPU temperature system temperature power and fan speed detection Expansion S...

Страница 9: ...Power OS Compatibility Linux kernel 4 14 above Mechanical Environmental Form Factor 1U rackmount Operation Temperature 0 C 40 C Storage Temperature 20 C 70 C Humidity 10 95 RH non condensing Chassis M...

Страница 10: ...nce 3 User s Manual Introduction 5 1 4 Block Diagram 1 5 Dimensions and Outlines The following diagram shows you dimensions and outlines of the Vengeance 3 Series Default 2 LAN ports max up to 34 LAN...

Страница 11: ...by programmable GPIO A sample code will be provided that allow users to define their own function Reset Tact Switch It is for reset the system to reboot your computer instead of turning OFF the power...

Страница 12: ...light is radiating the transfer rate should be 1000Mbps When this LED and Link Active LED both are dark no networking devices are attached Active Link LED for LAN Port The orange LED is on when the LA...

Страница 13: ...following items The Vengeance 3 Series network appliance hardware platform Power cord x 1 Redundant power cord x2 Mounting brackets for rack installation left right x 2 Plastic stand for stack up x 4...

Страница 14: ...Vengeance 3 User s Manual 9 Hardware and Installation 2 2 Board Layout TOP BOTTOM...

Страница 15: ...summary table of all jumpers and default settings for onboard devices Jumper Definition Jumper Setting JP1 CRT always on 1 2 Disable Default Open CRT Always On JP2 Clear CMOS Setting 1 2 Normal Defaul...

Страница 16: ...ll connectors on the hardware Connectors Label Mini Card Connector for mSATA CN1 M 2 2280 Connector for PCIeX4 CN2 ATX Power Connector CN3 LCM Connector CN5 Internal USB 3 1 Gen1 Connector CN8 ATX 12V...

Страница 17: ...D 10 No use 11 No use 12 No use 13 No use 14 No use 15 Ground GND 16 No use 17 No use 18 Ground GND 19 No use 20 3 3VSB 21 Ground GND 22 PERST 23 SATA0_RXP 24 3 3VSB 25 SATA0_RXN 26 Ground GND 27 Grou...

Страница 18: ...3 3V 15 GND 16 3 3V 17 PCIE_RXN_2_ 18 3 3V 19 PCIE_RXP_2 20 NC 21 GND 22 NC 23 PCIE_TXN_2_ 24 NC 25 PCIE_TXP_2 26 NC 27 GND 28 NC 29 PCIE_RXN_1_ 30 NC 31 PCIE_RXP_1 32 NC 33 GND 34 NC 35 PCIE_TXN_1 3...

Страница 19: ...es are properly installed before connecting the power connector Pin Signal Pin Signal CN3 1 12 13 24 1 3 3V 2 3 3V 3 Ground GND 4 5V 5 Ground GND 6 5V 7 Ground GND 8 PWR_OK 9 5VSB 10 12V 11 12V 12 3 3...

Страница 20: ...when the chipset is customized into Intel C246 2 4 6 ATX 12V CPU Power Connector ATX1 Pin Signal ATX1 1 4 5 8 1 GND 2 GND 3 GND 4 GND 5 12V 6 12V 7 12V 8 12V 2 4 7 PMBUS Connector PMBUS1 PMBUS1 Pin S...

Страница 21: ...System fans are always needed to cool down CPU and system temperature FAN1 FAN3 connectors provide power to these system fans default use FAN1 and FAN2 Pin Signal FAN1 3 1 Ground GND 2 12V 3 Rotation...

Страница 22: ...ted to the case mounted speaker unit or internal buzzer While connecting the CPU card to an internal buzzer please short pins 2 4 while connecting to an external speaker you need to set pins 2 4 to Op...

Страница 23: ...can be configured to control cash drawers and sense warning signals from an Uninterrupted Power System UPS or perform store security control You may use software programming to control these digital...

Страница 24: ...ver by releasing down and out on the hook This will clear retention tab Rotate load lever to open position at approximately 135 Rotate load plate to open position at approximately 150 Note Apply press...

Страница 25: ...ring installation Step 3 Processor installation Lift processor package from shipping media by grasping the substrate edges Scan the processor package gold pads for any presence of foreign material If...

Страница 26: ...ee image below Note Tilting or roughly shifting it into place can damage socket contacts Caution Do not use a vacuum pen for installation Verify that package is within the socket body and properly con...

Страница 27: ...h down latches on each side of the DIMM socket 2 Align the memory module with the socket that notches of memory module must match the socket keys for a correct installation 3 Install the memory module...

Страница 28: ...ver for power off state you can set up LAN Bypass through BIOS or use software program when entering into the OS If you don t do any change the state will keep the previous power off state The Vengean...

Страница 29: ...odule Slot4 0x8E0 0x8E4 0x8E8 0x8EC 7 6 5 4 3 2 1 0 BYM1 BYM0 X X SEGN4 SEGN3 SEGN2 SEGN1 W W W W W W Default value 00000000 Bit 7 6 BYM1 0 These bits are used to set bypass mode 00 Not used 01 Force...

Страница 30: ...ypass Control Register Address LAN module Slot1 LAN module Slot2 LAN module Slot3 LAN module Slot4 0x8E1 0x8E5 0x8E9 0x8ED 7 6 5 4 3 2 1 0 X X X X SEGF4 SEGF3 SEGF2 SEGF1 W W W W Default value 0000000...

Страница 31: ...based on the setting of Power On Bypass Control register SEGN4 SEGN1 Data bits 6 0 read back from this register is not defined and therefore must be ignored A read operation upon this register should...

Страница 32: ...odule Ports Chipset Bypass Vengeance 3 GbE Copper Modules MW CM 8P GbE 8 Intel 82580EB 0 v MW CM 4P GbE 4 Intel i211AT 0 v GbE Fiber Modules MW FM 8P GbE 4 4 Intel 82580EB 2 v MW FM 4P GbE 4 Intel i35...

Страница 33: ...unction by Jumper and Bios when power on state when enter the OS you can select LAN bypass function at power on off state by software the detail information please refer to the appendix A LED Definiti...

Страница 34: ...orange color LED light is radiating it should be 1000Mbps transfer rate When the green color LED light is radiating it should be 100Mbps transfer rate If the Link LED is dark and Active LED is light o...

Страница 35: ...MW CM 4P GbE Transfer Rate LED Light Color Fiber port Active Orange Fiber port Link Orange MW FM 8P GbE Transfer Rate LED Light Color Down Fiber port Active Orange Up Fiber port Active Orange Down Fi...

Страница 36: ...port 4 The orange LED is on when the LAN port connection is working The LED flashes when transmitting or receiving any signals to or from the appliance The LED is dark when the appliance is off Link...

Страница 37: ...is on when the LAN port connection is working The LED flashes when transmitting or receiving any signals to or from the appliance The LED is dark when the appliance is off Link LED for LAN port 1 port...

Страница 38: ...s working The LED flashes when transmitting or receiving any signals to or from the appliance The LED is dark when the appliance is off Link LED for LAN port 1 port 2 The double color LED light indica...

Страница 39: ...maximum Minimum clearance from uninsulated live parts 4 0 mm The equipment is to be installed in an environment with maximum ambient temperature must not exceed 40 C The openings on the enclosure are...

Отзывы: