RMT55H
20195 South Diamond Lake Road, STE 100
Rogers, MN 55374
800.621-2789
21
3.4
General Information
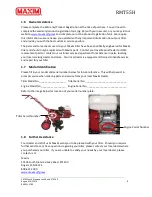
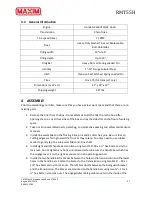
Engine
Honda GX160UT2QX2, 163cc
Transmission
Chain Drive
Tine speed (max)
72 RPM
Tines
Heavy-Duty Slasher Tines w/ Replaceable,
Bolt-On Blades
Tilling width
14” or 26”
Tilling depth
Up to 10”
Drag Bar
Heavy-Duty w/ Spring Loaded Pin
Handles
1”-12” Gauge Tubular Steel
Hitch
Precision Cast Hitch w/ Spring Loaded Pin
Tires
10 x 1.75 (for transport only)
Dimensions (L x W x H)
61” x 24” x 39”
Shipping weight
147 lbs.
4
ASSEMBLY
Prior to assembling your tiller, make sure that you have a clear work space and that there are no
missing parts.
1.
Remove the tiller from the box. Do not attempt to lift the tiller from the box. After
opening the top, cut all four sides of the box and lay the sides flat on the floor of working
space.
2.
Take out all unassembled parts, parts bag, and protective packing and safety maintenance
manuals.
3.
Install tine assemblies on shaft using 4 tine pins and 4 cotter hair pins. Be sure that all
cutting edges are facing toward the front as they rotate. You may need to use rubber
mallet to gently tap tine sub-assemblies onto tine shaft.
4.
Install right and left handle bars to hitch using two 5/16” 18 x 3 ½” hex bolts, and nylon
lock nuts. Do not tighten any bolts until all are started. Be sure the handle bar which has
the engage lever is on the right as you stand in an operating position.
5.
Install the two handle bar tie braces between the holes in the transmission and the lower
holes in the handle bars. Fasten the braces to the transmission using two 5/16” – 18 x 1
1/4” hex bolts and nylon lock nuts. The left brace bolts between the belt guard bracket
and the transmission. The braces are mounted to the handle bars using two ¼” – 20 x 1
½” hex bolts, nylon lock nuts. The engage/idler cable guide mounts on the inside of the

